Unlike the previous sections, the campaign of Battlefield Hardline clearly worth the detour. Long, difficult (at least in maximum difficulty) and breathless, this solo is not a cheap mode, and it would be a shame to miss it!
However, we find a point in common with Battlefield 4 in this single player mode: the items to collect. In the episode of DICE, we had to recover plates and weapons. Here, you have to find the 71 proofs, dispatched in the 11 episodes of the campaign, and necessary to be able to solve the 7 police cases that the game offers.
Achievements / Trophies
- Keep digging, inspector : Complete any deal solo.
- Real detective : complete 3 cases.
- The best inspector in the world : complete all cases solo.

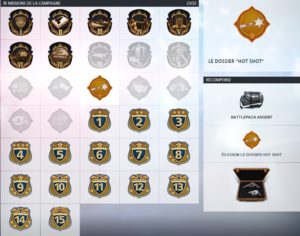
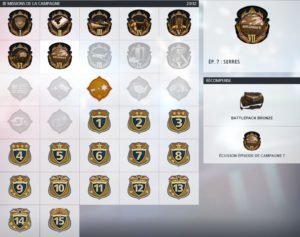
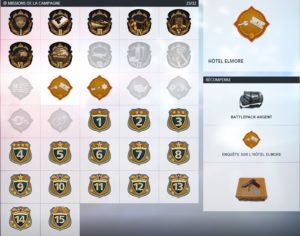
Rewards
Completing episodes and solving cases will earn you some rewards:
- Bronze, Silver and Gold Battlepacks
- Ecussons
Evidence to find
To find the evidence, we will have to rummage all over the place. To validate them, you must exit the scanner (A key by default).
- Episode 1
- Episode 2
- Episode 3
- Episode 4
- Episode 5
- Episode 6
- Episode 7
- Episode 8
- Episode 9
- Episode 10
Episode 1 - Back to school
There are 3 items to find in this episode. If you don't miss any, you'll solve the first case in the game: The "Hot Shot" folder
- Account book and money - Very easy to obtain, since it is a mission objective. Just take out your scanner and scan the account sheet on the desk.
- Stoddard Surveillance Photo - In the same room as the account book, look at the counter to the right of the room and scan the photo with Stoddard on it, right next to a printer.
- Hot Shot Box - Entering the next room, you will see a box, scan it, it is the last proof to complete the first case.
Episode 2 - Formality of departure
For this second episode, you will need to scan 6 objects.
First zone: Laundry room
- Drug shopping list - Scan the ugly plaid shirt hanging from a shelf.
- Note d'instructions - On the table in the rest room, you should see a large sheet, it is the object to be scanned.
- Hot Shot Box - Look at the floor, to the right of a large cabinet, you should see a half-open box, scan there.
Second zone: Home
- Dose de Hot Shot - Neutralize the people at the entrance and search one of them, the latter should have a dose of Hot Shot on him.
- Tablet with client - Look for a photocopier behind the reception desk, you should see a tablet above. Just analyze it!
- Answering machine - You should see an accessible room not far from the copier, go ahead and look on the desk then scan the object.
Episode 3 - Alligator Bait
Be careful, there are a dozen items to find in this episode 3, and they are well scattered. Don't forget to check the hint counter at the top right to see if you forgot anything!
First zone: Nature reserve
- Exploded drug package - Just having used your grappling hook and zip line, you will see 3 guys, neutralize them (or kill them, at will) then go to the middle of the area, you should see a block of white powder exploded on the ground, scan the.
- Drum of toxic products - Just before going to the dock, look at the barrel in the face and scan it, it's a barrel of dangerous products and proof.
Second zone: Cabins
- Chemical drum - Going towards the sawmill, you will see a very small island with a barrel, scan it!
Third zone: Ferme aux Alligators
- Alligator dead - Hard to miss it, it lies in the middle of the area. Just scan the carcass.
- Traces of torture - Arriving in the area, there are two small wooden huts on the right, take the leftmost one and look at the ground, you should see a pair of bloody boots. You just need to take a scan to learn a little more.
- A newspaper article - You will find it on one of the men to be arrested, Thomas Bell. Inspect it and collect the evidence.
Fourth zone: Lake
- Kilo the Cocaine - Quite discreet this one, it is very close to the sawmill, in a tower again, in the center of a workbench!
- Map of the region - You should see towers not very far from the Alligator Farm, go there with your vehicle, get off, use the grappling hook and then the zip line to go to the other tower. From there you can scan the large map of the region.
Fifth zone: Sawmill
- Spotted airboat - You will not be able to miss it, it can be seen from the water tower, by scanning the area, on the dock.
- Sampling equipment - As you advance towards the objective, you should see small "huts" on the right. Search him, one of them has the material to be scanned, on a work table.
- Kraft paper envelope - After reading the messages on the "phone" in the container, look to your left, there should be a desk with an envelope on it, scan this envelope for proof.
- Note pinned with a knife - Just after the cutscene where we meet you at the stadium, go to the left, there are stacked logs, you will see a note hung with a knife on a log. Scan it.
Episode 4 - Case Closed
There are 10 items to find in this episode, as always, don't forget to check the number of items collected with the indication at the top left of the screen in Scanner mode.
First area: Crime Scene
- Dye barrels - From the start of the episode, you will see 4 barrels lined up. Scan the lot for the first clue!
- Sports bag full of money - Difficult to miss this bag! It is filled with silver and a yellow sign numbered "1"
- Stolen Phones - Go upstairs, in one of the offices, you should see a mark of a corpse on the floor with all the signs, you will see a trash can with stolen phones.
- Peluche Parlante guests - Go to the office opposite, you will see a large mascot impossible to miss. Just scan it.
- Elmore Plaza business card - On the top floor, look on the desk, you should see a business card, you know what to do with it.
Second zone: Warehouse
- Guest DVD - On the ground floor of the warehouse, you will see guards chatting ... Look on one of the shelves, you will see a box with the mascot on it, just analyze that!
- Flyer pour Guests - Quite discreet this one, it is at the bottom, on a small shelf to the left of the room. You will recognize the funny mascot when you approach the flyer a little.
- Poster de Guests - Just below the equipment crate, you will see a poster of Tamu-Tamu, scan it.
- Letter from Neltz's accountant - On the desk, not far from the flyer, you will see a computer screen, a keyboard and a small sheet on the left, which is the letter that interests our cop.
Third zone: Cultivation of Marijuana
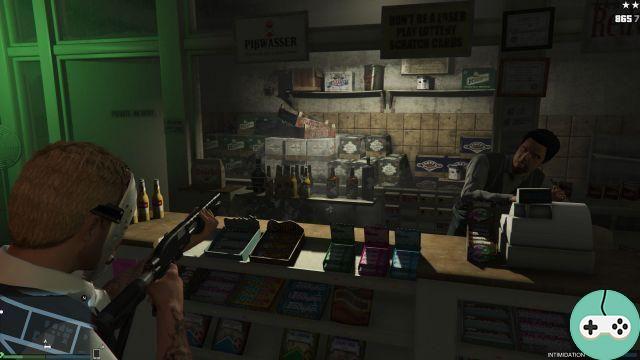
- Hot Shot Crate - The cash register is located in the basement, you will see, when you arrive, a guard fixing the surveillance screens. Before going to handcuff him, take a look at the corner on the right to see the famous crate.
Episode 5 - Gauntlet
An episode that serves as an interlude. No objects to scan here!
Episode 6 - Balance Sheet Filing
9 pieces of evidence to collect in this episode. Remember, your scanner is a powerful ally!
First Zone: Dealer
- Order form for a Bianchi - As soon as you enter the building, go to the offices on the left, you should see a large order form right next to a Serf Burger bag.
- Letter from Kang's wife - For this proof, go to the office in front of the entrance, you will see a large sheet on the right edge of the office, scan the letter!
Second zone: Breakage
- Branded luggage - After cleaning the area, go look in the garage, you will see a large piece of luggage with fingerprints on it, it is evidence to analyze.
- Photo of Boomer - Search James MUN to get the famous photo.
- Remote controlled detonator - On the workbench right next to a car.
- Album the K-Pop - The bench opposite, at the back of the room, you will see a K-pop album ... that's proof, despite appearances.
Third zone: Bodybuilder
- Bomb under Kang's Bianchi - Look at the bottom of the white car while entering the garage, you will see the bomb in question, which is to be analyzed.
- Hot Shot Palette - Behind the shelves, to the right of the garage.
- Photo of Lily Kang and Roark - In the office on the left, right next to the phone.
Episode 7 - Serres
There is a total of 9 proofs in the Serres episode. Be careful, don't forget to search SHINE so you can get the last proof of the episode.
First Zone: Residence
- White pickup truck - As soon as you enter the residence, go to the garage and scan the van at the back.
- Shipping labels - Go forward a little in the level, then go to the dark room on the left, you should see an office with lots of leaves. Scan it all!
- Trunk combination - Search Cameron BRILLER (without killing him) for the safe code.
- Photo wall - At the back of the residence, there is a gym, look at the "empty" wall, there is a hidden access, find it and once inside, scan the photos on the left wall.
Second zone: Terrace
- Tear gas tanks - In the veranda, look at one end to find a bottle with a logo /! above is one of the proofs.
- SS190 cartridge box - On the last stand, you should see a box with cartridges inside, this is one of the evidence to scan.
- SWAT bulletproof vests - There is a very small room in the shooting range, go inside and scan the "Police" vests.
- Rifle silencer - On one of the shooting ranges, you should see a small box with the famous silencer to analyze.
Last zone: Holy of Holies
- File in safe - You have to get the safe code on Cameron BRILLER to get this proof. The trunk is to the left of the bed.
Episode 8 - Sovereign Territory
Do not look for the proof in the first part of this episode, there is none. Go to the next area to start scanning the environment!
First Zone: Caravan park
- Insigne agent ATF - It is enough to search Jim PRESTON to obtain this first proof.
- Boomer folder - To the far right of the park, in the caravan, look at the table on the right and scan the file in question.
- Torture room - After climbing a ladder, go to the small building and look to the right, you should see a table with blood, a chair, and electric clamps. Analyze it all.
- Mobile - Turn around, look at the boxes at the other end and scan the highlighted cell phone.
- Labo de Hot Shot - It's hard to miss this proof. You will see many chemistry instruments in one of the barracks, scan the one on the stove.
- Bomb Plan - Go through the small hole and go into the caravan on the right, once inside, analyze the map on the table on the right.
Second zone: Gas station
- Plate - Exit the gas station and then take a closer look at the abandoned car. Switch to scan mode and take a closer look at the license plate.
- Grave of ATF officer - In front of the gas station, there is a ruined building, look a little to the left and analyze the agent's grave. RIP.
Third zone: Aerodrome
- Ricin bomb - Once inside the hangar, go left to scan the bomb on the workbench.
Episode 9 - Independence Day
You'll need to get your hands on nine pieces of evidence in this episode. Remember to check your scanner to see if the area has been emptied.
First zone: Place
- Box of books - Outside, next to the two thugs, you will see the box of books to be scanned.
Second zone: Home
- Organizational chart - On the large desk in the surveillance room, you will easily see the sheet to be analyzed.
Third zone: Offices
- Letter from a Chicago politician - The letter is visible on the large English desk, on the left edge.
- Notice of transfer - Search John STARNES for the notice in question.
- Estimated turnover - In the meeting room, there is a large whiteboard with lots of data on it, which you just need to analyze.
- Dawes computer email - Go up the stairs, go down the hall and scan the computer just in front of the entrance to get the proof e-mail.
- Photograph of Dawes' wife - To the right of the elevator, you will find the photo of Dawes' wife, which must be scanned.
Fourth zone: Penthouse
- Bank website - In the room at the back on the right, you will see a computer screen, analyze it to obtain information on the bank.
- Photo of Dawes' dying wife - Take the stairs and scan the photo of Dawes' sick wife on the cabinet.
Episode 10 - Legacy
The last 4 proofs of the game are to be recovered in this episode. Nothing very complicated here.
First zone: Roadblock
- Fax from Neil Roark - Scan the fax on the desk for proof.
Second zone: Technical complex
- Surveillance log - Sneak into the building on the left and scan the newspaper on the desk.
Third zone - Cabanas
- Summons to tax authorities - At the edge of the pond, in the cabanas on the right, you will see the tax authorities' summons on the shelf, in front of the telephone.
Last zone: Residence of Dawes
- File on Captain Mendoza - Climb to the roof then enter the living room and analyze the file on the table to obtain the ultimate proof of the game.
Many thanks to Z4phyr for their videos.