This fight is really very nice, the tanks have work a bit like on ADS (T2 of Coil). It is clearly not made for melee DDs due to the skill "Wrong Wheel" which is a zone (AoE) around Garuda or a sister.
I advise the tank to have life points (HP), especially the main tank (which will tank Garuda + a sister). The filmed run is not one of the most beautiful that we have done (especially me) but I find it interesting that you can see the errors and their consequences.
Warning! : the audio of the video can shock the chaste ears.
Preparation
Your team
- The dream composition is therefore a main tank (Main Tank, MT) with a lot of defensive CDs (PLD) or a very good well-equipped WAR and a secondary tank (Off tank, OT).
For both tanks, you need Provocation, it's just essential for this fight (if you don't have it at 50 yet, it's dramatic and get to work?) - 2 Healers, preferably a White Mage and a Scholar, with Virus and Bodyguard to optimize everything a bit.
- 4 DDs, preferably distances because on the last phase, it is almost impossible to dodge the Bad Wheel because there is very little room. A non-tank will be almost OS.
Know the enemy
Garuda and his sisters use several skills:
- Garuda:
- Sillage : frontal cone attack that stuns you. Easily dodged by getting behind Garuda's back before she sends her attack.
- Wind blade : targets anyone and hits nearby members
- Wrong wheel : zone attack around Garuda.
- Descending gust : cone attack.
- Suparna:
- Sillage : frontal cone attack that stuns you. Easily dodged by getting behind Suparna's back before she sends her attack.
- Wind blade : targets anyone and hits nearby members
- Wrong wheel : zone attack around Suparna. For a non-tank, it is almost safe to go there because it does a lot more than harm than Garuda
- Descending gust : cone attack.
- Chirada:
- Sillage : frontal cone attack that stuns you. Easily dodged by getting behind Chirada's back before she sends her attack.
- Descending gust : cone attack, which hurts much more than Garuda's. The targeted person is marked by a target.
- Wind blade : targets anyone and hits nearby members
While one of the sisters is alive, Garuda cannot take damage. On the other hand, the tank can continue to DPS to increase its haste.
The rewards
- Tank: Lacerating Gusts Ring of Protector
- Melee DD: Lacerating Ruffle Ring of Attacker
- Bard: Lacerating Gusts Ring of Aiming
- Mages: Lacerating Gusts Ring of Casting
- Healers: Lacerating Gale Ring of Healing
Strategy
There are 3 phases, the last two repeat in a loop until you complete Garuda.
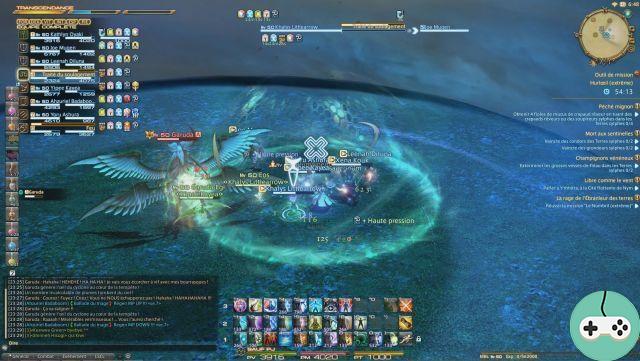
Phase 1 - The Pillars
The MT will tank Garuda as in Brutal. On the other hand, for all players at a distance, you must place yourself right in the middle between the 4 pillars and you do not move.

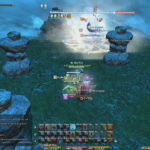
Why ? Garuda will turn around doing an action in the party, if you are near a pillar, it will damage it. Basically, you have to try to reach Garuda's Transcendence with 8 rocks to be safe.
At the end of phase 1, there will be the famous Tornado with the calm zone between. Hide behind the pillars, Garuda will reveal small feathers that technically won't touch anyone. Then, we stay hidden because she will slap her big slap like in Brutal.
Once this is over, you return to your place at the milieu.
For the MT, it will be a bit tricky to put Garuda back in place. Here is the best technique I have found to make sure it doesn't hit no of the 2 pillars: you exit to the outside, passing quickly through the tornado. Thus, Garuda will not go around the pillar and will come directly at you. Then, you place yourself between the two pillars but closer to the middle than to the edge of the tornado (not too much anyway so as not to kill your group) and once it has moved well on you, you stand on the edge. between the two pillars at the edge of the tornado and you face the middle. Garuda is therefore facing you and his back to the group.
You should be able to place it to prevent it from knocking down a pillar for you.
If this is not clear, the video is made for that. Even though I'm not completely satisfied with my placement on this run.
During this time, the DDs will take care of the Silky Feather then the rest of the feathers.
Obviously the Summoner, Dark Mage, and anything that has serious abilities to take down well in AoE, can just spam AoE actions. You have to kill the feathers quickly enough to prevent them from exploding your pillars and adding significant damage to the whole group.
Once all the feathers are deaths, you can switch back to Garuda. If you do not go fast enough, she may leave to reappear in the east this time and do a big cone attack again so you have to hide behind your friends the pillars. This time, the feathers falling from the sky may do so in the middle. Usually, it's almost impossible to dodge if you're right in the middle of a red zone. Just try not to take 2 or 3 at once. The only way to dodge these areas is to run nonstop, not repeating where someone has passed from Garuda's old location. And honestly, it's going to a lot of trouble for not much.
On the other hand, if you go fast enough, Garuda will call his 2 sisters to the rescue. Unlike Brutal mode, it will always have the same name and have the same color link (red and green):
- Suparna will always have the red link
- Chirada will always have the green link.
Then there are 2 ways to do it, I'll give you ours (the one in the video):
- Le Main tank take Suparna and Garuda and rush north.
- THEOff tank take Chirada and rush south.
Indeed, it is necessary to separate the sisters and Garuda to be able to inflict damage on them (simple version because in fact it is a little more complicated but it is not necessary that I explain to you in detail). Once all of these cute people are placed, you can start to engage in combat on Chirada.
When Chirada falls, the Offtank will retrieve Suparna from the Main Tank and bring her to the East or West (no need to go South this time). The Healers stay well in the middle to reach the 2 tanks (note: Kathlyn, our White Mage, prefers to move away from the rest of the group and concentrate on the MT without being bothered by that damn pillar in the field of vision. place at the edge to the east).
For the Main Tank:
Logically you have stuck your aggro on Garuda from the start, so hurry especially on Suparna quickly after your engagement and stay on it. Just throw a Flash or 2 and / or 1 or 2 aggro skills on Garuda for form.
For the 2 tanks:
If you don't know how to hurry between 2 tanks, here's a quick explanation. Taunt makes you switch to the one with the most haste on the target. It only lasts a few seconds. If you don't use any action behind to threaten, or the other person hates it again, you're off. So in practice it is: Taunt> Shield Throw / Tomahawk (for example) and especially the other tank do not touch the enemy anymore, not even a Circle of Fate, or Flash, or a self-attack.
When you see one of the sisters casting "Lame de Vent" you will systematically have the following thing during the whole fight: 1 sister + Garuda will disappear, then you will have small areas on the ground (we try to take only one at worst) and then they will put that to you quite frankly (especially for the tank which takes care of Garuda + 1 sister) with almost at the same time an AoE action around them, I named "Wrong Wheel".
What to do ? Simply Anticipate. You drop a Flash (one of the wheels will miss you almost certainly) + a defensive CD not to be done too early. You can watch the video if it's not clear enough (in which you'll see me anticipating way too much most of the time: P). Otherwise you can try to dodge it by running (kitant) a little without getting out of sight of the Healers. On this phase, it is doable but on phase 2, you will hardly be able any more because not enough space.
For the 2 healers and those who have Virus and / or Garde Corps:
After "Blade of Wind", you know that your Main Tank will take 2 big slaps, so you can choose:
- Virus on Garuda or Suparna
- Garde Corps le Tank
- Breastplate the Tank (you have time to use it when Garuda disappears and places the areas on the ground)
- Treatise on Comfort on the Tank.
And of course, prepare to heal well behind to get it back up pretty quickly.
On this phase, he risks having a red zone that can be on anyone, no need to tell you that you have to dodge it and then move back? Once Suparna is on the ground, we resume work on Garuda, until in turn she disappears. When she disappears, everyone comes to the milieu, the Scholar can use his Dogma of Survival to reduce damage.
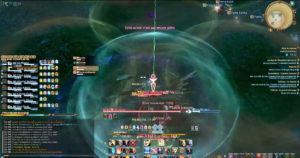
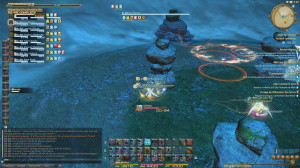
Phase 2 - Eye of the Storm
Here you are in the second part, it is from here that things start to get complicated. Garuda will reappear with several lacerating feathers and a new friend: the Plume Perforante (be nice to her and don't kill her!).
The Main Tank takes the Piercing Feather with it. Most of the time, it will come by itself on the main tank, but this is not systematic. If so, some Flash just to keep it on your person. We put Garuda away from the rest and tank her with your back to the group.
Me I'm lucky to have a nice Bard who marks me the pen or tells me where it is, it makes the task a little easier especially with the TAB of FFXIV: ARR. I even made myself a macro to target the enemy designated by the "Cross" sign used in the video. The macro for those interested is very simple:
/ ta
So when I don't see where it is right away or if it's in a pack of countless feathers (it's not me saying that), well rather than fight with my TAB, I use the macro.
Meanwhile, the Offtank as well as anyone with a feather on it (except the Main tank of course) pack up with the others to allow them all to be killed quickly with AoE actions.
The Off Tank should have the Main Tank in Focus and monitor his charges (ou stacks) (the little blue icon you can see on the right of the video)  . The same goes for the MT which should have the Offtank in Focus.
Every 2 and a half loads maximum, the tanks must swing the feather. At 3 charges, it's punitive and instantaneous death for almost everyone.
When the feathers are dead, DDs can switch back to Garuda. Always be careful not to kill the piercing feather, your best bet is to let the tanks lower it a bit in HP.
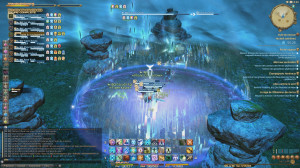
Garuda will disappear once again and leave plenty of small areas on the ground, if you're right in the middle you'll have a hard time dodging. This is when you can kill the Piercing Feather because you've been way too nice to her! As soon as she dies, she also leaves an area around her, so we wait and then we take refuge in the Dome which she formed when she died. Garuda will reappear, determined to kill you, but the dome will protect you and reduce the damage (without a dome it hurts a lot and you can see the damage on a tank because I get out of the dome once too quickly. Count almost double for a non Tank I think).
Annoyed, she will disappear again (definitely her kiff: O) and once again small areas on the ground. To this moment precise, the placement will change. I give you our (the one used in the video) as an example:
- North-West: all distances (whether DDs or Healers)
- Northeast: Main Tank
- South-West: Off Tank
You can change the placement by trying to respect the following positioning:
Tank> Healers / Distances <Tank
so that Healers and DDs have adequate distance to respectively heal tanks or hit enemies.
Before you start agree on your placement. Use the cardinal points for ease. And for those who have trouble, the East will always be in the East and the West always in the West, even if you come from the left or from the right (a little nod to some players who will recognize themselves if they read this). The 2 tanks can wait in the middle, ready to move.
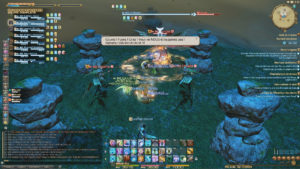
Phase 3 - Tornadoes
Garuda will reappear accompanied by her 2 naked and psychopathic sisters, who make Lee fantasize, and the Piercing Feather.
THEOff Tank takes Chirada (yes, yes the green link is it, you followed?) and heads southwest with it. DDs, you keep calm and wait for the light to turn green before turning off the brain and taking everything apart. When the Off tank has placed it well and / or gives you the green light, you can send the sauce.
If you're a suicidal-prone melee DD, you can go with the Off Tank on Chirada. If you value life, have fun, you will hardly be used from there: S
Even well played, it will be extremely difficult not to take too much damage for you. It's possible but risky, if you do, your Tank must be furthest away from you at Blade of Wind and you at the other end therefore.
Same for the Healers, heal but not too much so as not to recover Chirada, if you bring him in the rest of the group and you see a target on a person close to you and you are not behind Chirada's back, you can pray because you will surely die.
For the Main Tank, it will not be easy, you need Suparna sweater et the Perforating Feather. It sounds complicated like that, but rest assured, it is not insurmountable. Pullez Suparna on the Shield / Tomahawk Throw (feel free to use them multiple times), let the Piercing Feather target someone first (otherwise your Taunt won't do any good). last can use Veil of Saints to lose attention after Taunt.
Once all these pretty people within Flash's reach, swing a small Circle of Fate for example, followed by 2 or 3 Flash, and go to the North-East. Be careful, however, not to Flash Chirada or you will complicate the phase. Also pay attention to do not kill the Piercing Plume!
The tornadoes will appear and you will see if you are well placed or not. Don't panic, you have time to correct your aim before being thrown all over the place. The damage from the Tornado alone is really not that great. Same thing, you have a well-built hate on Garuda at this time, so we prefer to mount it on Suparna and we keep it in target to see the incantation of "Lame de Vent".
When the DDs go to Suparna, they are going to really hit the nail on the head right away so maximize your haste.
And again, same Garuda and 1 sister will disappear, followed by areas on the ground and then once they reappear, it's the big slap. So defensive CDs + Flash for prevention (on the video the first time we go into this phase, there is a good example of what is too early for Flash). The same goes for Viruses, Garde Corps, Stoneskin, Treatise on Comfort as explained above. As you can also see, it is very difficult to kite to dodge a "Wrong Wheel" at this time. The Off Tank takes a Wrong Wheel, the Main Tank takes 2 almost at the same time.
The two tanks should always keep an eye on their own debuff and on the other to know when to pick up the Piercing Feather. Like phase 2, we don't kill it right away, we need it.
When the Main Tank has 2 charges, facilitate the work of the Off Tank for the recovery, get as close as possible without going into the Tornado. The Off Tank gets her back with her Taunt, even though Chirada is not yet dead. The exchange of the pen is your priority.
Something is likely to happen at this point, just after the Taunt, if the Off Tank has not used something else to stall its aggro and the Main Tank launches actions (even on Garuda / Suparna or a Defensive CD), the Perforating Feather may return to the Main Tank. We don't panic, it's normal. On the other hand, the Main Tank is careful not to do zone action otherwise the feather will not let you go.
For DDs, you will understand, when Chirada is dead, we become Suparna. And when Suparna is dead, we go back to Garuda. The phase with the sisters, this is where you have to send everything, prefer to use your offensive actions at this time (Furious Shot, Blood for blood, etc.).
During Phase 3, you can, and especially the Main Tank, dodge the "Wake". It's simple, just go behind Garuda / Suparna's back during the casting. I admit that on this run, I didn't try too hard. All this to relieve the healers and not make you dizzy.
When Garuda disappears and not before, the Off Tank and / or DDs can end the Piercing Feather. Wait for areas on the ground et the AoE around the Perforating Feather et the disappearance of the Tornadoes then go take refuge under the dome formed by the Perforating feather.
Same as in Phase 2, Garuda will hurt but the dome will protect you from the Air Rafale. It will be necessary to heal the whole group: your healers can anticipate by using Stoicism and Medica for example. And it left for a Phase 2> Phase 3 until the last breath of Garuda.

With regard to the Transcendence, it's by feeling. If you have a Transcendence of Lv. 3 and a sister + Garuda, indulge yourself with a Transcendence of Mage, otherwise Transcendence CàC on Garuda to finish her or kill the sister, in short it's up to you. As you can see, the fight is a bit technical and above all a lot of fun!
The keys to success are 2 good Tanks who know how to play Ping Pong together in addition to substantial DPS and good healers.
PS: It's not the best run we've done, especially me. I was really not in it that day with a good headache. But in the end, errors can be of service to you (do not systematically dodge the wakes, slam your defensive CDs or your Flash too early or even get out of the Dome too early for the Air Rafale).
In short not to reproduce?
In addition, here is a video of the same fight from the point of view of a White Mage: