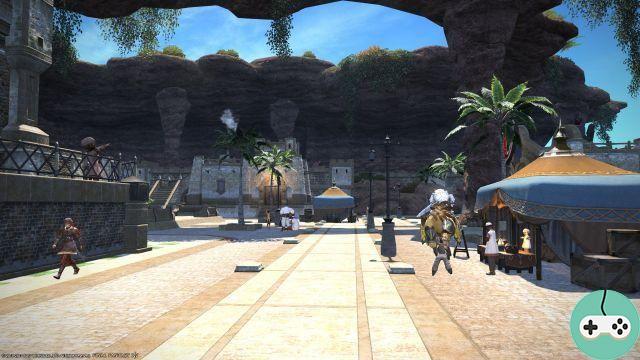
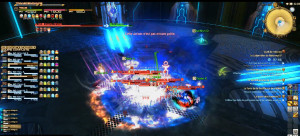
Level 4 of the Bahamut Maze consists of several waves of enemies that will test your stamina! Several strategies are used to overcome this fight.
Here I will detail the one used by the Static 1 of my Free Company. We also joined forces to write this guide. Because of this, it will be a little different from the others. It will include the strategy but also two other points of view: that of the Tanks  and that of the DPS
  .
.
Do not hesitate to share your experiences in the comments!
compositions
Here are several compositions used for this T4:
- Paladin x2, White Mage, Scholar, Monk, Summoner, Dragon Knight, Bard.
- Paladin x2, White Mage, Scholar, Monk, Dark Mage, Dragon Knight, Bard.
- Paladin x2, White Mage, Scholar, Monk, Black Mage x2, Bard.
You will understand, a Bard is essential. As for the Healers, the two complement each other very well.
Note that a minimum ilvl77 is required to enter this fourth floor.
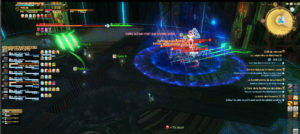
1st Phase: insects
We start with a group insects to kill quickly. Your tanks will bring them back to the center of the arena so that the DPS can use their area effect action.
When engaging (pull), I recommend that each tank take the one furthest at the end and bring it back using Circle of Fate to collect a second insect and a Flash to take it all (because at this point everything is almost packaged). Then we move a little to try to look like everything and optimize the DPS in zones. We use Flash on a loop on this (I usually do this until I have Circle of Doom available again which I keep for the future) .Use Cover on the HDs that get hasty.
A Bard uses Péan Martial on all intensive zone phases to prevent players from running out of TP.
When they are almost dead, your tanks will have to go and position themselves for the following group of enemies:
- the Main Tank (main tank or MT) will be placed in the northwest on the illuminated ground, as will its healer (the Scholar) but keeping his distance,
- the Off Tank (secondary tank or OT) will be placed to the northeast on the illuminated ground, as will its healer (the White Mage) while keeping his distance.
Quick Conversion + Magic actions can be used on this phase and will be available for phase 4
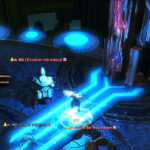
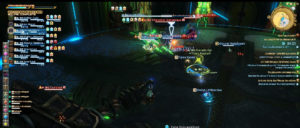
2nd phase: Mechanical knight and soldier
Each tank will take care of two enemies: Mechanical knight et Mechanical Soldier. We first eliminate the enemies who are on the Main Tank. The Bard and Mages take care of the Mechanical Soldier while the other DPS focus on the Knight.
 Main Tank
 Off Tank
The first knight dead, melee DPS goes to the Mechanical Soldier off Tank while the rest, including MT, finish off the first soldier. They then pass on the knight when the soldier does not move until the beginning of phase 3.
Tanks use a Circle of Fate as soon as they see enemies appear followed by a flash right after. In general, I do this cycle: Swift Blade on Knight> Inner Spirits on Soldier (during GCD)> Savage Knife Blade> Halone Knight's Rage> Usually we lose haste on the Soldier, I use Taunt + Shield Throw and it comes back. If he has too many HPs, I Flash, otherwise I let him ping pong between me and the mages. As an OT, get your aggro on the 2 quickly.
The Bard only goes on the first soldier if there are not two Mages in the group. The Mages do not pass on the knights because they take damage with each spell cast. On the first soldier, the mages separate from each other as well as healers to ping pong and avoid taking area damage together. Plan to use a defensive spell if the tank does not keep enough threat in this phase. The Mages move when the battleship spawns before starting the second soldier. If the second knight does not descend quickly, an Extra Lightning can be cast on it to optimize the chances of Storm Cloud when fighting the battleship. Finally, the Dark Mages must be ready for the 3rd phase: be under umbrella ice to recover your MPs before the start of phase 3.
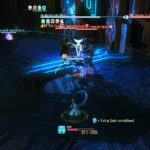
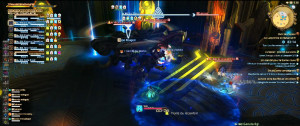
3rd phase: first Battleship
During phase 2, the MT will be placed in the center of the room, facing northwest. He uses Breastplate on himself. He must also be careful not to have Recover on him or the effect of Extra Medica. A ironclad will appear with several bugs.
Ranged healers and DPS move to the northwest, at the edge of the circle on the ground.
The White Mage then focuses on the Main Tank while the Scholar keeps an eye on the TO which deals with the remaining Knight.
When the Battleship appears, the MT places it in the middle. The insects will be attracted and absorbed by the Battleship. Those with the attention of the insects should be careful to get close enough to the Battleship so that it will eat them quickly.
The start of the fight is complex, you have to watch the enmity list. As soon as it appears, we catch him with Shield Throw, we don't waste time and we run on the insects in the East, we use Circle of Fate from the one closest to the MT (usually him it will aggro so we have the direct focus)> We use Flash and we position ourselves well to ensure that the Battleship is not in front of anyone. Normally, you have a minimum of 3 insects on you, the other insect that is furthest south can be capricious and get eaten a little later. There, we must send everything threat level because the DDs slam all their defensive CDs on this phase (we try to slam the big CDs as little as possible because we need them later). The OT can cast Breastplate on the MT to relieve it.
Your TM is going to be expensive, do not hesitate to use Divine Seal, Fairy illumination, Dome of survival for this phase. Your DPS must give their maximum before the appearance of enemies constituting the next phase.
Assist the tank with Virus in the appearance of the Battleship and Guardrail if necessary. The bard can cast enemy Requiem before arrival and then remove it after 20/30%
4th Phase: Insect and Drones.
The tanks regroup the bugs : the Off Tank manages the two in the East, the Main tank will look for two that appear in the West, go around so as not to pass in front of the drones-drilles, and bring them back to the Off Tank which is place approximately southeast of the arena. The TO having picked up the insects, the MT will be placed in the North, to the left of the luminous ground. He will put on a Breastplate and put it on the DDs which tank the drones as well as the OT. However, keep a little PM for the future!
DPS focus on drones : a part on each drone. Here you have to watch out for the "Verola" attack. It inflicts a condition on you that decreases your health. To avoid it, nothing could be simpler: stand behind the drone each time it casts Pox. Drones can be tanked by a Monk or Dragon Knight.

During this fight, your healers must mainly take care of the OT and DDs, with the Main Tank taking nothing special during this time. Then the Scholar will focus on MT while the White Mage is dedicated to OT.
Dead drones, all DPS focus on bugs on the OT.
The Healers are placed near the MT so as to stick to the back of the next ironclad. We place ourselves in such a way that future insects get eaten by the Battleship, the latter generally targeting healers.
Phase 5 will then begin, we will have to give everything!
The mages take the drone that appears further away while the other DPS take the drone that appears right in front of them. Defensive spells can be used during this phase if needed. Quick Magic + Convert are available and should be used for Double Blaze on Insects after the drone is dead. The bard uses Martial Ocean during the AOE phase on insects and removes it as soon as the knights / soldiers appear.
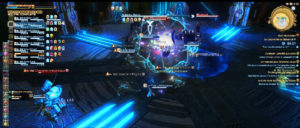
Phase 5: Battleships and Company
Phase 5 begins with the appearance of several enemies:
- un ironclad which appears just next to the MT if it is well placed. The MT does NOT use any defensive CDs on this Battleship in order to keep them all for the phase where he will have to tank 2 at the same time. Virus / Garde Corps owners can help the MT at this time.
As a Dark Mage, I cast virus / guardrail when the 2nd Battleship spawns when the tank has run out of defensive CDs. - un Mechanical Knight and one Mechanical Soldier that appear in the room. The Soldier is in the middle while the Knight is near the TO.
The Bard returns the Soldier to the OT. The latter is already busy and avoiding that he has to run after enemies will help him. Keep in mind that these enemies use zones, so they shouldn't be close to the healers!
Melee DPS focus on the Knight while the rest are on the Soldier.
Meanwhile, the Main Tank takes care of the Battleship with the help of the Scholar.
The Off Tank, relieved of a few enemies, proceeds to exchange healers: the White Mage swings on the MT and the Scholar on the OT.
Mages continue to do area damage until all insects are dead (on top of that if enough damage is dealt the knight is stunned and damage done by Mages does not reflect damage back to them. despite the Knight being hit) Silent Strike is our friend as soon as the Knight / Soldier appears to continue making zones without taking aggro. When only the Knight remains standing, the Mages can open the Battleship. With a little luck it will not absorb insects and therefore will not recover any health. Again the Mages throw lightning to favor the Storm Clouds on the next phase.
We then attack the second part of this phase where several enemies are encrusted at the party:
- a second ironclad that the MT takes immediately. He will use at this moment Invincible (but not too early so as not to waste a few precious seconds of invicibility while the Battleship turns to absorb the bugs) then warn when the latter will stop working. He will then have to use his defensive actions one by one to reduce the damage taken. (Ideal bearing: Sentinel> Rempart> Aguet + Forteresse and of course do not hesitate to use Convalescence) To be used in such a way as to manage server lag: the next CD is slammed when there is 1 sec of delay to the previous one. All his actions used, the White Mage uses Divine Seal to gain healing power. Guardrails and Viruses are also welcome.
If your OT is not available before the end of the MT's Defensive Cds, it's hot and you might not get there.
- un Drone Drill that spawns near the MT: DPS takes care of it using Melee Transcendence. The bard immediately passes over the soldier to break his breastplate and freeze him.
- un Mechanical knight and one mechanical soldier that the TO will tank. He can use Invincible when he has both enemies on him.
- a few bugs which will have to be absorbed by the Battleships. Either it happens naturally right away, otherwise they will be tanked by the OT (the DDs must bring them back to the OT) The MT can ultimately take one with Taunt to make a Battleship eat it directly (Risky maneuver because the Battleship will turn on the healer to eat him and risk wedging a Rotofauche on his head).
Le Drone drills dead, the melee DPS and the Bard pass on the Mechanical Soldier then the Knight. They must be eliminated as quickly as possible in order to free the OT so that it can recover the second battleship.
The mages immediately take care of the Battleship. Offensive spells are reused at this time. The bard can use Mage's Ballad if necessary after the knight is dead or after the first battleship is dead.
The TO therefore recovers the ironclad who has the most loads (this is the one that absorbs the most bugs) pull it away a bit and occupy it while the DPS takes care of the Battleship marked with the MT.
Le premier ironclad dead, we pass on the second. The MT switches to Sword Oath if it is PLD and can DPS also without staying in front of the enemy.
During this last fight, we will enter the final phase.
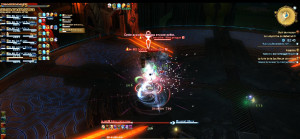
Phase 6 : explosion !
Depending on your DPS, you will only have to endure phase 6 for a short time. The platform you are on will start to explode from everywhere, causing waves of damage called "Emergency Cancel" as you kill the second battleship.
Your healers will therefore need to use AoE healing spells to keep the whole party alive while the Bard uses Mage's Ballad.

Finally, here is another video made by Zuh. the strategy employed is the same until the penultimate phase. Everything is detailed on the video so as not to miss any element.
Loot List
Tank equipment:
- Heavy Allagan Gauntlets
- Allagan Bracelets of Fending
Mage equipment:
- Allagan Rope Belt of Casting
- Braies d'incantateur Allagoises
- Allagan's Earrings of Casting
Healing equipment:
- Allagan Tunic of Healing
- Allagan Rope Belt of Healing
- Allagan Bracelets of Healing
- Allagan Ring of Healing
Melee Equipment:
Monk:
- Allagan Visor of Striking
- Allagan Tasset of Striking
- Allagan Sabatons of Striking
- Allagan Choker of Striking
Dragon Knight:
- Allagan Visor of Maiming
Bard:
- Allagan breastplate of aiming
- Allagan Sabatons of Aiming
Common accessories:
- Allagan Ring of Maiming
- Allagan Choker of Aiming