


This guide is brought to you by Khazou
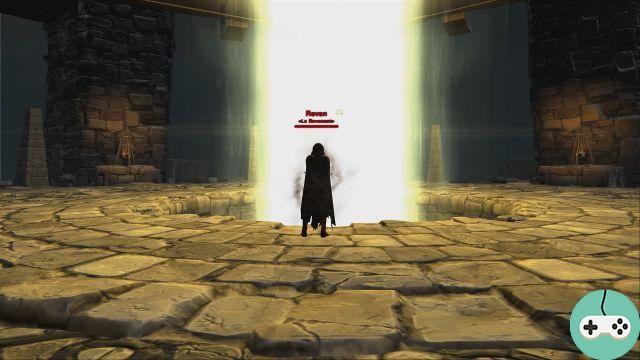
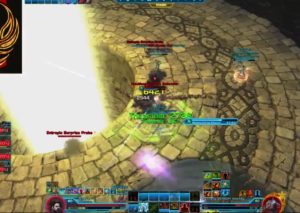
Revan, or one of the most twisted bosses we've seen to date. The strategy involves very little randomness despite everything, we only see little Revanchard.
The fight against Revan is broken down into several phases that I have broken down as follows:
- Phase 1 : lasts until the disappearance of Revan and the appearance of HK
- Phase 2 : ends with the death of HK
- Phase 3 : begins with the reappearance of Révan and ends with his disappearance (28%)
- Phase 4 : begins when Revan's shield breaks and ends when it disappears (9%)
- Phase 5 : begins with the descent of the Core and ends when the latter dies
The general rage is set at 11 minutes and with a heave around 11:05, it is impossible to survive without immunity (Objectively, you have - 15k health points left .. you will take 40k minimum).
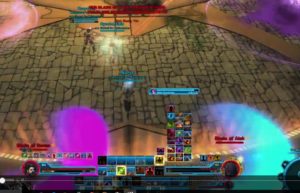
Phase 1 - Abilities
- 1. Heave : area damage, internally. 15k except the first which causes double.
- 2. Saber overloaded : Revan's "standard" attack. He gets 2 charges and each charge allows him to attack 2 times. Wide cone attack.
- 3. Corruption d’essence : Light DoT which reduces damage by 10% per charge. Must be dispelled by healers. Upon dispelling, a deathfield spreads DoT to anyone affected. The expiration of the debuff causes the death of the wearer. Only targets DPS.
- 4. The yellow link : binds 2 players, Tank excluded, with a yellow laser. Damage increases rapidly over time. The yellow link must be destroyed by the central vortex.
- 5. Impale : Projects the target an unlimited distance. The pylons allow you to stop.
- 6. Death Streak : mechanical imposing a switch between the Tanks. The target drops a red circle 6 times, dealing medium damage each time and applying a debuff that increases damage received by 5% per unit.
- 7. The blades : Revan summons 2 lightsabers. These lightsabers always spawn the same distance away from him and target the person closest to the sabers spawn point. The sabers cannot be destroyed, they must be thrown into the central vortex, or into the void.
- HK : this is not an ability of Revan, but HK is present during this phase, and randomly shoots a player causing him high damage and knocking him to the ground.
- Assassination : if you show your back, you will understand your pain! 40 / 45k on average.
Phase 1 - Combat management
The fight begins with a little surprise… Indeed, Revan will throw the first person who hits him on the opposite side. Be careful not to be sent directly into the vortex.
- 1
- 2
- 3
- 4
- 5
- 6
- 7
Heave
The heave is an area damage that occurs every 30 seconds. The first heave will see this damage doubled. If you do not have any Specialist / Vanguard in your composition, you will have to think about placing a defensive power to reduce the damage in order to relieve your healers who will have to do elsewhere.
If you have one or more Specialists / Vanguards, just remember to get closer to Revan (7 meters) when less than 10 seconds left in order to benefit from the Sonic Shield.
The heaves always intervene at more or less critical moments and it is therefore important not to forget anyone like the Tank who has just finished posing these dying traits.
Overloaded Saber
No major difficulty with this attack, just keep in mind that the cleave is very wide and does serious damage to non-tank classes. The ideal is therefore to turn Revan towards the void when he discharges these sabers and to avoid making him move during this attack.
Corruption d'essence
Essence Corruption is therefore a stackable debuff that only targets group DPS. Each unit reduces damage done by 10%. When the debuff is purified, a deathfield is created. Anyone hit by the deathfield will then gain a charge of the debuff and greatly complicate the task of your healers.
The person who dispels gets the debuff, so it's important that only your healers do the dispels.

There are different tips to manage this mechanic:
- Your DPS must be responsive and exit the raid quickly so that they can be dispelled without the risk of spreading
- Players not affected by the curse stay grouped (close to Revan for mass taunts)
- If a player gets 2 charges, they must not be dispelled at the same time. A healer will have priority and give the top to the second
- If you don't have the curse but need to break the link, try not to run to the guy who is going to be dispelled.
- In general, prefer to isolate yourself on the empty side than on the vortex side.
At 78% and 68% two white circles will appear. There are 3 possible positions:
- Entrance (6h)
- In front of the entrance (12 noon)
- To the right of the entrance (3h)
These circles allow whoever enters them to immediately lose all charges of Corruption of Gasoline. Intuitively, we will send the most fragile healer to dissipate (logically at 4 charges).
The second circle can be difficult to take since Revan is only 3% phaser, but if you have the opportunity to take it, do it.
Tip:
- If you've fallen behind in dispelling, you can voluntarily stop dispelling a player and that player will use the circle instead of the healer.
- When the circles appear, if the curse is on a DPS that has the ability to dispel, it is possible to let that DPS dispel the other and take the circle.
You can also combine the two.
Yellow link
No difficulty with this mechanic, you just have to be reactive and communicate, the 2 players must go opposite each other and pass the ray through the central vortex.
Running after each other is bad for your health and will inevitably lead to the death of one of the 2 players.
The linked person can also have the Essence Corruption at the same time, so try not to go too far or delay the dispels.
Impale
The impalement is characterized by a red zone. This power propels the tank over an infinite distance, so we have to be thrown into a pillar so that it stops our fall.
Nothing too rocket science here, especially as while it channels, you have the option of turning around to adjust your placement. Just remember to type it just before the screening otherwise you will have surprises.
Death stroke
Mechanics not very complicated which will force your Tanks to exchange Revan. The targeted Tank will be slowed down and drop red circles at regular intervals. The total number of circles dropped in P1 is 6. Each time the Tank drops a circle, it receives moderate damage as well as a debuff increasing this damage by 5% per unit.
The Tank must receive a heal during this phase because there is always a Heave during or immediately after.
Average agony damage without defensive powers: 6k per circle + 15-20k depending on the number of debuff for the heave = Tank dead or almost
The blades
Blades can quickly become dangerous if poorly managed. They deal an average of 5k damage per second and combined with a heave + a HK shot, it can kill someone quickly.
The objective is to expel the blades outside the platform with a strong preference for the ray which has the merit of destroying them directly (Without that, sometimes they bug and they are invisible ... and that's the tragedy) .
Soldiers / Mercenaries are best suited to kick them out, but Maverick / Sharpshooter, Scholar / Sorcerer, Guardian / Ravager can do the job too. It is also possible to anticipate the appearance of the blade and to position yourself in order to destroy it immediately after its appearance.
As an indication, Revan phases at 65% and he must do it in 1min40 maximum, otherwise you will probably not see the end of the fight.
When Revan disappears, 2 circles will appear, your healers must finish the dispels and go to dispel themselves. You have to be quick in the execution because HK arrives quickly and he does much more damage than Revan.
Last tip, with or without Avant-Garde / Specialist:
- Try to stay together as often as possible for zonal care
- Make sure to finish the phase close to the entrance, it will save you time in your placement for HK
- While we're waiting for HK, you can DoT the latter, or if the raid is in bad shape, help your healers get the party back up.
Phase 2 - Abilities
- Pseudorandom Violence: the attack is aptly named since it randomly targets a player. The damage is conical and severe enough to kill an unresponsive player.
- Slash: Basic HK attack.
- Perforated Organ: Gift left by the slash, HK's main source of damage.
- Handful of Grenades: Throws a grenade to each player. Dissipable.
- Shot in the legs: no damage, big slowdown.
- Butt shot: if you show your back, HK throws you a butt shot, on the ground for a long time, loss of aggro, in short we do not show his back!
- Cheated Rifle Shot: 5,5 second channel. Kill the target.
- Droids: they appear during HK shooting. Only the biggest should be killed.
- Shield: you have to be inside to be able to type HK… reduces the space and it can be annoying.
Phase 2 - Combat management
- 1
- 2
- 3
- 4
- 5
- 6
Pseudorandom violence
Pseudorandom Violence is not a difficulty in itself, it just happens often at the wrong time, right after the grenades. If you don't have a chance to dispel your grenades, try to anticipate the possibility that you will be the target and that you will not be able to do anything because you will be down. We put a defensive power on the grenades which precede the Pseudorandom violence therefore.
Cutting and Perforated organ
Basic HK attack that causes an average of 10k on the Tank. The slash comes with a cumulative debuff:
- 1 accumulation = 6k/3secondes
- 2 accumulations = 12K / 3 seconds
- 3 accumulations = 18k / 3 seconds
It is not possible to switch before the 2 accumulations and you have to be careful not to go too fast. The option of moving HK a bit to save 1 or 2 seconds can save the day. If your debuffs have not yet disappeared and the other Tank already has 2 accumulations, move away to collect HK, by the time it arrives on you, you should have lost your accumulations… to do with feeling!
Handful of grenades
HK throws grenades at the whole group. These grenades can be dispelled. All classes that can dispel must do so, but not just any old way:
- Never under the dome of HK
- Preferably on top of each other, in order to avoid the dangerous surface
Depending on your makeup, you can dispel your tanks. From experience, it is important to dispel the Tank that will receive HK's Death Shot or the Tank that already has 2 accumulations of Perforated Organs.
Shooting in the legs / butt kick
Nothing in particular… You have to do with the slowdown. The Lacrosse seems to kick in if you turn your back on HK for too long. It throws you to the ground and causes you to lose aggro. It lasts about fifteen seconds… it's almost a guaranteed wipe.
Cheated Rifle Shot / Droids
At regular intervals, HK will channel an attack for 5,5 seconds on the Tank. At the end of the pipe, the vortex must be placed between the Tank and HK in order to absorb the damage. If the Tank is misplaced and the Vortex is not blocking, it dies.
During this time, 4 droids, 3 small and one big, will appear. The larger one channels a power, which will cause very heavy damage to the target. After approximately 4/5 seconds of appearing, the 3 small droids will channel an attack for 1,2 seconds. This pipeline must be interrupted.
One allocates 1 DPS, the Tank not targeted by the shooting and the 2 Healers for the interruptions (The Healers being able to miss the interruption, they interrupt the same one).
No secrets here, you literally have to pulverize the biggest droid while performing the interrupts properly.
Our friends the pomegranates will happily disrupt this phase.
Bouclier
The shield, in addition to absorbing damage, will reflect it back to you, so be careful when you are outside. The difficulty with him is that you have to make HK move as little as possible in order to maximize DPS.
Hence the logic to avoid any dissipation of grenade inside shield.
For our part, we have opted for a systematic dissipation of the 2 Tanks by the Healers. In order to prevent HK from moving, the 2 Tanks will have to pile up when their grenades are dispelled.
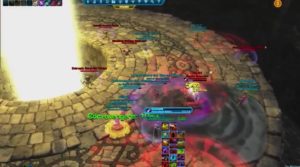
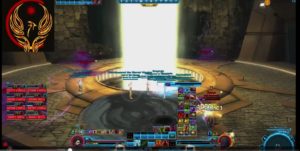
Phase 3 - Revan the Return
When HK dies, you will be able to climb a bit, now is not the time to daydream, we use the speed boosts and we hurry to destroy the 4 pylons.
During this phase, Revan gains and loses some abilities.
- The Impalement disappears completely from its cycle.
- Death Bolts now only contain 5 charges.
- Essence Corruption and Link completely disappear from its cycle.
- Revan gains a sort of Bloodlust which increases the damage of his overloaded saber.
- The core of the machine turns on and attracts and projects every 15 seconds. It begins with a projection.
Revan having significantly less power to use, the overloaded saber will come back more often and he will discharge the 2 charges in a row, with the increase in damage, this can quickly be fatal for the Tank.
Placement
There are different ways to place / move during this phase but here is the one we used. This placement will also allow you to “pre-shot” the blades which is not a luxury in this phase.
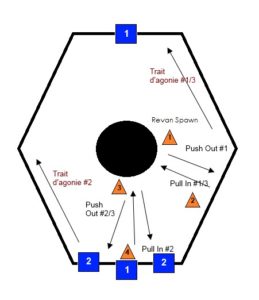
The blue squares correspond to where the blades will appear. The first appearance of the blade occurs just after the projection and just before the first Traits d'agonies.
The second apparition occurs just after the third screening and just before the third Traits d'agonies.
After the third projection, you must return to position 2 bypassing the arriving Aberration.
Depending on your DPS you might get an extra throw, if that happens return to position 3 after being drawn for the third time.
In this phase, if your Tank is not a Vanguard / Specialist, know that the Traits of Agony always intervene before a pull. You may need to adjust the position of the second Death Bolt so that you don't get drawn directly into the passing Aberration.
A trick here is to anticipate the appearance of the blades in order to project them as soon as they appear.
Revan disappears after 28%, it is possible to make him fall lower while waiting for the casting of the next Heave, or even better of the next series of Aberration (he connects the two just before the fourth projection).
Once Revan is gone, the small climbing phase begins.
Transition Phase 3 - Phase 4
No secret for the climbing part, you just have to not be one-armed. We got into the habit of doing it in pairs. The first tries to go as fast as possible while the second ensures the climb. Once a person gets to the top, all of the dead will come back to life and the top floor will be unlocked for the whole group.
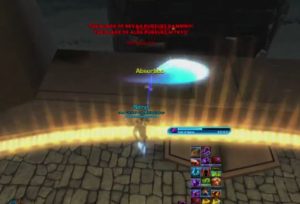
Arrived at the top, you will find a Revan in full channel of a power of destruction and under shield. The objective is to destroy the shield before it ends its channeling.
It seems that the shield gives way after a fixed number of hits received, so there is no need to burst during this phase. Simply place all your DoTs and spam the white stroke.
Phase 4 - Revan
Revan's shield has just dropped and it is spreading miserably on the ground, I urge you to drop everything. The objective is to shorten this high phase in deceit as much as possible! Inspiration / Thirst for blood and Doping therefore.
We find exactly the same abilities as in the previous phase, with the exception of Aberrations, supreme deceit of Revan's strategy. We will come back later.
In this phase, the first action of the Core will be a Projection, so remember to position yourself correctly, regardless of Revan's position which remains static at the start of the phase.
After recovering from his fall, Revan will chain the following abilities:
- Aberrations
- Lame
- Agony
- Overloaded Saber
Until the End of the Dying Bolts channel, Revan will not move. The blades will therefore always appear in the same place, and it is strongly recommended to Pre-shot at least one if not both ... in any case, you must be able to get rid of them as quickly as possible otherwise die in excruciating pain.
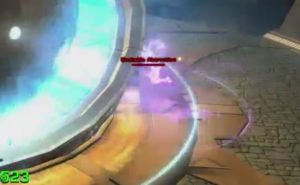
Phase 4 - Aberrations management
The general mechanics of Aberrations are as follows:
- The 4 Aberrations appear.
- One by one, they will "light up" (mini Nova effect).
- You will need to locate the firing order of the 4 Aberrations (a talented announcer is required here).
- Finally, to everyone's delight, once the 4 Aberrations are lit, they will explode, throwing anyone who is not looking (the character, not just the camera) at the exploding Aberration! In most cases, you will be thrown into the void.
- Be careful not to get thrown into an Aberration behind you.
- Tank
- Healer
- DPS
- Advertiser
If you don't have a Vanguard / Tank Specialist, know that this phase will drive you crazy. Indeed you MUST watch the exploding Aberrations. So far, easy. BUT between the first and second blast will occur the pull, which will immediately put Revan behind your back.
Revan will therefore come with his "Exploit Vulnerability" power to put a 40k in your gums. In short, with a Guardian / Ravager, you can survive it by slamming all your defensive powers a little.
In Shadow / Assassin, I'm not sure if it's even possible, there must be a way to do something with phasic displacement or something like that… I'm not sure yet.
If, on the other hand, you are sane and have brought back your Vanguard / Tank Specialist buddy, then everything is simplified, you will only have to click Immutability / Hydraulic Manipulation 6/7 seconds before the pull to be quiet.
Finally, not totally, the 4 Aberrations never being on the same side, there will come a time when you will show a piece of buttock that Revan will appreciate to exploit for the Tank in this phase, so you must make sure to place Revan between you and the Aberration which will explode… a nice straight line and you can suddenly keep hitting it.
There is no big problem here if you are prepared. The 4 explosions will cause serious damage in the raid, stacked with the Heave that falls at the end, you can possibly lose players.
So, you might as well learn how to do it from the start, during the phase where the Aberrations explode, you have a duty to continue to heal. There are a bunch of powers that don't turn your character over, take a test.
Also get into the habit of directly targeting yourself to start your AoE heals, it won't turn you around and it's still a good way to heal everyone.
Also anticipate this phase by putting bubbles / ramparts / probes on everyone.
Finally, the use of a Defense / Shield Maverick / Sniper defensive power at this precise moment is not penalizing for the rest and is therefore strongly recommended.
2 options are available to you:
- The security version, we stop DPS completely, we slam a defensive power to help our healers and we watch the 4 explosions in turn according to the announcements. If the ads are clean, the risk is zero.
- The less secure version, you do like the Tank, you circle around Revan while continuing to hit him. Do not forget to snap a defensive power either to relieve the care on this phase. The direct benefit will be the shortening of the phase.
Probably the most ungrateful role, the integrity of the group rests on your shoulders and your ability to visualize the 4 Aberrations well and not to stammer during the announcements.
As an indication, if the Aberrations are well distributed, it may be difficult to see them all, so the announcer will focus on the three he sees, and he will directly announce the one he does not see. A support person can therefore focus on it.
We have also opted for a system where we announce the first three Aberrations which light up and then when the fourth lights up, we announce again the first to watch.
There is in fact a slight downtime but which also allows you not to be surprised. Aberrations explode once every 2 seconds, so don't hang around in the announcements and have a certain rhythm to announce the next one when the current one explodes.
Phase 5 - The machine
If you have arrived here, it is because you have understood the mechanics of Aberrations and in fact you are not very far from the down.
During this phase, you lose 1% of maximum health points every 2 seconds, it is possible to make some resistance via special defensive powers.
We find the mechanics of the Projection / Attraction, the heave and finally the Aberrations. There is at least 1 Heave that occurs at the same time as the Aberrations blasts around 60 stacks. Potentially fatal given that you will only have around 20k maximum health left.
Phase 5 - Aberrations / Heave Management
The previous tips remain completely valid except that Revan is no longer present.
To hit the machine, you must be close to it, if you have Immutability / Hydraulic Manip, you must use it in defensive power before each Pull to increase your uptime on the machine otherwise you must not forget to back up systematically before a sweater so as not to be toasted by the shelf.
For non-Commando / Mercenary healers, your best bet is to let the Throws / Pulls wander around, so you don't have to worry about your placement.
For DPS, you have the option to do as with Revan, aka spin around the machine to line up with the next Aberration that will explode. It's quite situational and the risk-taking is not negligible but it can make the difference between a wipe and a down.
Another technique is to type the machine with snapshots by performing left / right to force the character to look in front of him and therefore towards the Aberration.
Care and Heave
The more you advance in the phase, the lower your health meter will be. It will therefore be more and more obvious that your healers will have to move up the group BETWEEN the explosions and especially BEFORE the Heave. Depending on your healer composition, different tips exist, but to stay in general, you must always anticipate (and the parsely timer greatly helps!) The next Heave.
Depending on your DPS, choose the best time to use your defensive powers. It is perfectly possible to survive the Heave of the 80 accumulations.
Tips and tricks
- Immutability / Hydraulic handling allows to resist Impale EXCEPT if you aim at a pillar. It also helps resist the slowing applied by Agony Bolts. And finally to the projection / pulling of the machine. (who said CHEAT?)
- However, with 4.0, the cooldown of Immutability / Hydraulic Manip will be reduced to 45 seconds, so it will no longer be usable all the time on the Pull in phase 5. You should therefore not fall asleep and back down like everyone else!
- The Resilience / Shroud of Force allows you to fully resist the damage of the heave, you are virtually immortal in the last phase with the right uses.
- Combat Focus / Explosive Fuel can resist Agony Bolts, HK DoT damage, and damage from Aberrations explosion. The Overloaded Saber can also be dodged in this way, but it is much less interesting.
- The Reactive / Energy Shield brings a real big reduction in damage received, learn how to place it (Tank or DPS).
- Phase March / Phase Move can allow you, via a mad reflex, to survive being ejected from the platform. Please don't rely on it too much!
- The Consular / Sorcerer Force Barrier obviously makes it possible to resist all damage but also the Throwing / Pulling of the machine. However, you can't turn your character with it, so if you use it while the Aberrations explode you are probably already dead.
- Disagreement in Commando / Mercenary and Vanguard / Specialist can allow (for sure in Arsenal special) to resist all kinds of things (heaves, Aberrations damage among others), including the debuff of the machine reducing health points .
- Dodge / Evasion, bug or not, allows HK's grenade to be dispelled 1 in 3 times.
- During the phase with the 4 probes, the 2 Tanks can participate in the task by tapping the large probe.
- If you have a Guardian / Ravager, its mass taunt absorbs all of the Heave's damage, which is pretty good for the last phase.
- The new skills of 4.0 will allow you to dodge a throw or pull from time to time with the anti-throw uses going well.
It's your turn !


