


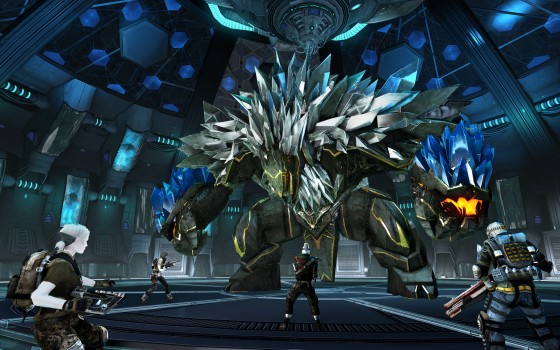
A boss with interesting combat characteristics has appeared with Defiance DLC 2, "Archbender": Warmaster Volge.
Warning: victory against the Warmaster absolutely depends on the coordination of all the players with you in the instance because he is very resistant. You may do a personal score over 1 million damage, as this guide can help you, if your teammates do not do enough on their side the Warmaster will escape you.
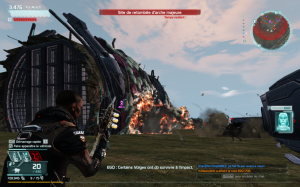
Major arch fallout
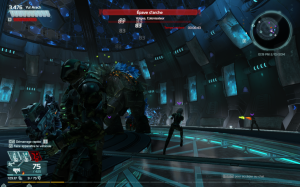
The confrontation occurs after having attracted on Earth a "major arch fallout", thanks to the use of four batteries of intercommunicators arranged on the ground. Planned locations are identified on the map as “potential major impact sites”. You will then have to face consecutively three waves of enemies (variable type) outside then a wave of volge before being able to penetrate inside the arch, the rest of the fight being instantiated in a closed environment (maximum set at 20 players per instance). Once entered, a final wave of infantry and volgian gutters will try to block your passage, and finally, the room which contains the Warmaster will be accessible by accessing via two hatches open at the corners of the room. It's time to reload your ammo and get off, then you'll come face to face with the Warmaster in his crystal sarcophagus surrounded by a force field. It will then be necessary to destroy one by one the various switches around the sarcophagus to free it: it is not a race, wait until all players in the instance are present before destroying them, you will need all the firepower for the fight. From this moment you will have 7 minutes and not a second more to beat him before he had time to activate his personal teleporter and disappear.
Behavior
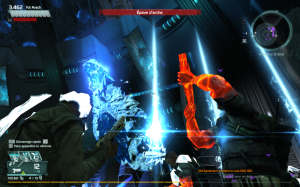
The Warmaster dons crystalline armor that makes him impervious to damage, as long as it is not broken. In addition, it includes innovative attack techniques compared to anything that can exist so far with the bosses of Defiance, the main one being that it no longer focuses only on one enemy (player) at a time to concentrate its attacks, but of course several. This therefore induces a higher level of difficulty.
The Warmaster will successively use 6 different attack techniques:
- Fixed on a player : swing his arm to hit / strike the ground with both arms
- Roulade : will roll on 30-40% of the room's surface
- Bomb : throws energy bombs from its back, multi-target, destructive
- Reloading : Hangs on the ceiling and throws energy bombs during its recharge
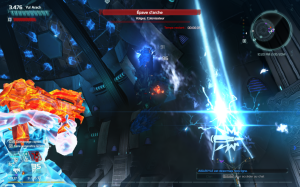
- Laser : projection of a destructive laser
- Summon crystals + enemies : Crystals and Volge enemies are called in for reinforcement, occurs after armor has given way
Combat techniques
Since the beginning, several effective fighting techniques have been discovered and implemented by experienced players to overcome the Warmaster, the one I will explain to you later is the one I apply and which has been proven, not only with me, but you should know that other techniques exist and are at least as effective. Until Trion decides to change the Battlemaster's behavior, or his damage resistance, or whatever, it will remain valid.
You must keep two main objectives in mind throughout the fight: to dodge attacks as best as possible (of course) and above all, concentrate fire on the Warmaster's back. The back is indeed sufficiently accessible to be attacked effectively and, we will see later, certain assets are particularly effective for this point of attack. The goal of always targeting this place is that it exposes a large part of its crystalline armor that will have to be broken as quickly as possible in order to increase the damage, indeed before that the assaults will be absorbed by the breastplate and the Warmaster's health bar will not drop one iota. Consequently, it is therefore useless to shoot in front of him for example (invulnerable in this place), or on the arms (not in this technique in any case), all the firepower must go on his back, do not disperse!
Finally, concerning the dodging maneuvers: it is enough to be moving most of the time, the Warmaster having a preference for fixed targets, always move towards his back (for the reasons mentioned above) and as soon as you are unable (without the possibility of getting up), especially not waiting for someone to pick you up: check out immediately ! You will return to the upper floor and this will be an opportunity to reload your ammunition before returning to combat. It should be noted on this subject, as we will see later in the recommended configurations, that defensive assets are neither really effective nor useful, it is better to be incapacitated and come back than to lose asset locations.
Configurations
In this technique, the Warmaster fights with two different configurations: the first being played while the armor is still in place behind his back, the second being selected once it is dropped (you will be informed by your EGO: “Looks like there's a breach in his armor.”).
Setup 1: drop the armor
The first configuration will be used before the armor on the Warmaster's back breaks. It is a question of finding the best possible compromise between high rate of fire and consequent damage. Regarding the weapons below, the ideal would be for them to have a nano "radiation" effect, which has a wide spectrum of damage and accumulates them.
A choice : (* the ones I play most often)
- VOT Pulser Tachmag *
- VBI assault rifle *
- BAM Launcher
- YOUR Volge Assault Rifle
Configuration 2: tumble the Battlemaster's life bar
After the armor has fallen from the Battlemaster's back, it's a matter of making a maximum critical hit so that his life bar goes up in smoke. It is also at this time that he will begin to summon volge enemies to support him: above all do not worry about it, stay focused on the Warmaster.
For this part, my choice stopped (like many players) on the VBI Pack of Wolves HP-6, I cannot recommend you enough to get it. Be careful, playing the Wolf Pack, like all pistols for that matter, involves good aim to be effective in terms of damage. Otherwise, choosing a detonator with a fast charger mod is a good compromise.
strengths
Regarding the perks, the combination below is the one I play and recommend to beat the Warmaster (all perks are level 3). The capacity used is of course the “overload”.
- Quick charge
- Murderous madness
- Gunman
- Killing machine
- Feedback
- Strength of soul
- Surplus energy
- Low-blow
- Riot shield
Shield, dynapods and dopas
Regarding these three components of your configurations, which will be shared on both:
Bouclier
You can go on a Rhino or a Tachyon (I use a Tachyon IV DX reloader), without any specific resistance to certain damage (all are ineffective against the Warmaster, even the electrical resistance when it falls to the ground). ). Since the cooldown is long between each attack, it is better that you resist as long as possible during the offensive.
Dynapods
The damage dynapods are to be used mainly when the Warmaster is hanging from the ceiling with his right arm, or when he is in the phase of “recovering his wits” and that he remains almost motionless. Most of the time, it moves too much, and you won't be able to hold your position for long due to its targeted attacks, so it's more haphazard. Experience will teach you when it is best to deploy a dynapod.
Dopas
Main objective: damage! In this case, the Dopas de Castagne is particularly indicated. Useless to take a dopas of care, the attacks of the Warmaster are so devastating that hardly used, your shield will be immediately discharged. Try to use them to the fullest after the armor has fallen as they promote critical hits.
Summary and conclusion
Summary
- Wait until you are complete (20 players) before releasing the Warmaster.
- Keep the focus on his back, if you're not behind him, do nothing other than get around him as quickly as possible.
- If you are incapacitated: Extract yourself immediately.
- Ignore the willy enemies, focus the Battlemaster.
- Use the right combinations of weapons / assets / combat accessories (Damage).
Conclusion
The Warmaster is really an interesting challenge. He will ask you to refine your efficiency in your movements and your attacks, it is not easy to combine the two at first, but with a little practice, you can quickly send him back to his ancestors and grab some interesting booty!
As I said before, this guide explains one technique for beating Battlemaster (with which I regularly score over or equal to 1 million damage), if you have a different one in place, don't hesitate. not to let us know in the comments, thank you!


