


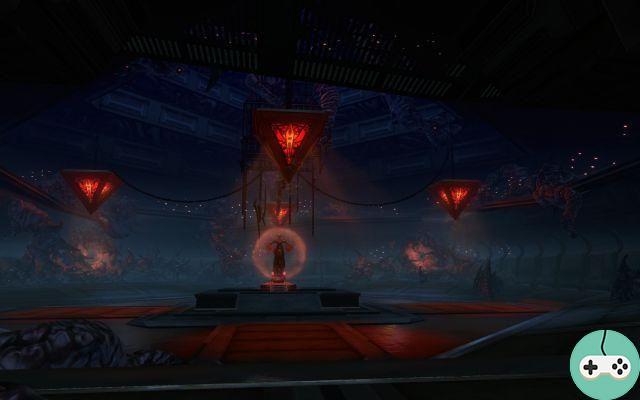
Did you kill Brontes in the Dread Fortress and still crave a challenge? The second operation, the Palais de l'Effroi, is made for you! After a few uncomplicated enemy packs, you will quickly come to the first boss: Beast
Hard Mode: 2 health
Important points
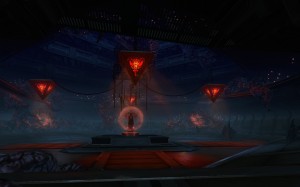
As you may have noticed upon your arrival, the room is very small and consists of four red portals. Larvae and fright monsters will come out regularly to spice up the fight. Here are the things to know:
- When a dread monster is near the boss, it deals more damage. This is easily noticed thanks to their blue appearance.
- When two Dread Watches are nearby, they protect each other and absorb some of the damage. This is easily noticed thanks to their red appearance.
- Dread larvae have very little health but inflict fairly significant damage. It is recommended to kill them as soon as possible.
To make the fight more complicated, three other abilities come to bother you:
- A tentacle spawns regularly and deals significant damage if a player is not nearby. Plus, if she isn't killed quickly, she explodes leaving your party in a deplorable state.
- A red zone appears randomly around a player and explodes after 5 seconds. All players in this area take damage.
- A cloud of red smoke appears randomly under a player and deals very, very heavy damage after 1 second. You must get out of this area as quickly as possible.
Please note: it is possible to have both zones at the same time!
Bestia, meanwhile, sticks a debuff on your tank that stacks quickly. To avoid dying, tanks must exchange Bestia at the first debuff, although it is possible to hold up to fifteen cumulative effects.
Course of the fight
The start of the fight is a taste of what to expect later. You'll have to deal with weak enemies without needing to deal with boss debuffs. The phase must be managed as follows:
- Tank
- Damage Classes (DPS)
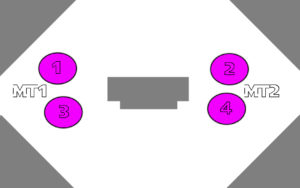
- The main tank collects the first watch of dread
- The secondary tank collects the second watch of dread
- The main tank collects the third dread monster
- The second dread monster dies!
- The secondary tank collects the fourth dread monster
- The fourth dread monster dies!
- The secondary tank picks up the first dread monster from the main tank
- The main tank collects Bestia
- The first dread monster dies!
- The secondary tank recovers Bestia after its first debuff.
- The second dread monster dies!
- All players take care of the dread larvae.
- All players take care of the second dread monster.
- A player takes care of the tentacle.
- The second dread monster dies!
- All players take care of finishing the tentacle.
Repeat this combination for all the other dread monsters keeping the priority: second> fourth> first> second to hit only one side except the last.
The next phase determines the level of your damage classes since you will only have the boss to kill. If your level is high enough, phase three begins around 55%. Above, it may be very complicated! Here's how to handle the third phase:
- Tank
- Damage Classes (DPS)
Starting the phase well is decisive for the rest of the fight. You have to choose which tank gets the first dread monster and for that, there is no secret:
- If you just traded the boss, whoever doesn't have the boss gets the dread monster. The taunt will be available at the time of the exchange.
- If you are going to exchange the boss soon, whoever has the boss collects the dread monster and waits a few seconds to have the debuffs so that his buddy takes over the boss.
Keep this same technique for the other dread monsters, remembering to distribute the damage. You must therefore exchange the boss but also the dread monsters. From the moment each tank has a dread monster, only the boss must be exchanged and that until his death.
For this phase, always keep the same targeting priority as for the first phase. As soon as you have killed two dread monsters, go to Bestia. This one must have between 30% and 40% of points of life. Above, it will be more difficult to finish the fight but it remains playable.
Difficulty
It is certainly the simplest boss of the operation, it simply requires a minimum of organization on the part of your tanks. The damage to be done is not huge and you should never normally see the rage. As in almost all operations, we have the right to a piece of equipment before going after the next bosses.
Booty
- Belt / Armband / Implant / Earpiece 78 type Token
- 1 random coin out of set 78
- 1 exotic element equalizer
- 1/2 mass manipulation generator (s)
- 6 ultimate distinctions
- 8 elite distinctions


