


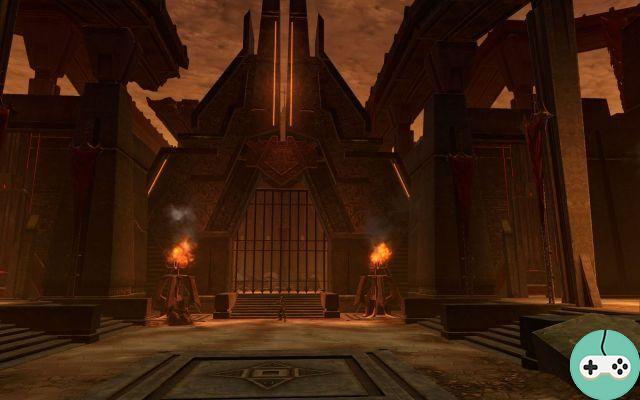
After the nag method, let's move on to the technical method with the second boss of the Dread Palace: tyrants
Hard Mode: 2 health
Important points
Tyrants is quite particular about its movement, since it only moves by teleportation, and always placed in the middle of a slab. However, it only has four important features:
- Simplification is represented by a 10 meter red circle appearing on a random player. This circle is reduced then fixed on the slab. The panel in question disappears after a few seconds. It is therefore important to position yourself well so as not to find yourself trapped.
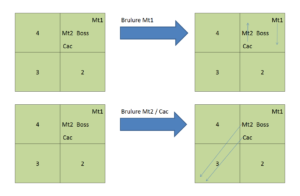
- The Furnace first appears as a curse, on three or four people in the group. When this ends, a zone of flame is fixed to the ground for several seconds and then goes out.
- The Affliction is the same as the Sorcerer with the exception that Tyrants can place two at the same time and this one hurts much, much more. For those who do not have a wizard, tell yourself that this is only big damage over time that cannot be avoided. It gives the healers a bit of a job.
- The Lightning Explosion is here to incorporate a minimum of rigor on the placement. This attack hits everyone in front of Tyrants and inflicts very heavy damage.
The boss cycle is as follows:
Simplification - Lightning Blast x 2 - Furnace - Lightning Blast x 2
Course of the fight
Let's move on to the practical side! First, divide your group into three to facilitate the Furnaces and Simplifications. Each group has its own slabs and a specific order to remove them. The green group should consist of the two tanks and all melee classes, the purple and orange groups are balanced between healers and ranged classes. The placement being quite complicated to explain in words, I invite you to look at the second card. The letters Mt1 and Mt2 represent the main and secondary tank, D / H represents the distant and healer classes.
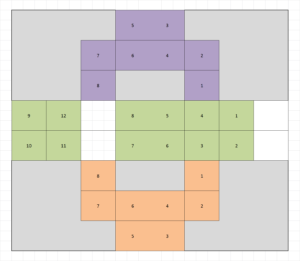
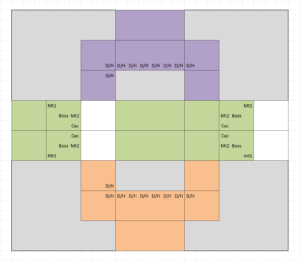
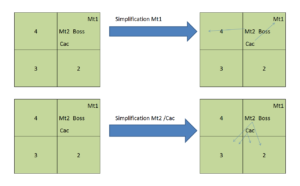
Based on the placement described above, here are the diagrams that show you the movements for tanks and melee classes depending on the case. I did not describe that of the healers and distant class which remains simplistic. The first image is devoted to the furnace while the second is devoted to simplification. Regarding the latter, there are two important things to know:
- When the main tank has a simplification, the melee classes must regroup with it and the secondary tank must collect the boss.
- When the secondary tank or melee classes have the simplification, they must never remove the slab present in front of the main tank. They therefore have two tiles left: the one next to it and the one diagonally from the main tank.
All you have to do is establish this method on all the other slabs to kill Tyrants. Be careful though with your placement between slab eight and nine since everything will be reversed. If you happen to have the simplifications always appearing on the same side between the purple and orange group, don't worry, just regroup when the tiles run out. Do not hesitate if you have questions, or things that you do not understand.
Difficulty
The big difficulty comes from the placement which must be respected absolutely and which can take a certain time to assimilate. Healing is also important compared to the first boss. However, if everything is handled well from start to finish, you will eventually find this boss quite simplistic in the long run. The trick is to train!
Booty
- Relic 78 type Token
- 1 random coin out of set 78
- 1 exotic element equalizers
- 2 generator mass manipulation
- 6 ultimate distinctions
- 8 elite distinctions


