Second Galactic Starfighter guide written by Eviad / Viandeur, Katuor Guild Maverick on the Mantle of the Force server, with support from Shana. It follows a first guide that we recommend that you read beforehand.
After the guide to GS theory, I move on to a more detailed description of the ships and how they are used. This guide is intended, like the last article, for players of all levels and lays the foundations of GS combat.
Summary :
- Presentation of the vessels
- Attack hunters
- Eclaireurs
- Bombers
- Armed Vessels
- Ship controls
- Target an enemy
- Operation of the electromagnetic gun
- Sensor operation
- Speed and Cadence of Turn
- The escape
- Management of the various power gauges.
Presentation of the vessels
We will see the presentation of the role of each of the ships, their strengths compared to other ships (in short, which makes them unique) and their disadvantages: each ship has a different role. Obviously, every ship has roughly the same potential and it's how you harness that potential that makes a ship effective in combat. The presentation of the different ships is not made to compare them, but to allow you to choose which one would suit you best. I would also like to point out that, as there are a thousand ways to pilot a ship, this presentation depends only on my point of view, and the major asset of a ship depends only on the way of playing of each one.
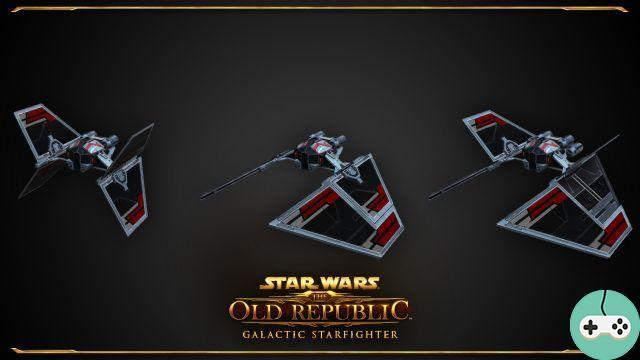
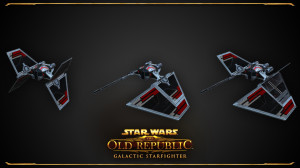
Attack hunters
Attack hunters are characterized by their lack of mobility and strong armor. They are very effective for… attack (yes, I am breaking open doors).
- Star Guardian / Rycer
- Bird of Prey / Quell
- Héraut / Empire
- Cost : you get it with the game.
- Description : It can have two different blasters which make it versatile (effective in long, medium or short range). He is slightly more mobile than other hunters.
- Major asset : an ion blaster that slows down the enemy and destroys their shield.
- Cost : 5000 Fleet Requisitions (RF).
- Description : It only has one blaster, but two types of missiles, which also make it quite versatile.
- Major asset : long, medium and short range missiles, with very different effects from each other: ionic missile (slowed target and shield destroyed), electromagnetic missile (very useful against bombers and their mines), etc.…
- Cost : 5000 RF.
- Description : It is more particularly designed for combat support but also has good offensive assets, such as ranged hacking which weakens a target by gradually reducing its shield power and preventing it from using its system component power (and its shield / motor power if you optimize it). It is, however, slightly less mobile than other hunters.
- Major asset : the one-of-a-kind repair probe that deploys to each of the nearby vessels, and treats them for a while, wherever they go.
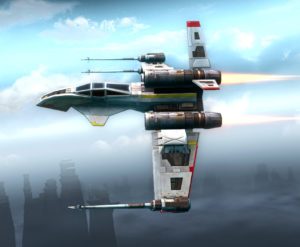
Eclaireurs
Scouts are characterized by high mobility which compensates for their lack of damage resistance, making them difficult to pick up for beginner players. They are particularly effective at capturing objectives in domination mode.
- Novadive / Lightning black
- Flash / Bumblebee
- Spearhead / Bloodmark
- Cost : You get it with the game.
- Description : It is, at 3.0, the most mobile ship in the game (great engine power, great agility). It is very effective in domination mode, because it can quickly reach objectives and its major asset lies in its rockets, ultra effective against stationary objectives (turrets and armed vessels in particular), as well as the electromagnetic field, unique in its kind, which proves very useful against enemy drones, mines and turrets. It is however not very resistant, and has a rather reduced range, but compensates for its lack of defense by a high survivability (it is very hard to hit, because of its mobility, its high evasion, and it has a maximum of 3 components. that allow it, independently, to escape missile lockdown)
- Major assets : Its rockets or its electromagnetic field.
- Cost : 5000 RF.
- Description : Vessel mobile and not very resistant, it has a role more centered on the offensive of other vessels than the novadive / black lightning but remains however a vessel whose range of attack remains reduced.
- Major assets : an arsenal worthy of attack fighters, associated with a mobility that they do not have.
- Cost : 5000 RF.
- Description : Less mobile and more resistant than other scouts, it can play the role of support in combat, and has offensive strengths.
- Major assets : a repair drone, incapacitating missiles like the electromagnetic missile or the ionic missile, and very efficient system powers.
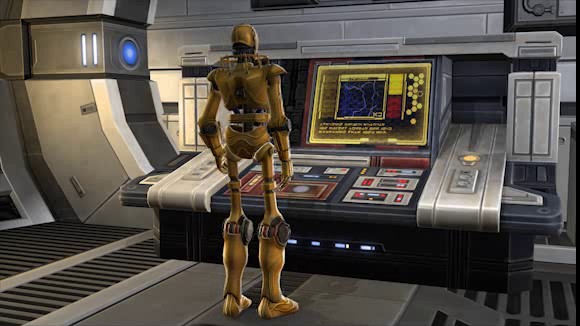
Bombers
Bombers are characterized by their lack of mobility and high resistance to damage. They are very effective in defending objectives in domination mode.
- Rampart type 4 / Cleaver
- Warbringer / Legion
- -Massue / X
- Cost : 2500 RF.
- Description : It has an arsenal of mines with various effects and functioning (which inflicts severe damage to hulls and / or shields, which slow down) and which act at reduced range (less than 3000m). This bomber is effective in close range combat, despite its lack of mobility.
- Major asset : It has a hyperspace beacon (a reappearance point for ships of our own faction that can be placed anywhere we want and which offers enormous strategic interest).
- Cost : 5000 RF.
- Description : It has an arsenal of drones with various effects (slows down the enemy, damages the enemy, heals the allies). Unlike mines, drones do not disappear the first time they are used and have a wider field of action (it should be noted that this bomber still has “searcher” mines, that is, self-guided missiles that attack an enemy. he gets too close). In addition, this ship has long range missiles and heavy laser cannon (high damage, 6000 meter range, high power consumption), which makes this bomber more effective in medium / long range combat.
- Major assets : A drone system allowing him a long-range offensive or even repair.
- Cost : 5000 RF.
- Description : It has a heterogeneous inventory that allows it to adapt to many combat situations. My point of view is that this ship, thanks to its strengths, is a hybrid between an attack fighter and a bomber (And that's just my point of view!)
- Major assets : It has short / medium / long range missiles and blasters, added to a drag drone or mines, as well as various engine components, including one that allows missile lockout to escape.
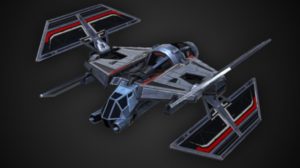
Armed vessels
Armed ships are characterized by their enormous offensive power, and a very high attack range, but also by their reduced mobility and an overall lack of close range attack.
Each armed vessel employs one or more Electromagnetic guns (see in the “ship control” part) and potentially has the “fortress shield” which protects you if you are stationary, by increasing your shield power.
- Grabuge / Mutilator
- Cometbreaker / Annihilator
- Condor / Jurgoran
- Cost : 2500 RF, but it is offered to players who were subscribed when GS was released.
- Description : It is the one that is slightly less mobile and less resistant than other armed ships, but has a little more evasion. In particular, it has two electromagnetic guns in combat, in addition to a main weapon of the blasters type. All of its weapons consume weapon power, so if you run dry, you might as well become useless. it is therefore advisable to have a large reserve and an engine / weapon power converter (Warning: if this is the case, you become vulnerable to missile lock-ups, so it is preferable to take the "warp field" as a component shield, because improve to the maximum, it allows you to escape missile locks).
- Major asset : an ionic electromagnetic cannon that destroys the enemy's shield and slows it down (more multi-target and cuts power regeneration when upgraded), associated with another more powerful cannon that destroys the enemy's hull (plasma cannon or armor-piercing bullet cannon).
- Cost : 5000 RF.
- Description : It has only one electromagnetic cannon, but has destructive long-range torpedoes which, for their part, do not consume weapon power. So if you drain your power gauge, you can still rely on your missiles to deal damage. This vessel is therefore more versatile.
- Major asset : being less dependent than mayhem / mutilator in weapon power, you can choose to take as the engine component "barrel", which will allow you to escape missile locks (so you can choose a shield component other than "warp field" , or “gyropropellers” engines which will make you infinitely more efficient in combat).
- Cost : 5000 RF.
- Description : Just like the Comet Breaker / Annihilator, it has a blaster, electromagnetic cannon and missile at its disposal, but has its missiles and blasters operating at close range. This is a good compromise if you don't appreciate the weapon's ineffectiveness in close combat.
- Major assets : Components for close range combat, not very effective against a scout at close range but is a considerable advantage against attack fighters who stick to us: they expect us to stop and shoot them inside us turning around, and we lower them while remaining mobile, or, they move away to fall back violently on us, and we shoot them on sight with the electromagnetic cannon. Warning : taking short-range missiles has a significant disadvantage: like the comet-breaker / annihilator, it will be common to no longer have sufficient weapon power, but unlike this one, you will not be able to pass on long-range missiles, and will be forced, either to do nothing, or to temporarily join the fray at the risk of getting caught.

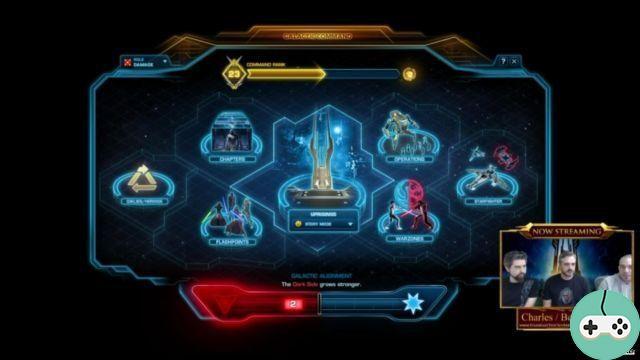
How to control your ship?
To grasp the simpler commands, it's best to practice in the GS tutorial mode, which is available on the launcher screen at the top right. Key concepts more advanced than basic movements will be discussed here.
Target an enemy
You must target your enemy if you really intend to hit him with your blasters or lock him (to launch a missile in the face afterwards). For this, you have different means:
- Tab (tab, this is the key above "caps lock" on your computer): allows you to target the nearest enemy. Press Tab several times to cycle through enemies, from closest to farthest (Limited to those within your detection or communication radius with allies).
- R : press R to view the enemy who last hit you (note: missile locks do not hurt the enemy, so this key does not let you know who is locking. In fact, no key is activated. can, so you have to guess for yourself). It works great for armed ships that are difficult to locate (provided they are within range of sensors)
- E : Press E to target the enemy closest to the center of your cursor in front of you.
By targeting an enemy, you get some information about them, in a dial usually at the top left of your screen:
- His image : so you can know, if you know a little about it, what type of ship the enemy is using, and therefore the most effective way to defeat it
- His position in relation to you : at what distance it is, and if it is back to you, perpendicular to you, etc ... the important thing is to be able to notice if it remains in front of you whatever your movements. If so, it will observe you and have you in its sights (important to know in the case of an enemy playing an armed ship)
- The enemy's target : the important thing is to know if the enemy is targeting you, and not someone else. If it targets you, your name will appear in red on the dial. Otherwise, the name of the enemy's target appears in white. It is also important to use this information to protect your critical allies like the armed ships, you have X in your team playing armed ship and you see that your enemy targets him, attack him and thus protect X.
- The enemy's situation : finally the most important: the health and the shield of the target, as well as the different effects present on the target (positive as negative)

Operation of the electromagnetic gun
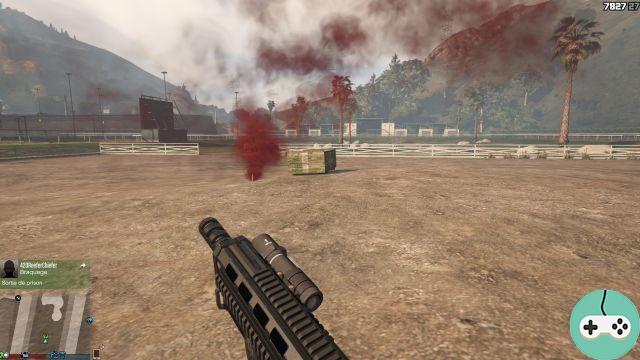
The power of armed ships is due to electromagnetic cannons. These guns make it possible to reach very distant targets (between 500 and 15 meters) and offer a huge strike force, but their use requires a loading time with each shot, which forces you to stand still (you become a prime target). Electromagnetic cannons, like blasters, use weapon power to function and are particularly energy intensive. Armed vessels therefore rely more than all other vessels on weapon power, but have the advantage of not being concerned with the ammunition for this weapon (unlimited fire).
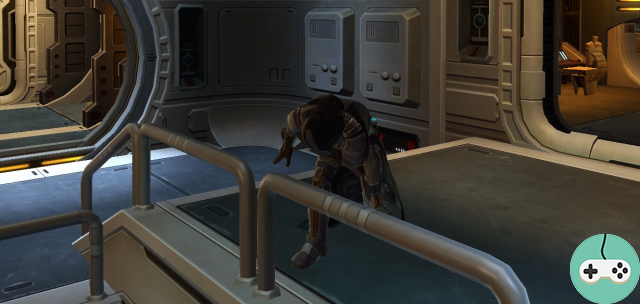
To use your cannon, first put yourself in "zoom" mode, that is to say "right mouse button" in general (activation of the secondary weapon). In doing so, you will be stationary (zero speed), and will have access to a zoomed view in first person. Keep pressing the left mouse button to load your cannon and release the left button to fire. A gauge at the top of the zoom dial shows you the weapon's loading status. To aim, move the cursor over the red reticle of the target (the target must be within range)
You can of course turn, albeit slowly, but pressing any key involving a speed movement (you are in motion again) will result in exiting zoom mode (inability to shoot)
The electromagnetic guns therefore depend on the loading time. This is how it works:
The more a shot is charged, the more damage it inflicts, but this is a workaround: it is necessary to have a minimum charge to be able to shoot, and you can only charge up to a certain charge level. When this charge level is exceeded, you consume weapon power without making your shot more powerful, but you thus delay your shot. Basically you have some leeway as to when you will shoot. Be careful, your energy reserve empty, you will shoot automatically, often without you aiming correctly at a target. This implies that, except in an emergency, start charging only when you have a minimum of weapon power in reserve: otherwise, you risk not having enough power to fire or not enough gun power. time to aim. Finally, I would remind once again that the electromagnetic gun consumes energy. Here is a short video illustrating the charge of a cannon.
Sensor operation
You can only target enemies that are within range of sensors (enemies farthest from you and your allies cannot be targeted or even seen). The range of your sensors varies depending on the ship used and the secondary components used. Seeing an objective or a location without a player doesn't mean there isn't one! But if your sensors are more effective than the enemy's, you can see it without them seeing you (so you're ahead of the game).
Example:
- armed ships may need communication sensors to be more effective (see targets further below to adapt).
- Don't rush into an objective unconsciously, there may be a few ships lying in wait without you knowing it.
The sensors are more powerful in the direction the ship is facing: this is the difference between the radius and the focal length of the sensors. It is therefore advisable to stay facing the point of appearance of enemies, or vice versa, to attack the enemy with his back turned, and more particularly when attacking / defending a control point.
Long range sensors allow you to locate an enemy. Communication sensors allow you to communicate the enemy's position to allies (allies, if within range of communication sensors, can target the enemy, even if the enemy is out of range of the sensors. Respective “long ranges” of the allies).
You should know that an enemy can make himself more discreet by opting for the secondary component "sensor alteration" and / or the passive crew power "silent operation". These two powers reduce the detection range of your sensors for the enemy equipped with them. only.
Speed and rate of turn
Your speed is divided into 5 stages. In descending order, we have:
- Boost speed : it is the one you have when you use your engine power (space bar)
- Top speed : keep pressed Z to go to your top speed, without using engine power
- Average speed : this is the speed you have when you are not touching your ship.
- Reduced speed : keep pressed S to reduce your speed (you reduce your speed quickly, up to a certain minimum level)
- Zero speed : press X once to stop, press X again to restart at medium speed. At zero speed, you just need to do Z, S or space to start again directly at the corresponding speed.
The rate of turn, or how fast you turn, depends on how fast you are. To have an optimal rate of turn, you must be at reduced speed (S button). Being in zero speed or in boost speed prevents you from having an acceptable rate of turn. The overall rate of turn depends on the vessel being used. Here is a video illustrating the various speed regimes during piloting.
Escape
Evasion of a ship is the characteristic that determines how likely the enemy is to miss its shot, if it is correctly carried out (i.e. if it has fired at an adequate range in the red circle. which determines where to shoot to hit your ship). Evasion concerns all blaster or electromagnetic cannon type weapon fire. Having a weapon accuracy over 100% reduces the target's evasion, and therefore the likelihood that you will miss it (just as having an accuracy under 100% increases the enemy's evasion).
Management of the different power gauges
You have three different power gauges: the weapon power gauge (in yellow), the engine power gauge (in purple) and the shield power gauge (in green)
The weapon and engine power gauges have a similar function: use the engine boost (space bar) or a maneuver and you lower the amount of energy in your engine gauge, fire with your blasters and you lower the amount of energy in your weapon power gauge. Attention, in the case of the engine reserve, only the use of the boost or of a maneuver consumes energy: this does not prevent you from moving forward (slowly) with "Z" or "up arrow".
The shield power gauge decreases when you take damage. Be careful, you have two independent gauges at the front and at the back of your ship. Taking multiple shots from the front of your ship decreases the front gauge, without impacting the rear gauge, and vice versa.
Anything that consumes energy (taking a hit on the shields, shooting, using your boost, etc.) will automatically switch the concerned reserve to “recently consumed” for a few seconds before returning to “normal”: every Power reserves have a "normal" rate of regeneration as well as a slower "recently consumed" rate.
To be effective, you should therefore not use the engine and weapon powers jerkily (in which case your energy will always recharge very slowly) but wait a little longer in order to have more energy. Comparatively, the one who acts with patience will have the capacity to use more energy (with more profitability) than the one who acts jerkily in the same period of time.
Numerous crew improvements or passive powers allow you to increase the total capacity of your gauges, and / or their consumption.
In addition, you can also boost one to the detriment of the other two during a fight. To do this, you can use the F1, F2, F3 and F4 keys on your keyboard to switch energy modes between, respectively: blaster power, shield power, motor power and shared power. When you give power to one of the three elements, its regeneration and capacity will be increased while that of the other two gauges will be decreased. In F4 mode (basic when you spawn with a ship), the power is balanced between each of the gauges. For more information about the power mode, see the Thorspark guide, section "Tips for getting started".
Changing the power settings of your device.
That's it for the presentation of the basics of GS! Do not hesitate to comment, criticize or ask questions, the work that I provide is of course not perfect, as it only comes from my own GS experience. The next guide will cover the different GS combat modes, and the various strategies to adopt.