


Today let's tackle the BIG piece of SWTOR, the one everyone wants to have a part of: operations!
Small reminder on operations
Two in number for the moment, the operations are areas with 8 or 16 players that can be traversed according to 3 different difficulty levels: normal, difficult, nightmare and which will ask you to face relatively powerful enemies and 'apply certain strategies.
First of all, what are the differences between the different configurations?
The loot table is exactly the same whether you are 8 players or 16 players. "It sucks" will shout some! Yes, the loot table is the same, but the number of loots is higher in loot / player ratio.
Indeed, an 8 player operation boss will generally give you this: 2 set pieces, 2 high level non-set pieces, an epic craft plan, marks / distinctions and craft components.
A 16 player op boss will give you a little more than twice the number of 8 player loots.
As for the difference between the difficulty modes, it's the level of the item that will change this time.
Normally, bosses give Token Columi (mark to be exchanged with an NPC)
In difficult, the bosses give Token Rataka, which offers equipment superior to the Columi.
(see article on level 50 equipment)
And in a nightmare then? Well it's the same as in difficult ... except that you have the prestige, the pride, the honor, what am I saying the JOY of having succeeded in the highest difficulty mode !!! Isn't that the best reward?
Now that we've covered what clearly attracts most of you, loots, let's talk about the operations themselves and the strategies to be put in place.
First of all I want to warn you, reading this guild is to take away the interest of the proposed challenge. Indeed it is always more enjoyable to find the strategy by oneself rather than by a third party. However, I understand that some do not share this ideology and that is why I am writing this article, simply so that everyone has a choice!
So if you just wanted to know the difference between the different game modes, go on your way. But if you are looking for a way to triumph then the rest is for you!

Composition of the transaction : 1 Tank, 2 heal, 5 Dps
Mini equipment : from level 50. Not particularly full epic (5 or 6 pieces are still welcome)
The room is made up of 5 bosses and some trash to kill between them (just to slow you down a bit but without any real difficulty, just big bags of HP).
To get to the Operation, head to the Fleet station, via the departure lift for "Inter-fleet transport" level missions:
- for the Empire, the elevator is in the West. The entrance is on the Shadow of Ziost, at the top right,
- for the Republic, the elevator is in the East. The entrance is on the Gav Daragon, on the upper mooring level via the command deck.
The first time, you will have to take the quest from the PNJ which is right in front of the entrance. After a nice little introduction, you disembark in the snow and head for the door. But BE CAREFUL, two turrets guard the entrance and the serious things start here.
Droïde d'annihilation XRR-3
The first boss is a test for your party. If he is reactive enough on this boss then you will be able to reach the 5th boss of the room without too much trouble.
To make the droid appear, you will have to get rid of the two turrets. As long as these remain active, enemies will continuously arrive between them.
You have to make a control on one of the two turrets in order to focus the other quietly, then once it has fallen, you take care of the second. The enemies are not mean and a few area attacks (AOE) will easily overcome them. Once the second turret has fallen, the voiceover resumes and the droid will descend from the sky in front of you.
Placement / Engagement
The distant ones must regroup near one of the two columns which were used as support for the turrets brought down just before.
The tank and the cacs engage in combat in front of the distant ones either slightly on the left side or slightly on the right side depending on the chosen withdrawal column.
Fighting
Indeed at several times, it will be necessary to fall back behind a column (including tank) in order to avoid an attack by the boss. When he says: "Perimeter violation" you have to hide! if the cacs don't recoil fast enough, he'll gently stun / bump backwards just to give them a booster shot. And then it will launch missiles continuously at anyone in its line of sight, except ... if it can't see anyone.

Well sheltered, we wait to be able to resume the fight.
Throughout the duration of this "phase" the boss keeps one knee on the ground, so you have to watch when he gets back to his feet and return the DPS.
A little later in the fight, he will target every player with a missile. The red AoE symbol is then under your character at this time. The area is barely larger than your character and you only need to take a side step or two to get out of it (it starts to cast as it says “enemy tactic analyzed”).
It goes from time to time, lock a person and throw a missile at them which will make them back up and deal some damage to them. Nothing too bad and in any case inevitable.
Finally in the last 6/7 percentages of his life, he will stay in mode: "Perimeter violation", at this time you must no longer hide but finish him because he remains in this combat mode until the end.
If you can beat him then GG because the next 3 bosses will not resist your group.
A few trashes later, you will arrive in front
Gharj
New boss, new atmosphere, new strategy but basically not so different than the first one.
Placement / engagement
Throughout the fight, the distant ones must be as far as possible from Gharj. Indeed he has the annoying habit of jumping and inflicting damage on anyone near him when he touches the ground. We therefore have the Cacs + tank on one side of a platform and the distant ones on the other until the end of the fight. At different times, you will have to jump on another platform thanks to a path will form because Gharj will "sink" the platform on which you are currently.
Gharj" src="/images/posts/4143672b44b8c2d9decab351ee114845-3.jpg">
Distant well grouped in order to favor the group heals and far from the boss.
Fighting
As seen just above, when he jumps he will deal damage to the cacs. The cacs need to move back as far as possible to minimize the damage.
Every once in a while it will blow everyone back and thus land you in lava. You have to get back to the platform as quickly as possible so as not to accumulate a dowry (Damage of time = damage inflicted periodically). But don't worry, if everyone comes back running, there's nothing insurmountable about the damage.
After a while add will come in reinforcement, once again in order to help the heals, we must kill them as quickly as possible. However, if additions arrive at the time when it is necessary to change the platform, you change the platform as a priority and once on the new one, you kill them.
Finally in the last percentages of his life, he will call for reinforcements again, but there as usual: focus Boss first!
Now make way for two events
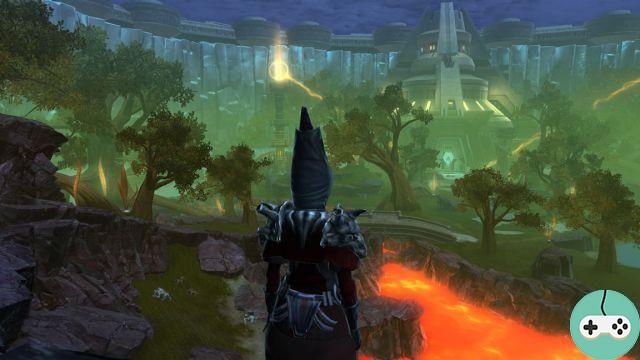
The Ancestral Pillars
The next challenge is not a boss but a puzzle. In order to unlock the chest located in front of the door, you will have to line up various symbols on the two towers located to the left and to the right of the door, relatively distant but unmissable when you look for them. To do this, there are two consoles. One allowing to turn the first wheel to the left and the other to the right. Once the three symbols have been found, you move to the upper wheel etc… until the 8 symbols (4 on each pylon) match.
The Ancestral Pillars" src="/images/posts/4143672b44b8c2d9decab351ee114845-4.jpg">
Go more than a symbol for this pillar!
Placement / Engagement
There are 2 ways to achieve this encounter depending on the number of tanks in your lineup.
There cannot be more than one gap line between the two turns! This means that in order to be able to move to the second row, the first row must be good on both laps. Etc., etc
So if you have 2 tanks, you cut the group into 2, 4 people in front of each pillar and the healers take care of turning the cogs.
If you have only one tank (something I recommend for a gain of DPS on all the other bosses), you will have to form a "bus" and walk around together. Afterwards, if you have a DPS with some defensive CDs, it can also pass if the healers are awake!
Example of a ride if you do not split the group: Turn A, 1st gear -> Turn B 1st gear and 2nd gear -> Turn A 2nd and 3rd gear -> Turn B 3rd and 4th gear -> Turn A 4th gear
Fighting
Every time you go to touch the consoles in order to rotate the cogs, enemies will arrive. Remember, we can do it in 2 groups so no worries, they are not very mean. You can activate the cogs every 10 seconds or so.
So if you have two groups it will go very quickly. If you have only one, it will be longer but instead of being 4 you will be 8 all the time which will favor the DPS on the adds and the healing on the group.
Once the 4 symbols are aligned, go to the chest and arm yourself with patience ... Each of the 8 players will have to help themselves, each in turn since only one person can open the chest at a time.
Good news from there there is no more trash!
The Hellish Council
Placement / Engagement
These are 8 duels, one against one, without the possibility of helping the others at the start.
You will find 8 mini-bosses with 3 different health levels: 2 * 20k / 2 * 40k / 4 * 70K. You will have to place each member of the raid in front of one of them and free them. Here's how to place them:
20k Pv ==> The healers
40k Pv ==> Les tanks
70k Pv ==> Dps
The Hellish Council" src="/images/posts/4143672b44b8c2d9decab351ee114845-5.jpg">
Once everyone is in place, one person activates the main console and each initiates their fight by attacking their opponent.
Fighting
All the combat lies in the placement of the duels. Then you just have to kill your opponent in a maximum of 2 minutes. Once your opponent has fallen, you can attack a neighbor's opponent once every 10 seconds (you get a 10-second debuff, you have to wait for him to leave), so you have to place your most powerful blow. Etc etc etc. There is really nothing very complicated here ...
But the last boss… that's something else…
prepare stims and credits for repairs?
Soa the demonic

Here is the ultimate chamber of eternity challenge. 5 different phases.
Engagement / placement
Unlike the other bosses that one could almost qualify as a pole, Soa will give you a challenge and when, I hope, you will overcome it, the satisfaction will be great. There are 5 distinct phases during this fight. But before starting the fight, the whole group is placed on the platform of Soa, that will not engage the fight and makes it possible to be sure that nobody will fall in the hole, where will take place the continuation of the fight?
P1: The Tank engages the boss and turns him into a raid. The cacs put themselves behind his back and the distant ones all advance at the level of the plot located in the axis of the screen just above, halfway between the boss and the back of the room in order to avoid an area damage that will appear randomly on the most distant plots of Soa. Of course, wait until the boss loses his shield before slamming your dps burst (Burst = any spell that allows you to increase your damage for a short time)
Once at about 75% HP, he will lock himself in a shield, then starts P2
P2: You absolutely have to come back as quickly as possible to the start of the platform, where the whole group was before hiring the boss (on the left of your mini map). Because the whole middle of the room will collapse and we will have to play Super Mario in order to reach a new room located below. Each time you jump on a platform, the dps must destroy the plot in the middle of it (very little HP) otherwise Soa cast a devastating AoE. Who says fall says damage, it will therefore be necessary to take heal breaks. But there is time normally, the platforms fall slowly and you can take several breaks while waiting for the next platform to appear.

While waiting for the next platform, heal break, well grouped.
P3: Once in the new room, similar to the first, phase 3 begins. This time no more AoE on the pylons but 3 new things:
- Balls of lights will pop and focus some players, they move slowly and of course they must not come in contact with you otherwise… Boom!
- The boss will place a person in a cyclone which will smash them against the 4 corners of the room. We cannot heal this person or interrupt the spell and of course they will take damage every time they meet a wall. The healers, it is therefore necessary that the whole group is in good shape (or under the sorcerer's boubou in order to absorb the damage). However in P3, the damage is not too serious.
- He is going to lock a person in a trap, a kind of light cage. At this point, all DPS must target the cage in order to get the person inside. The latter will find herself in a parallel world without having much to fear.
Once the boss at 30% HP starts P4 which is exactly the same as P2, we all go back to the same place (to the left of the mini map so as to have the first platform in front) and we arrive at P5.
P5: This is where serious things start, before it was just a simple appetizer.
The P5 is actually like the P3 but… worse.
- Balls deal more damage,
- The person who visits the room in the cyclone will take more damage,
- It will spawn traps more and more quickly.
In addition, he will have a shield on him that makes him invincible. The only way to break it is to place it under a huge spinning pyramid which will spawn in one part of the room, move and eventually fall. It is therefore necessary that the tank places the boss exactly under the pyramid before it falls so that the shield gives up about ten seconds during which we can therefore do damage to it.
During the fight, as long as the boss is not touchable, the Dps take care of the traps in order to quickly release the person inside. At the start of P5, moreover, all the dps are waiting for the first cage. Indeed it is PRIMORDIAL to have the whole group during the first breaking of the boss's shield in order to hurt him as much as possible. Because thereafter, the appearance of traps being more and more rapid, it will be impossible to have the whole group to type on Soa. So start of P5: we release the buddy in the first trap, we get closer to the boss, the pillar falls on him and we hit him as hard as possible! etc etc etc until it falls.
Last thing: If the tank misses ONE pyramid, it's off to a bad start (unless you're full Columi and have a big DPS). If the pyramid falls on the tank in addition to the boss, it will sting hard! So the tank must ALWAYS be kept high alive and it must be ready to strike its defensive spells at the appropriate time. As soon as possible, when the boss does not have his shield, the healers are invited to do some damage to him. During one of our tryouts, we left him with… 1200 HP… imagine the frustration at the time. You must lower it from 29% to 20% at least on the first burst.
Voila, I hope to have helped you well. Once again this is only a help and not "The Perfect Strategy". This is the one we found on our server and which allowed us in 2h30 to complete the room entirely as well as the Karagga Palace which I will tell you about in a next article very quickly as well as ALL the ZL in HM?
Kerigan, GM Soleil Noir, Empire, Battle Meditation


