


Foreword
This message is for players who want to try the ZL adventure in Hard mode. Unlike the front 3.0, the new ZL HMs offer a much greater challenge, so before tagging on the RDG be sure to:
- Master your class and your role.
- Having equipment up to the challenge.
- If you are DPS always have your desaggro handy (I put the V key on shortcut, it's quick and accessible).
Incursion on Korriban requires consistent and very responsive care and precise group positioning.
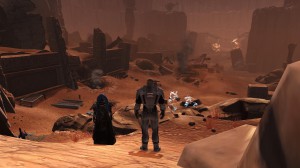
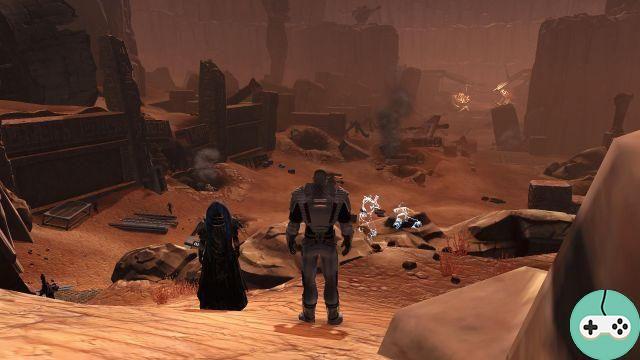
Groups of enemies
Once is not customary, this ZL does not really pose any difficulty between the bosses. However, pay attention to:
- Strong type Imperial / Republican soldiers (they look like Vanguards). They are found on the first 2 packs of the ZL which are not "mandatory". Much more present on Assault on Tython, these enemies are hell for the tank. They channel a firebomb that takes the form of a red AoE and melts you at high speed (10K per tick anyway). So immobilize them, stop their incantation, and avoid their area at all costs.
- To Champion-type Guardians, these don't hurt very much but they have a lot of health. Also when you engage them they spawn a lot of strong and normal type ads.
Riilna / Renning
This boss requires precise tanking and high mobility. Indeed, a bad placement will result in the death of the tank in one hit!
To avoid taking risks, identify well before pulling the 3 glass cages that contain the boss's farts. You should NEVER have one of these cages on your back when tanking. Indeed these are electrified and regularly the boss will project the one who is aggressive. Let it be clear, there is nothing to procrastinate, if you touch the cage it's one shot, even Lourdes water can do nothing for you!
You can pick up the boss in melee without problems, however be careful of the Force Storm he regularly channels.
Finally, 3 times in the fight (less if you send wood), the boss stops attacking and aims at one of the glass cages with his lightning bolts. This has the effect of shattering it and releasing two strong-type adds on the party that go into contact with the closest. Also when he channels, the ideal is to put you all in contact with the boss to facilitate their recovery by the tank as well as their sudden extinction of AoE.
This boss hardly presents any difficulties BUT, if you have forgotten where your desaggro is (desa what?) And you turn the boss over, it is you who will be thrown with the disastrous consequences that ensue.
R-9XR / I5-T1
PV: 728k

This big tin should not be too much of a problem in terms of tanking (you will rarely get aggro) or DPS, however the care can be complicated if your placement is not rigorous.
The fight takes place in 2 phases which are repeated successively.
- "Column" phase:
- Anything more basic, the tank picks it up, flips it over and the others hit it. Regularly he will spawn 4 adds that will move towards the biggest threat. It is therefore regularly on the healer that it falls. Here no excuses for the latter! If the tank can't provoke them then it's up to you to take them down and you can largely do it on your own as they are a weak type. If you are a thug: a defensive power and a grenade followed by a blaster burst and that's it. If you're a Mercenary or Sorcerer it's even easier, a Mortar Vol or a Force Storm and it's over (they're weak type, I remind you so they get stunned by those AoEs).
- Regularly the droid will target a party member at random (but never the one with aggro) and hit him with several channeled rays. The boss is then unstoppable, so you can't escape it. Slam a defensive power and take your troubles patiently.
- If you are familiar with the mechanics of this boss, a simple technique is for a DPS to provoke the boss just before the ray phase. So the tank can be one of the potential targets of this attack (it's a lot of risk for a lot I agree ^^).
- Phase "in minefield":
- The boss surrounds himself with a shield which makes him invulnerable to all types of damage, he places a large red AoE under him which hurts a lot, and places small other red and yellow AoEs on each member of the group.
- The reds do heavy damage immediately, the yellows place a mine that will remain in play until the return of this phase.
- The group must therefore position themselves around the boss and avoid all AoEs. Here as with all AoEs in the game, one step is not enough to run in all directions and crisscross the entire area.
- Two little tips:
- If you are a Shadow / Assassin tank or a Vanguard / Specialist tank with the use that accelerates your immutability (the Guardian can also have it with Plumb it seems to me), take advantage of this phase to cross all the mines as you see, your speed will keep you from taking damage and you will make way for others. It must be the tank that does it on the other hand because if you miss your shot and you take the damage you risk being severely reprimanded by the healer that you will have drawn from his sleep.
- The AoE under the boss disappears before the boss stops dropping the little red and yellow AoEs, and he doesn't drop them near him. So as soon as the big red AoE disappears, put all of you under the boss, there will be fewer mines in play!

Jensyn / Soverus
PV: 723k

There is a prerequisite for this boss, you must have more than 45k of HP if you do not want to run the risk of getting one shot.
The boss takes the pole and does moderate damage that poses little difficulty.
MORE :
Regularly droids will appear. They are of 2 types
- One launches a self-destruct phase and takes 20k from those near him.
- The other immobilizes a player who can do nothing as long as the droid remains in play. It should then be destroyed, especially since the boss surrounds himself with a reflection which protects him against any type of damage and returns them to you! So if you don't help your boyfriend, don't touch the boss ^^.
Then after 3 (approximately) "suicide bombers" droids, the whole group is immobilized in the air and receives a visit from the boss. This phase ends with a general bump that deals you up to 20K damage. So if you took the Probe Droid just before, you're in terrible trouble. Once the bump has been suffered, and before any action is possible, one of the players (random) receives a saber throw which can do up to 24K damage!
So do the 20K + 24K calculation without being able to slam or heal or defensive power… Obviously, if the throw falls on the tank, you won't even notice it, but on light armor, that's another story!
Here the healer must imperatively place his HoTs (heal over time) on the whole group before the big boss phase arrives because it is necessary that at the end of the cutscene (just before the projection and the damage), all the group is 100%.
Generally you have the right to 2 phases "immobilization" before falling the boss.
Boss bonus
PV: 278k

It's strange enough to be reported, it looks like this one is completely bugged when you do it on the empire side. He then has fewer health points and falls with disconcerting rapidity and without enrage.
We will therefore focus on the Republic side, because here there is a real challenge.
I advise you to tank it at an angle as it will regularly throw a party member randomly. This boss does heavy damage to the whole group and resets his aggro with each bump. Regularly it immobilizes everyone and during this time does heavy damage which will leave all players (if they do not receive healing) at 10-20%.
Towards the end of the fight, around 30%, the boss receives a buff that doubles all the damage he inflicts. If the group's DPS is good, this buff appears between 2 immobilization phases, and no problem just send a little more healing.
On the other hand, if it appears during an immobilization ...
First, you can't afford to let the pipeline go to completion because the whole group is going to die. You must therefore all slam your destun at this moment (the healer must therefore have the boss as a concentrated target so as not to miss the appearance of the buff), and send your strongest defensive and self-healing powers. When that happens, the Mercenary / Commando and Sorcerer / Scholar Heal AoEs allow you to keep everyone afloat as long as they have all slammed in with cannon and defensive power. On the other hand for the Thief it is quite simply impossible! When this scenario arises, the only solution I have found is to strongly monoheal myself and normally at the end of the buff, all that remains is the tank and you standing, I wake up a DPS and we ends at 3.
The best solution is therefore to hit very hard so that the buff does not appear during immobilization.
Good luck to everyone !


