


Following the schedule established for the raids, I was able to access the second part of the Mogu'shan vaults last week via the raid tool, requiring a minimum of 460 equipment level. Here is the detail of this second part, a little longer than the first (count 1 hour). It is possible that the methods mentioned here only work with the "raid tool" mode, do not hesitate to send me your strategies for the normal or difficult mode.
The mogu, proud of their supremacy, have stored numerous testimonies of their exploits in a large network of vaults. The construction of these vast halls predates the earliest writings of the pandaren, so much so that they remain shrouded in mystery. Rumors had it that they contained a powerful army and it was for this reason that the vaults were the first target of the ancient Pandaren rebellion. But since the Mogu Empire was overthrown, they have been sealed.
Here are the bosses accessible during this second part (3/6):
You can find the details of the first 3 bosses (The Stone Guard, Feng the Cursed and Gara'jal the Spiritbinder) in the first part of the Mogu'shan vaults.

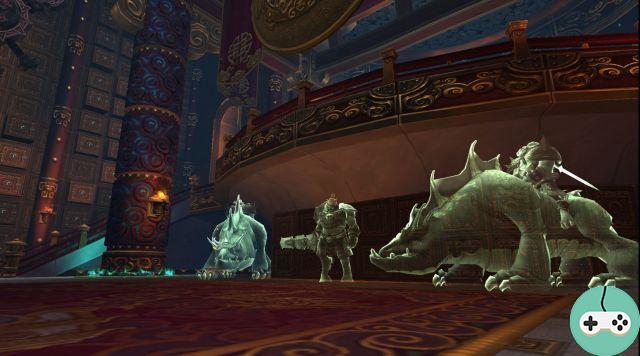
This second part of the Mogu'shan vaults begins in a majestic room, the depot, filled with not very strong spirits accompanied by the spirits-kings, the bosses who will follow, for the moment not attackable. When each pack dies, the spirit disappears to join its little friends on the balcony.
The spirits-kings

Ancient writings evoke these legendary rulers, powerful mogu who had carved out an empire for themselves out of Pandarian rock. Their names are still enough to shake the earth: Zian of Eternal Shadows, Meng the Mad, Qiang the ruthless and Subetai the Fast. Some say that their spirits haunt the vaults, lost in their memories of glorious battles.
The principle of combat is simple, the spirit-kings come to life in random order, attacking the group until they are defeated (with the raid tool, they have 69.78M points of life). Once done, they stay in the form of a shadow, continuing to use a special ability (all 1.15 in this form), so combat becomes more and more difficult. Of course, depending on your luck in the draw, the fight will be easier!
Qiang the ruthless

The main ability of this boss is command to flank, which I personally find very successful. He spawns a row of mogu in one part of the room that cross the room, dealing damage to anyone in their path. Once defeated, Qiang continues to use this ability, so you have to be vigilant and move away promptly (for reference, the boss yells "Soldiers! Push their flank!").

The boss's other two abilities shouldn't be taken lightly. For the first, brutal attacks, the tanks must hold hands, facing the boss, and squeeze their buttocks in order to share the damage inflicted on the targets in front of him. Everyone must move aside for the second, annihilation, inflicting damage in a cone in front of him (beware of small DPS, it is not good to take all this damage, the front of the boss is absolutely to be avoided!). Be careful, the boss raises his sword and turns before killing him, follow his movement!
Meng the Mad

The main ability of this boss is maddening howl which makes all players hostile towards each other. You must then inflict 20k points of damage (no more, there is no point in killing your favorite GM, a few area damage is enough) to each player to regain their sanity. Once defeated, Meng continues to use this ability.
The boss will oscillate between two states, hysterical and cowardly, depending on his madness gauge. When the latter is full, it changes state. Each time according to his madness gauge, he will increase his physical damage in hysterical state (tanks, plan to drop your survival CDs at the end) and return the damage in cowardice state (it starts to sting towards 50 %, depending on your life, slow down or stop the DPS). In order to slow his madness progression, classes that can, will interrupt his madness, increasing his madness gauge by 10.
Subetai the Fast

This boss's primary ability is plunder, a charge that heavily handicaps affected players (reduced healing done and increased physical damage taken by 50%). In order to limit the damage, it is therefore essential to move away from other players as soon as Subetai appears and for the rest of the fight because once defeated, he continues to use this ability.
Her other abilities deal significant damage. The salvo is a series of 3 damage cones, more and more narrow but also more and more lethal. It is advisable to move away quickly by gauging in relation to the first. The second, rain of arrows, inflicts damage to all players within 8m of the target person. In addition, these players suffer the Pinning effect due to an arrow planted in their body (ouch), it is of course necessary to help his injured friends and extract the unwanted promptly by doing damage to the arrow ( 632k health points).

Zian of Eternal Shadows

This boss's primary ability is Eternal Shadows, an additional enemy that attaches to a random player in the party and follows them. This shadow deals proximity damage (10m), so the designated player must run away from friends (in order to avoid an unfortunate strike) while the distant DPS takes care of it. Once dead, the shadow explodes into a purple ground area where you should not set foot. Once defeated, Zian continues to use this ability.
Another of his abilities, Shadow Blast, is interruptible and should be interrupted whenever possible in order to avoid unnecessary area damage. Finally, he casts Charged Shadows an area spell that has the specificity of extending to all players located within 8 m of each other. Another reason to keep well spaced.
Once the boss is dead, go down the stairs and come out through the hall of modelers where mogu are waiting for you (again and again). These mogu have the annoying ability to set players in stone (statufication), so avoid taking several, it's long and unnecessary.

Continue to Elegon which, for older players, will remind you of the appearance of another Ulduar boss ...
Elegon
Elegon" src="/images/posts/977ef02c1bab5cdce2fc5860f95a776e-12.jpg">
Determined to advance the empire, the mogu recycled and adapted the technology of the titans to generate untold power within the depths of the ancient complex. Why this energy came to feed the frozen spirit of a celestial dragon remains a mystery buried in the depths of the vaults.
This fight posed us some concerns because it does not forgive if we do not know the strategy (however not very difficult). We should not fall ...
Elegon-Hole" src="/images/posts/977ef02c1bab5cdce2fc5860f95a776e-13.jpg">
The principle is rather simple and is based on good positioning and management of the energy vortex. The latter, summoned by Elegon, increases damage and healing done by 50%. Abused, you will say to me, it is a fact but here it is, as long as we stay in this vortex, we accumulate overloads, increasing with each charge by 5% the damage taken. So don't overdo it!
During the first phase, we are on the snake with its 305M of life points. He will blow in a cone in front of him, heavenly breath, if the tanks are doing their job and have their backs to the raid, you won't have to deal with it (luckily because the appearance of the boss does not simplify the location of the front and the back. behind).
He will summon a celestial protector with 8.43M health points, which must be killed promptly (they inflict a lot of damage, especially under 20%) and be careful of his explosive death, inflicting 200k points of damage as a base. to the whole group: can you imagine if you played a little too much with the vortex?
Once the protector is dead, he goes into phase 2 and launches extract the power. He attempts to revive nalak'sha's motor by drawing 6 energy charges from his body, permanently increasing damage dealt to him by 10% (this effect stacks). The goal in this phase is to kill the energy balls before they come out of the vortex. If all 6 balls are killed, then Elegon will summon 6 more, regaining a charge to extract the power (we are not going to spit on 10% more damage!). However, do not expect to kill them many times, they speed up by 20% each time and therefore become difficult to manage. Healers must be vigilant as each ball explosion inflicts significant damage combined with overload.
Elegon-Balls" src="/images/posts/977ef02c1bab5cdce2fc5860f95a776e-14.jpg">
Phase 3 is triggered when at least one ball has not been killed which activates 6 empyreal focuses (3.35M hit points) cutting the outside of the room with walls of lightning.
Elegon-Lightning" src="/images/posts/977ef02c1bab5cdce2fc5860f95a776e-15.jpg">
The most dangerous of this phase is then triggered and the interior of the room becomes dematerialized: any DPS having forgotten the balls and having remained on the boss, in the middle, will then be caught in the act and will pay for his crime by a fatal fall. During this phase, cosmic sparks appear (984M health points) randomly on players in the raid (inflicting area damage at the point of impact), your tanks will appreciate that you bring them to avoid running around (especially that they sting, casually)! Break all the empyreal focuses to make the boss go back to phase 1 (remember to finish the sparks before returning to the boss).
When Elegon is down to 50% health, he becomes unstable and uses radiant energies, periodically inflicting Arcane damage to all players, primarily those outside of the vortex asking to manage. overloads with more care so as not to combine two sources of damage that can be fatal.
Will of the emperor
The main vault room has housed stone soldiers who have stood still for centuries. Ranks and ranks of warriors, statues armed for a battle that never began. What treasures do they watch over? And what is their connection with the titanic power buried with them in darkness?
This fight is at the height of an end of instance: chaotic! In the large round room will appear adds:
- 2 Emperor's Rages + 1 Emperor's Strength
- 2 Emperor's Rages + 1 Emperor's Courage
- 2 Emperor's Rages + 1 Emperor's Strength

Whenever possible, kill rages last and prioritize strength / courage.
- The Emperor's Rage (which can be controlled) has the ability to focus on a player who will therefore have to run until the Rage is dead.
- The emperor's courage does the same, but on a tank (less annoying!) Which will also have to take him for a walk (if he can because if he tanks a boss, it can be complicated ..). Its specificity is to put on a half-armor, protecting the front of its body: the DPS must be positioned correctly to inflict damage from the rear.
- The Emperor's strength deals area damage around him, hitting the ground. As far as the distant ones take care of it as a priority.
After 90 seconds of combat, coinciding with the arrival of the last group of 3, two titanic assemblages appear in the large alcoves, these are the actual bosses Jan Xi and Qin Xi. Each tank takes a boss and conveniently places it at the bottom of the stairs. They have 239M of life points each, fortunately their life is linked. Distant DPS focuses on bosses while contact DPS prioritizes other enemies that continue to arrive (emperor's strength / courage / rage as before).
When bosses reach 100% mana (20), they unleash an opportunistic attack, 5 sets of special attacks, devastating bow, and stomp, dealing heavy damage. The first, devastating arc, is difficult to predict because the boss will strike to his right, to his left or in front of him, so you have to place yourself carefully behind him (or far away). The second, trampling, is an area within 12 meters around it. If you're a dodging pro and don't take damage from those special abilities, you gain an opportunistic attack, dealing 500k physical damage (well, that I read in the dungeon codex because I got everything taken ...).
Once 9 rage / courage / strength appear, the ancient mogu machine collapses and the gas of the titans floods the room, inflicting Frost damage and above all increasing the physical damage inflicted on all (players and assemblies) by 25%. It's time to type the assemblies! Let go, there is no rage / courage / strength that appears during this phase!
And it begins again !
There you have it, the vaults are now emptied of their threats. Chronicler Cho concludes:
It is therefore done. And yet ... how many of these machines are hidden underground? What remains to be discovered of the dark secrets of the mogu? I'm afraid the war against our old enemies is far from over.
I really hope there are other enemies! What would we do if not?


