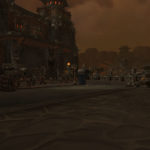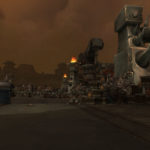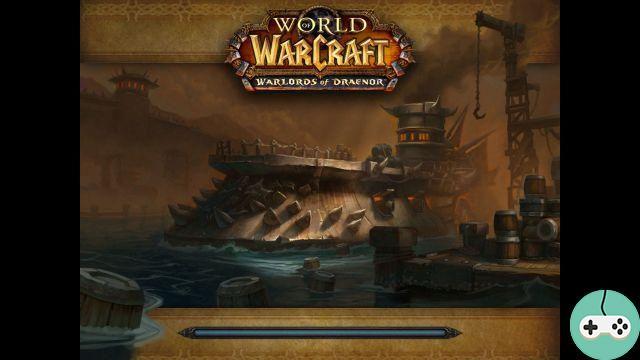
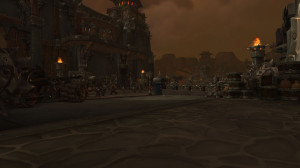
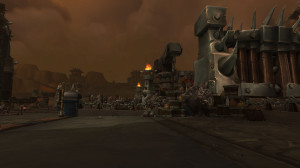
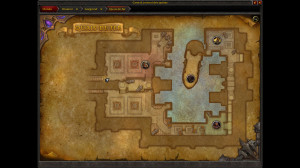
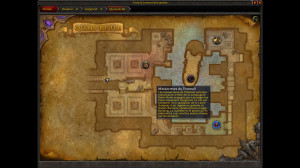
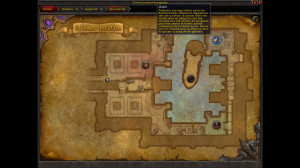
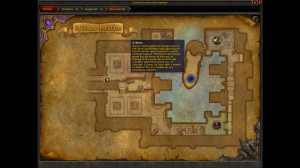
The instance named Iron Docks is a level 92-94 dungeon (in the normal version) and located on the north coast of Gorgrond. It is a naval stronghold of the Iron Horde, where huge ships are assembled and prepared for war. The orcs have enslaved creatures from across the continent to defend their ships. It is the scene of preparations for a naval assault on Shattrath.
There are 4 bosses to defeat and the equipment to collect is level ilvl 550 on normal difficulty (minimum ilvl required of 520) and 630 on heroic difficulty.
Boss to defeat
- Nok'gar Slicer
- Grimail Slayers
- Oshir
- Skull
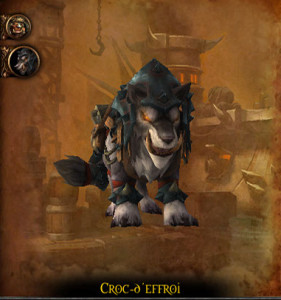

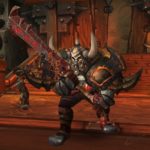
Nok'gar is an orc, warlord of the Warsong clan. Riding his Dreadfang wolf, he quickly rose through the ranks of the Iron Horde and now commands a battalion. During the confrontation, archers are posted around the quay. After a while when his wolf is defeated, Nok'gar directly attacks players.
Techniques
Dread fang
- Howl of Carnage: Dreadfang utters a cry that increases the damage of allied orcs for a short time.
- Savage Slash: Dreadfang leaps at a player, slowing their movement speed and causing them to bleed.
- Lacerating Sweeps: Dreadfang leaps forward and bites any player in its path.
Nok'Gar Slicer
- Barrage of Barbed Arrows: Nok'gar signals archers to fire a volley of arrows that deals direct physical damage.
- Flaming Arrows: Nok'gar beckons the archers to fire a volley of flaming arrows that ignite the ground and deal magical damage over time.
- Reckless Taunt: Nok'gar lets out a cry that scares away any attacking players.
Manage the fight
- It is not possible to target and attack Nok'gar while he is on the back of his mount.
- The tank should quickly move Dreadfang and / or Nok'gar out of areas targeted by archers.
- Healer and DPS should move out of the sights of Flaming Arrows and Barbed Arrow Barrage quickly, especially if Dreadfang has cast Howl of Carnage.
- Dreadfang needs to be tanked with your back to the party for Lacerating Sweeps to hit a minimum number of players.
- The healer must focus his healing on the target of Savage Laceration.
- When Nok'gar casts Reckless Taunt, stop all attacks on him.
Heroic / Challenge
In these modes, Slicer Nok'Gar descends from Dreadfang when its mount reaches 50% instead of when it dies. When both are active, Dreadfang will use Savage Laceration and Laceration Sweeps. It's important to kill Dreadfang quickly, so it's a good idea to stick with heroism for this time. The healer should be careful not to lose the tank and players affected by Savage Laceration.
Booty
Skinning Nok'gar will give you the chance to obtain a One-Handed Ax (Bloody Ripping Ax) and Trinket (Slicer Butcher's Fang), as well as rings and chest parts. The complete list of objects can be viewed at this address.
 Ahri'ok Dugru
 Makogg Brussels
 Neesa Nox
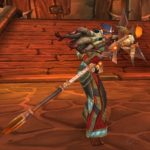
The Tristeral Slayers are a group of 3 elite mercenaries from the Black Box Company and hired to protect the trains that pass through the Gorgrond region. The group is made up of a Burningblade Swordsman (Makogg Bladebreaker), a Goblin Engineer (Neesa Nox), and a Bloodthirsty Shaman (Ahri'ok Dugru). The three mercenaries attack at the same time.
Techniques
Ahri'ok Dugru
- Blood Bolt: Ahri'ok summons a black miasma and projects a blood bolt that wounds players.
- Blood Sphere: Ahri'ok summons a blood globe that protects his most wounded ally, absorbing a large amount of damage. If the shield is broken by damage, it heals bosses.
- Sudden Restoration: If the Blood Sphere is shattered by damage, it unleashes a wave of healing on Mercenaries for a few seconds.
- Blood Corruption: Ahri'ok that deals periodic damage to a player.
Makogg Brussels
- Flaming Slash: Makogg rushes straight ahead, spinning his blade, dealing good damage to all players.
- Circular Lava Blow: Makogg inflicts fierce attacks with his fiery blade and spawns waves of lava that injure players in their path.
Neesa Nox
- Trippeshot: Neesa shoots a powerful bullet at a player.
- Faulty 9000-XL Defibrillator: Neesa's defibrillator malfunctions and unleashes a chain of lightning that hits 3 enemies (and more if the chain of lightning can spread).
- Ogre Traps: Neesa anticipates the movements of the players and shoots 8 traps around the players.
- Ragged Tendons: If a player walks into a trap, they have their movement speed reduced and bleed.
- Sappers: Being a Goblin Engineer, Neesa is accompanied by Sappers.
- Big Boom: The sapper beats his heart, charges in the direction of a player and explodes, dealing damage in an area of effect.
Manage the fight
- Do not hit a target surrounded by a Blood Sphere.
- Watch out for Ogre Traps, which in addition to slowing you down considerably, will make you perfect targets for Big Boom.
- Stay away from each other when Neesa enchants defective Defibrillator 9000-XL defective.
Heroic / Challenge
There are no new mechanics in these difficulties, but all abilities deal more damage. It therefore becomes essential to kill Ahri'ok as quickly as possible and to ensure that Sudden Restoration is never activated. It is imperative to immediately pass on the targets affected by the Blood Sphere.
Booty
If you defeat the Mercenaries, you'll have a chance to get a Gun (Black Iron Precision Rifle) and Trinket (Slayer's Stun Grenade), as well as necklaces and head pieces. The total list is available at this address.
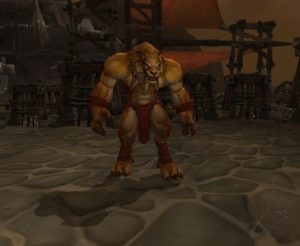
Oshir is a saber of arrows from Arak, captured by the Thunderlord clan and brought to Gorgrond to be trained as a unique fighter of the Iron Horde. We confront him on one of the quays, when he has just been released by his jailers.
Techniques
- Mealtime: Oshir rushes at a player and knocks him to the ground. He deals damage to him until he has lost his Hungry Frenzy buff.
- Hungering Frenzy: Oshir devours the tackled player and only releases them after taking damage equal to 5% of their maximum health.
- Primal Assault: After performing a somersault, Oshir charges his target and inflicts heavy damage on his trajectory.
- Run: Oshir leaps onto a cage on the dock and frees the creature trapped inside.
- Ravenous Wolf (freed creature): Each Ravenous Wolf attacks a different enemy.
- Sky Terror rylak (freed creature): This is a flying creature that attacks players with Acid Spit.
- Acid Spit: The Terror of the Sky rylak launches acid at a player, also dealing damage to nearby players. The creature also creates an Acid Jet at the same time.
Manage the fight
- The tank only takes care of Oshir. He must try to place it so that Primal Assault only hits him and not the other players.
- The healer must focus their healing on the Mealtime target.
- To make Oshir lose Hungry Frenzy, the tank and DPS must all attack the boss.
- DPS must change target when Oshir casts Cavale.
- Get away from the Acid Spit.
Heroic / Challenge
The only new mechanic for these difficulties is the Ravenous Wolf Pack Strength buff. Even though they will be more powerful as a result, it is always advantageous to round up the wolves to kill them faster. But the healer will need to be operational to deal with this additional damage.
Additionally, Hungering Frenzy becomes more difficult to interrupt, requiring inflicting 8% of Oshir's health to interrupt Mealtime.
Booty
Oshir can drop a sledgehammer (Mindbreaker Scepter) and a trinket (Kihra's Adrenaline Injector), as well as wristbands and belts. The list can be viewed at this address.
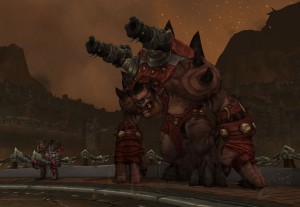
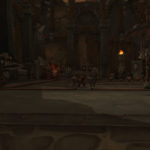
Skulloc is a giant of Gorgrond wielded by two members of the Iron Horde. It is the greatest force of the Iron Docks. He is confronted on the deck of a boat surrounded by his two masters: the warrior Koramar and the gunner Zoggosh seated in a turret.
Techniques
Skull
- Barrage Barrel: Crânoc fires with its cannons. Impacts inflict Fire damage to enemies near explosions.
- Smoke Blast: Heat and smoke escape from the rear of the ship, inflicting heavy damage to players. The power of this explosion increases with the number of Cannon Barrages that Skulloc has performed.
Koramar
- Berserker Leap: Koramar leaps violently at players. Its landing inflicts area damage around the impact area.
- Shattering Blade: Koramar rubs his blade against the ground, projecting sparks at players in the area of effect.
- Blade Storm: Koramar spins around, dealing AoE damage around him.
Zogosh
- Rapid Fire: Zoggosh focuses his attacks on a single player. All players in the path also take damage.
Manage the fight
- Everyone needs to take cover when Cranoc throws Barrel Barrel and move forward between rounds.
- It is essential to move away from the rear of the ship during Barrel Barrel to avoid the (potentially fatal) damage of the Smoke Blast.
- Move as far away from Koramar's area of effect.
- Move away from each other so you don't take damage from Rapid Fire if you're not the target.
- The healer needs to allocate more healing to the Rapid Fire target. The tank can react accordingly by casting a defensive spell to relieve the healer.
Heroic / Challenge
There are no additional mechanisms in these difficulties. However, it is going to be more difficult to kill Koramar before the first Barrel Barrel, asking to have to manage his abilities. It's always best to ignore Zoggosh to kill Skulloc first.
Booty
At the end of the fight, you will be able to obtain rewards such as a wand (Painbringer's Crystal), a fist weapon (Bloodied Hand of Misfortune) and a staff (Chasm Piercer Mooring Hook), as well as leggings, shoulder pads and gloves. All these objects can be viewed at this address.