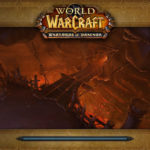
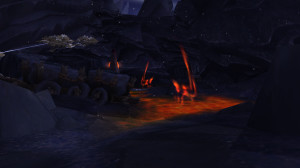
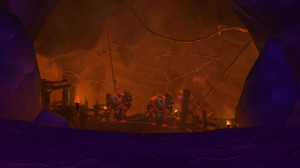
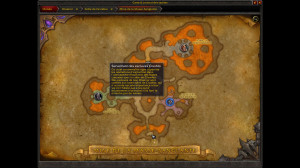
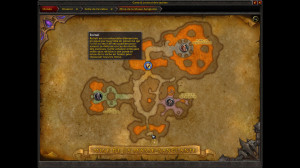
The Bloodmaul Mine is a level 90-92 (normal) dungeon located north of the Frostfire Ridge area. This is an ogre lair set in the caves of an active volcano. Ogres use slaves (none of which emerge alive from the mine) to produce gems. But it is said that the ogres are looking for a very powerful relic ...
There are 4 bosses to defeat and the equipment to collect is level ilvl 530 in normal difficulty and 630 in heroic.
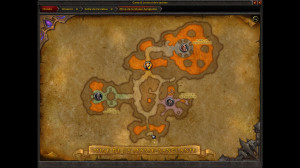
Boss to defeat
- Blacksmith Gog'duh / Magmolatus
- Overseer of Crushto Slaves
- Roltall
- Gug'rokk
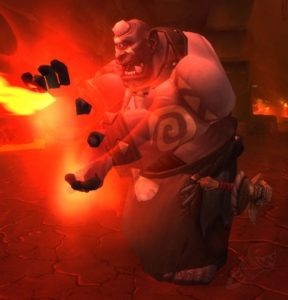
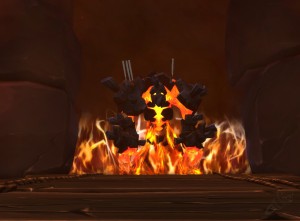
Ogre geomancers are quite famous for their mastery of the elements. But sometimes they go too far and this is the case with Gog'duh. This ogre has manipulated the Fire element so much in his forge that Magmolatus (a Fire Elemental) has gone into great fury and is spiraling out of control. Gog'duh therefore strives to contain Magmolatus. We face the Master Forge then Magmolatus in the forge of the Mine.
Phase 1: Forgemaster Gog'duh
Techniques
- Magma Barrage: Gog'duh creates puddles of lava on the ground that deal periodic damage to players within.
- Ruin, Earth Servant: Gog'duh summons an Earth elemental for protection.
- Shatter the Earth: Shards of earth pound the ground, dealing damage at the point of impact. Spikes then move away from the epicenter and inflict damage in their path.
- Heavy Strike: Ruin hits the ground in front of him, dealing heavy damage and stunning targets within the cone.
- Calamity, Servant of the Flame: Gog'duh summons a Fire Elemental for protection.
- Dancing Flames: Calamity deals damage over time to a player. If the spell is not dispelled, it passes to another nearby player.
- Firestorm: Calamity launches a firestorm around itself, dealing periodic damage to nearby enemies.
- Burn: Calamity deals direct damage to a player.
Manage the fight
- The servants of Gog'duh must absolutely be tanked, as soon as they appear.
- Magma barrages are the only spell cast by Gog'duh, it can be interrupted and easily avoided.
- DPS should kill minions as quickly as possible, to avoid being overloaded (except for the achievement of ending the fight without killing a minion).
- The tank and melee DPS must move away from the Heavy Ruin Strike, when the cone looms on the ground.
- Spikes that protrude from the ground should be avoided after using Break the Earth by Ruin.
- We need to dispel the effect of Dancing Flames as quickly as possible.
- The Calamity Firestorm spell must be interrupted, as this would prevent the tank (and melee DPS) from performing its role on this minion.
Phase 2: Magmolatus
Once Master Forge Gog'duh is seriously injured, he breaks the bond that holds Magmolatus and the Elemental unleashes.
Techniques
- Withering Flames: Inflicts heavy damage over time. This spell also reduces the target's attack, cast, and movement speed by 25%. If the effect is not dispelled, the spell burns a random ally of the target with Asphyxiating Ashes.
- Asphyxiating Ash: Inflicts heavy damage over time. This spell also reduces the target's attack, cast, and movement speed by 25%.
- Slag Strike: This is a more powerful version of Ruin's Heavy Strike. Magmolatus hits the ground in front of him, dealing massive damage and stunning targets within the cone.
- Lava Impact: Magmolatus creates an area near a player and sends a projectile that deals degressive damage depending on how far away the players are. The impact summons a magma elemental that has two skills.
- Magma Barrage: This is the same version as Master Forge Gog'duh.
- Volcanic Wrath: The Magma Elemental hurls a stream of magma in a straight line.
Manage the fight
- The tank does not deal with Magma Elementals and must focus on Magmolatus.
- The tank and melee DPS must move away from the Slag Strike, when the cone looms on the ground.
- We need to dispel the effects of Withering Flames and Asphyxiating Ashes as quickly as possible.
- Avoid the Lava Impact which deals high damage.
- Do not stay in the Volcanic Wrath or the puddles of Magma Barrage.
Heroic / Challenge
During the phase with the Master Forge, Calamity will cast Dancing Flames on two players (and no longer one). The healer will therefore have to remove it from the first player and then wait for it to jump on a second player to remove it. Some glyphs can help suppress Dancing Flames faster (Glyph of Cleansing, Glyph of Detoxifying, Glyph of Natural Healing, Glyph of Cleansing, Glyph of Cleansing the Spirit).
Booty
This boss drops gloves and chest parts. The complete list is available at this address.
Video
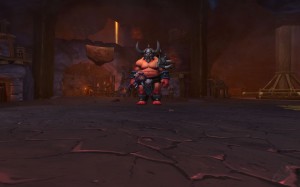
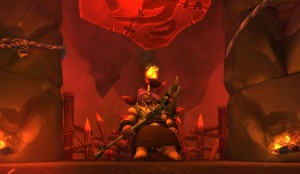
Crushto is an ogre who makes sure that the work is done in the mines, even if it means killing the slaves he watches over. He is a brutal character and we confront him in one of the caves of the mine.
Techniques
- Ground Crush: Crushto deals damage to all targets in front of him and stuns them.
- Fierce Shout: Crushto gives a shout that increases his damage and weakens the will of nearby miners (when a miner loses all of his will, he fights for the boss).
- Savage Slam: Crushto slams into the ground, dealing damage to all players and knocking them back. This spell works with Crushing Leap.
- Crushing Leap: Crushto jumps at players and knocks them to the ground. Captured miners attack tackled targets.
- Rally of the Miners: Nearby miners are forced to fight for Crushto.
The captured miners are forced to fight for Crushto but some of them notice your faction and rally with you.
- Traumatic Strike: The miner throws blows at target player, dealing direct damage and bleeding.
Manage the fight
- The party must regroup behind the boss to maximize healing, area damage, and limit movement.
- Ferocious Cry must be interrupted. If Crushto still manages to cast the spell, you must concentrate the healing on the tank.
- All DPS must tank miners. This allows you to distribute the damage of Traumatic Strike among the members of the group and to avoid accumulating the bleeds on a single target (and especially not the tank).
- The goal is to kill all the miners present before Crushto launches Crushing Leap.
- When Crushto casts Crushing Leap, the healer must focus their healing on the target of the spell, while DPS is focused on the miners who pummel them.
- Ground Crush is a spell to be avoided as soon as you see the area displayed on the ground.
Heroic / Challenge
There are no additional mechanisms in these modes. But abilities like Earth Crush or Fierce Scream will be more dangerous. It is important to move away quickly.
Booty
Slave Overseer Crushto drops a trinket (Crushto's Rune Alarm), polearm (Crushto's Decapitator), and wrists and leggings. The list is available at this address.
Video
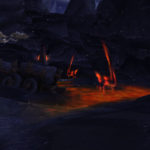
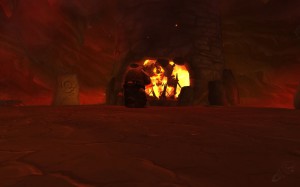
Roltall is a large Fire Elemental summoned by Gug'rokk himself. He is the keeper of his master's lair (in case the slaves revolt) and pushes back all enemies by throwing flaming rocks at them. Players face him on a bridge over lava.
Techniques
- Burning Boulder: Roltall summons a burning boulder that injures nearby players on impact. The boulder continues to roll the entire length of the bridge, injuring and stunning players in its path.
- Heat Wave: Roltall deploys a heat wave that deals periodic damage and knocks players back for several seconds.
- Burning Slag: Roltall sends small projectiles that ignite all players in the targeted area.
- Searing aura: This is an effect of the environment near sources of intense heat.
Manage the fight
- The whole group must avoid the Burning Rocks which fall either to the left, or to the center, or to the right of the bridge. A circle appears on the place where the next rock will fall so anticipate (in heroic mode, the rock makes a round trip).
- The tank and melee DPS must stay in front of the boss to avoid falling victim to Burning Slag. They still have to move to avoid the rocks.
- Ranged players should stay far enough away from the boss to avoid the Searing Aura effect.
- They must also avoid the Burning Slag, especially during the Heat Wave.
- When Roltall prepares to cast Heat Wave, cast heal over time (HoTs), defensive and / or instant spells.
Heroic / Challenge
Players standing near the boss will be affected by Searing Aura. So, standing near the boss to avoid the Burning Rocks is no longer a good idea. In addition, the rocks now return to Roltall once the end of the bridge is reached. It is therefore always necessary to memorize the lines of appearance of the rocks for the return!
Booty
Roltall, when dead, drops a one-handed ax (Intelligence: Roltall's Brutal Crescent) and a trinket (Toria's Blind Eye) as well as cloaks and boots. The complete list can be viewed at this address.
Video
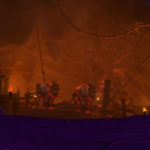
Gug'rokk is the governor of the Mine. He was not thrilled with this position when he first took office, but he realized that he could act as he wanted without anyone disturbing him. Players face him in a room equipped with melting furnaces.
Techniques
- Lava Bolt: Gug'rokk focuses a Molten Slag attack on a player and he gains a charge of Heart of the Furnace.
- Heart of the Furnace: Each charge of this effect causes Gug'rokk to gain 10% damage for 1 minute.
- Lava Barrage: After 3 charges of Heart of the Furnace, Gug'rokk releases the magma energy and deals damage to all players.
- Magma Eruption: Gug'rokk spawns pools of magma at each player's location for 2 minutes. These puddles deal periodic damage to players inside.
- Summon Unstable Slag: Gug'rokk summons a Fire elemental with abilities.
- Raging Flames: Elementals deal damage to two random players every 2 seconds.
- Empowered Flames: When an elemental reaches the Furnace, it becomes Overpowered and deals damage to all players every 3 seconds.
Manage the fight
- Players (except the tank) must regroup behind the boss before he casts Molten Eruption.
- The tank must move to an area empty of puddles to continue the fight. Also remember to anticipate the duration of the fight to avoid ending up with a room full of puddles.
- You absolutely must stop all Lava Lightning. If you can't, dispel the charge of Heart of the Furnace on Gug'rokk. If Gug'rokk manages to accumulate his 3 charges, cast defensive spells to collect Lava Barrage.
- Ranged DPS must kill Summons before they reach the oven.
- The healer should focus a little more healing on the victims of Raging Flames.
- If a Summon hits the oven, cast a defensive spell to counter the damage from Empowered Flames.
Heroic / Challenge
Gug'rokk will frequently cast Flame Burst on all players, dealing moderate damage and increasing fire damage dealt for the next 20 seconds. Healers should remove this effect by prioritizing the player with the most charges. Players with a lot of charges must avoid the Molten Eruption and use the defensive CDs to survive.
Booty
As you search Gug'rokk, you can find a Shield (Ogre Plate), Mace (Gug'rokk Crusher), and a Left Hand (Gug'rokk's Grandma) as well as helmets, rings, and shoulder pads. Everything is available at this address.
Video