


Note: This Knight guide will focus on the group PvE aspect, where the latter is most useful. It will be updated as the class evolves. The first 2 parts of this guide will describe each skill and talent. If you want to get to the point, go directly to the "Build and Rotation" part to see the distribution that I recommend as well as the rotation.
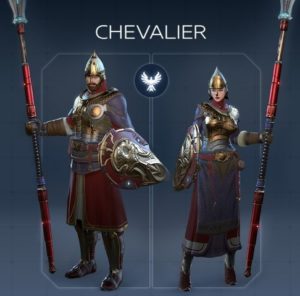
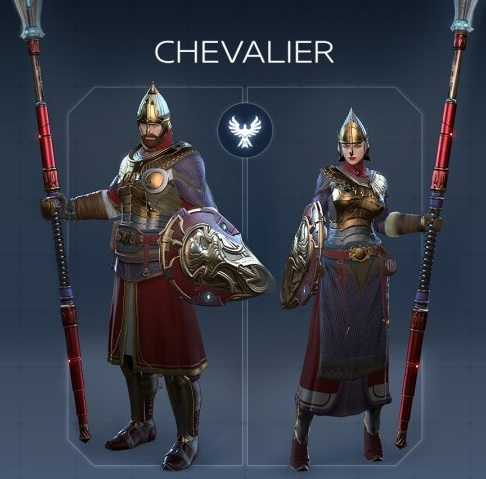
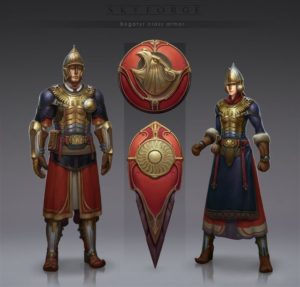
The Knight is the second class of Protector along with the Paladin. His role in group PvE is that of a tank. In any MMO, a tank is defined by two aspects: the ability to ensure that enemies stay focused on it, and the mitigation of damage received so that you can take it better. In the case of the Knight, the mitigation involves a gross reduction of the damage received, where the Paladin will focus on absorbing this damage. In addition, the Knight has the possibility of returning part of the damage received to his opponents. The Knight's energy resource is Willpower, which is produced by certain attacks and regenerates over time.
Glossary
In order to facilitate understanding, you will find here a summary of the terms that I will use later (especially for the uninitiated). Reading this article may be helpful if you are new to the game.
DPS: Damage Per Second, represents the amount of damage done by your abilities. Also said of a class whose role is to cause damage.
Mono: Single target, qualifies skills that only hit one target.
AoE (or AE): Area Of Effect, qualifies skills affecting an area or a group of enemies.
Mob: Mobile Object, a small name given to enemies
Burst: Ability to do a lot of damage in a short time but not always usable, opposed to sustained damage. Also said of skills temporarily increasing your damage or that of one or more of your allies.
CD: CoolDown, a skill's “countdown” cooldown. Also qualifies for skills that temporarily increase damage dealt or reduce damage received. And a CD, it "slams".
Channeled: refers to a skill whose effect will last until you release the key or a maximum time. In general, you have to channel your skill to the end to get the most out of it.
SG, SD: Left Mouse and Right Mouse, the clicks corresponding to the main attacks
CtoC: Body to Body
Competence I, competence II…: defines the level of workload for the competences concerned.
DoT: Damage over Time, skill dealing damage over time.
Buff: Temporary improvement on your character, increasing his abilities (bonus damage, statistics, speed ...). Conversely, we have the Debuff.
skills
- Basic
- Fence
- Location 1
- Location 2
- Location 3
- Location 4
- Location 5
Concussion Coup : SG + SG + SG
Deals mono damage. Activates pulse charging.
Strike Resolved : SG + SG + SD
Deals mono damage. Consumes 25 Willpower, if available, to inflict more.
Random Attack : SG + SD
Deals AE damage to targets in front of you.
Aries : SD
Deals AE damage to targets in front of the knight. Activate a Pulse Charge if at least 1 target is hit. If you have 2 dodge charges available, holding down on Aries will cause your character to charge and trigger this skill upon contact with a target.
Ravages
Deals AE damage around the knight. Consumes 35 Willpower.
Falcon Attack
Launches your stalwart ally at a target up to 30m, dealing mono damage. Costs 35 Willpower.
Lance projection
Deals mono damage up to 30m and forces the target to attack you for 6s. Damage increases if you are more than 10m away. 6s of CD.
Fence
Defensive Stance, changes your base combos, reduces damage taken by 25% but reduces will regeneration by 50%.
Whiplash
If you die, you can use this skill within 5s to revive at 100% health. 8min of CD.
Mighty Blow
Execution of the Knight, restores 35 Willpower points.
Stock : SG + SG
Deals mono damage.
Random Attack : SG + SD
Deals AE damage
Resolved Strike 2
Increases the damage of Resolute Strike, the hit target will take 30% more damage from Knight for 10s after this attack. Does more damage if it consumes 50 Willpower.
Barrier 2
Replaces Barrier. Same passive effect, using a skill consuming Willpower will give you a shield for 4s, doubling the damage reduction (50%) and returning half of that reduced damage to the target (up to 12% damage reduction). maximum life points of the knight).
Reviews
Your role is to tank so we will orient ourselves more towards Barrier 2.
Rebuff Resolved
The knight kneels on the ground and puts his shield above him. Skill channeled for 3s max (or less if you let go of the key), the knight absorbs all the damage received and returns them at the end of the skill to all enemies located in the orange zone with a maximum of 25% of the life max of the Knight. Enemies are forced to attack you for the duration of the skill and the following 4s. 20s CD
Fortress
Channeled skill reducing damage received by nearby allies by 80%. Active until the key is released, absorbing 33% of the knight's max health or 7s. 25s of CD.
Reviews
Fortress is situational but can become very useful (even mandatory) in certain situations with high group damage. Rebuff grants you full invulnerability, forces enemies to attack you, and can deal a significant amount of damage. Very useful against groups of small enemies who hit very hard.
Temper tantrum
Restores 100 willpower points. For 15s, increases damage dealt by 40% and range of attacks by 50%. 1min30 of CD.
Resolute defense
Restores 100 willpower points. For 15s, using a will-consuming skill will grant you absorption shield equal to 15% of your max health for 4s. 1min30 of CD.
Reviews
We will take Resolute Defense.
Random Attack 2
Increases Random Attack damage. If 3 or more targets are hit, grants you absorption shield equal to 2% of your max health for 2s.
Falcon's Fury
Slows target enemies for 5s. 30s of CD.
Reviews
Falcon's Fury is not of great interest. Random Attack 2 offers an additional shield during group fights, always good to take.
2 possible choices here
Falconry
Modifies Falcon Attack, giving it 2 charge levels. The first is the normal attack, the second (Razor Grass) is an AE attack online in front of the knight.
Earthquake
Replaces Ravage, deals damage around the knight, gathers enemies in front of him, stuns them and slows their movement speed. Costs 35 Willpower points.
Stunning Blow
The knight jumps on the target, stunning them for 3.5s and dealing damage.
Reviews
Earthquake without hesitation, it's vital to group enemies. For the 2nd choice, I do not see too much interest to the load, I would opt more for Falconry which, associated with a talent, will increase your mono damage.
Talents
Sky hunter
Reduces the Will cost of hawk attacks and increases their damage if the target is less than 50% health.
Falcon Attack is an important part of your rotation, reducing the Will cost is critical. The damage bonus is always good to take.
Open wounds
Resolute Strike and Knockdown have a 50% chance to put a DoT on the target. Increases Resolute Strike to 100% if it consumes Willpower.
No utility for a tank in PvE.
Force Deployment
Increases impulse damage by 20% and restores 12 Willpower with each impulse.
Capital in the management of the Will.
Salt in Wounds
Concussion Blow inflicts more damage on controlled enemies (stunned, slowed ...)
PvP only and barrier-free.
Mother Earth
Increases damage from Ravage / Earthquake.
Useful against groups but this talent occupies 8th place in terms of priority, tied with Fauconnier. I'll talk about it later.
Threshing drum
Increases Random Attack damage
No great interest.
Collision
Ram stuns targets for 2s and deals more damage if Pulse Charge is activated.
The control effect is capital to survive groups of Pack type enemies.
Triumph
Killing an enemy restores the impulse charge, or gives you a 2nd (maximum) one if it was already available.
As a tank, you will rarely kill enemies. Use in solo.
Suppression
Increases the duration of the Stun inflicted by Knockout Strike as well as its damage.
Not great, probably more useful in PvP.
Fearless youth
If Ram's charge hits a target, restores a dodge charge. In addition, the latter regenerates 2 charges (at best every 30s) if the knight does not have enough.
I don't advise using the Aries charge, for me it's better to keep these dodges to dodge special attacks. I therefore do not recommend this talent.
Heavy tip
Lance Throw slows the target for 3s and the damage is increased even more if the target is more than 10m away.
In PvE, the goal of Projection is to attract distant enemies into contact with you. Slowing them down defeats this objective.
Falconer
Using Razor Grass increases the damage of the next 2 Falcon Attacks by 75%.
Quite useful, but is tied for 8th place with Mother Earth in terms of priority for Talents.
Rock wall
Barrier 1 and 2 reduce damage by an additional 5% (or 30%, and 60% for the additional shield from Barrier 2). Increase threat generation.
No question to ask.
Knightly Courage
Reduces Rebuff and Fortress CD by 5s.
Allows you to use your invulnerability more often. A must.
Master of Battle
Using Angry Crisis and Resolute Defense reduces the damage taken by your allies within 30m during their duration and increases their movement speed.
Far too situational to be useful.
Fighting spirit
Mighty Blow reduces the cooldown of Angry Crisis by 30s.
No interest as a tank.
Counter-catch
The duration of Barrier 2's additional shield is increased by 1s. Estoc regenerates Willpower.
Longer shield and more Willpower. A must.
Not heavy
Earthquake stuns targets for 2s every 4s or more.
The control effect is essential for surviving groups of enemies. To take.
Will Breaker
In PvP, increases the bonus damage received by the knight inflicted by Resolute Strike. In addition, increases the damage taken by the target from other players.
PvP only
Unshakeable
The knight is immune to all controls if his health is above 70%.
Very powerful in PvP, very situational in PvE, where most control effects are avoidable. To replace Falconry / Earth Mother if necessary.
Build et rotation
PvE group tank
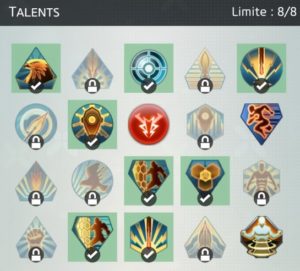
This build is focused on defense. I prefer to take the Falconry talent, allowing to increase mono damage. If you'd rather favor your AE damage, replace it with Mother Earth. If the boss ever inflicts a lot of inevitable checks, take Steadfast instead.
As well as making sure enemies hit you, which isn't too hard with the Rock Wall talent, your main job as a tank is to survive. With this build, you will have 30% passive reduction by activating Barrier 2 (which must be activated at all times), which is good, but not enough. Using skills that consume Willpower will create a 5s shield, reducing damage taken by an additional 30% (or 60% total) which is the best defense you can claim.
The problem is that with this duration and its "cost" (the fact of having to consume willpower to activate it), it is not possible to have this shield permanently active. This is where the impulse charge comes in. Indeed, the Force Deploy talent restores 12 points of Willpower, and by pairing that with the Impulse Barrier symbol, you gain an absorption shield of 3s, and it is he who will make the interval between your shields of Barrier 2. The knight has 2 skills activating the impulse charge: Ram and Random Strike. Aries' extra impulse damage along with his associated stun effect makes him the ideal candidate.
The Knight's defensive rotation will therefore consist of alternating these 2 shields, making sure that there is always one active, otherwise you will only have a simple reduction of 30%, which is good, but not enough.
Rotation multicible
Aries (impulse barrier active) -> Random Attack (impulse barrier comes to the end of its duration) -> Earthquake (Barrier 2 shield active) -> Random Attack x2 (Barrier 2 shield arrives at the end and the impulse charge is recharged) -> Aries ...
When engaging enemies, it may be best to start with Earthquake in order to rally enemies. This rotation also offers the advantage of stunning enemies for 4s (2s Ram and 2s Tremor) over the 6s cycle duration. A stunned enemy does not hit, which is the best possible defense.
Monocible Rotation
Ram (Impulse Barrier active) -> Thrust (Impulse Barrier reaches the end of its duration) -> Falcon Attack (Barrier 2 shield active) -> Thrust x2 (Barrier 2 shield comes to the end and the impulse charge is recharged) -> Aries ...
If you took the Falconer talent, you will replace 1 in 3 Falcon Attacks with Sharp Grass, which will increase the damage of the next 2 Falcon Attacks.
In these 2 rotations will fit Resolved Rebuff. This skill gives you 3s invulnerability in addition to reflecting some damage to surrounding enemies. In a multi-target setting (with Pack type enemies), it is best to use it earlier in the fight, as invulnerability gives your allies a few extra seconds to kill as many enemies as possible and greatly increase your chances of survival. The ideal, during the engagement is to start with an Earthquake, and to chain (2s later, the time for the enemies to come out of the stun) with the Rebuff, so that the enemies can hit you and suffer your damage reflection. In a single target setting, there are 2 ways to look at it: either you use this skill for the invulnerability aspect and you save it for the most powerful inevitable attacks, or you use the damage reflection aspect and you keep your rebuff for the most powerful avoidable attacks and thus put a nice slap on the boss. These 2 approaches are equal and remain at the appreciation of each one.
For the other skills, Resolute Defense offers you an important absorption shield with each consumption of Willpower, very useful for difficult moments (movement phases where the enemy is still attacking for example).

Equipment and Statistics
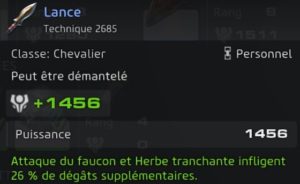
Primary Weapon
Not much shiny, the better the damage-increasing weapon type with your Hawk.
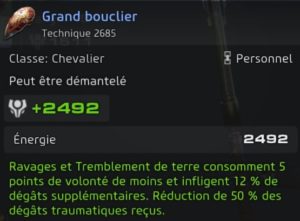
Secondary Weapon
Favor the shield increasing the damage of Earthquake but especially decreasing its cost in Willpower.
Rings and Chapels
As you have seen, defensive rotation is based on the use of impulse charge. It is therefore essential to store the most Landfill Recovery, this will be your main objective. Do not take an interest in statistics (Strength, Spirit ...) until you have reached 40% Discharge Recovery (the maximum), otherwise your defensive rotation will have flaws. When this goal is reached, your second priority in terms of secondary stats is the health bonus. You will naturally have mounted your Spirit (only rings with Spirit can have discharge recovery), which is interesting considering the amount of bonus on Aries. Then, I will recommend the Force, which will allow you to smooth your damage and therefore the generation of threat.
For Chapels, focus on Discharge Recovery until you get the maximum. Then, Adaptation will give you damage reduction (up to 11.4% with 2 purple chapels) for 2s with each hit received. Chapels offer 3 other defensive stats: Shield Power, Parry, and Stamina. I was able to test them and found their very minimal effects on my survival. For the moment, I see no point in taking them. From the moment you have your 40% Recovery and your 2 Adaptation chapels, I advise you to take chapels that increase your damage (thus threat generation), ie Impact Force and Precision. By choosing these stats, I was able to tank Anomalies and Isabella 2 * without Lumancien without a hitch. The threat generation aspect is not to be overlooked, especially if your Alchemists and Berserker work well together.
Symbols
The priority is of course the Impulse Barrier, a crucial part of your rotation. There are 2 symbols on the Atlas each offering 3% of your max health as the shield value. Then the interesting defensive symbols are the Paladin symbol, Skillful Maneuvers (although I would advise against putting this shield in your spin, a shield when dodging doesn't hurt) and Life Energy. Finally, complete with symbols that increase your damage, so your threat generation.
This is the end of this Knight's guide, don't hesitate if you have any questions!
Are you going to train the Falcon?


