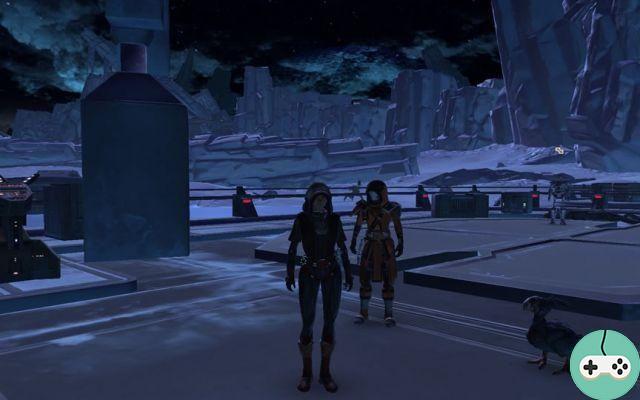
I introduce myself, Fayte, Assassin Tank on the Phateem Halls of Knowledge server, officer in the guide "The Sith Order" specializing in PvE roster 8. I started MMOs with SWTOR at the end of December.
Our advanced PvE is easy to summarize. Before 1.2, we clean the normal and hard mode, we are 4/5 in the Nightmare Eternity Chamber (pre 1.2), 3/5 on Karraga nightmare (pre 1.2), and 4/4 on Denova normal . We're starting Denova's hard mode next week and we're also going to end the pre 1.2 nightmare that we put aside when Denova arrived. So much for the presentations, let's move on to the main topic, the Tank Assassin.
For starters, the Tank Assassin is clearly trigger-based and by no means a predefined cycle, which is what makes it so charming. It offers gameplay that leaves room for improvisation, it is a specialization that is played in part by "feeling", everyone has their own way of doing things.
Why prefer a Tank Assassin over other Tanks?
I can't tell you, I haven't played the other classes, but what I can guarantee is that if you're looking for dynamic gameplay to make you look like a ferret on amphetamine behind your screen, you're going to be served. .
What I can also affirm after several discussions with Syn (Ravager Tank from our guild) is that the Assassin Tank is surely the best Tank for Multi-Target and also one of the Tanks with the highest DPS (in competition with the Specialist).

Statistics
- Endurance: this is your main statistic, it influences your resistance and your number of life points.
- Willpower: It increases the damage of Force and Melee, important to keep the aggro with a good DPS.
- Shield Index: This statistic defines your chance to trigger your shield, this is the most important stat for the Tank Assassin.
- Absorption index: second statistic to favor, absorption increases the amount of damage your shield takes.
- Defense index: common to all Tank specializations, it defines the chances of dodging an attack.
The priorities
Endurance> Willpower> Shield> Absorption> Defense> potency> precision
There is another "choice", which is to prioritize Defense over shield. It's up to you to decide, I'll explain: either, as the assassin's tank specialization would like, you walk with your shield, at the risk of taking big slaps, or you choose to be more "safe" and therefore to have a good defense index to be able to have more chances to dodge an attack.
Normally you already have enough defense with Columi / Rakata pieces, this is not a stat to optimize on Columi or higher. (watch out for the Black Hole equipment on the other hand). This choice is up to you, it depends mainly on your style of play. Personally, I work a lot on the shield, but I still chose to add a lot of defenses on my equipment with increased parts, it is always that of taken (4 increases in Power + 12 / Defense +18).
If you decide to add more defense to your gear, excluding augmentations (so with Sophistications or Modifications), try replacing Absorption but never remove the Shield index. The power will be useful to you to keep the aggro with a good DPS and the precision will serve to you not to miss your attacks (a 100% precision is enough).
Normally your stats should look like this if you want to go on Nightmare Raid or Hard Denova. In parenthesis, I give you my statistics (Full Rakata, with secondary hand, torso, head and legs Black hole):
- Armor Index: ~ 6400/6800 (7074): There isn't much you can do about it, it's defined by your gear. In full Columi, you should be around 6700 which is the minimum required to go into a nightmare or Denova.
- Damage Reduction: ~ 40% (41,58%): Only in energy and kinetics, the Columi / Rakata 4-piece set bonus gives you 2% more on all damage types.
- Defense chance: ~ 22% (25,41%): this is not the stat to optimize but be careful to exceed 20% anyway or you will get slaps. Your Rakata stuff will normally provide you with what you need.
- Chance of triggering the shield: ~ 30% (31,35%): be careful, you must absolutely exceed 30%, which will allow you to reach 50% with the "Dark Zone".
- Shield absorption: ~ 45% (45,15%): it is better to aim for 50% but this is only possible at the expense of defense, which I do not recommend.
The tree of talents
I'm on 33/0/8. Some people use a 31/0/10 tree instead. No real differences but I will still explain my choices:
Punitive Blade: I only use the fix to trigger "Stimulate", I didn't find it useful for it to do 6% more damage because I never use it if I have Stimulate, which can also trigger with "Laceration" and "Assassination".
Bulge shadow: not using it is a big mistake for me. 2 points here allow you to increase your chances of having the famous "regeneration" of the assassin and therefore a 15% more chance of having 425 points of life restored and of inflicting 150 points of additional internal damage, causing the total at 65% chance.
Electric execution: not essential but useful for keeping multiple targets with "Shock" (if the DPS gives you time to build up your aggro).
Premonition: so, here I can already hear voices saying to me "Oh unhappy, you did not take this talent? Are you crazy?". Well no, I preferred to keep my points for something else and "sacrifice" 2% defense, which I gained thanks to my increases. It will depend on your equipment and I recommend that you take this talent and do without it only if you have at least 4 increases in defense index (+72 defense index).
Anguish: useful only on mobs, bosses are immune to it, so useful during the leveling phase but useless in raid.
Torment: I didn't find it useful to use this talent, which only saves strength, which is not really necessary with the assassin who has really simple strength management. To be stranded, you really have to do the nag
Relentless Darkness: Stacked 3 times, it allows you to regenerate health with Force Lightning, increases its damage by 15%, and makes it impossible to interrupt. It is the talent to be given priority.
Growing Darkness: increases the damage of the "Discharge" by 15% and the damage of the "Withering" by 30%, this is not negligible because these are 2 spells that we often use, especially to keep several mobs.
Withering: The ultimate spell of the tank assassin. To sum up, it can deal up to 1k5 damage on 5 mobs, while slowing them down by 30%, reducing damage done by 5% and generating strong animosity. To top it off, it also allows you to ride the 3 fierce darkness with the electroshock. This talent is mandatory!
Force Pull: Draws mobs towards you. Useful to avoid running towards the mobs, but also to resume aggro, interrupt a mob on again to prevent a mob from going to do carnage in the middle of the raid.
The choice is yours, I'm just giving my opinion and I think some will disagree with me. My advice is to really make your template suited to your playing style. Anyway; there aren't a lot of possibilities, the only points that may vary are DPS so it's really up to you.
Gameplay
As I said at the very beginning, the Assassin Tank is all about triggers and improvisation. But once you understand everything, it is not very difficult to play and it becomes enjoyable.
In Multi-cible:
Your priority will be to unleash your "Relentless Darkness". For that, I start the fights with "Withering", which will slow down the targets, reduce its damage and also allow me to aggro more easily with DPS, especially on multi-targets. You continue with the "Discharge" and the "Laceration". Normally, you already have a lot of aggro on multiple targets and you should have them all on you, unless a DPS hits an AOE. If you lose 1 or 2 mobs, you swing your zone taunt and you are quiet (normally).
Then you continue with the patch or laceration to do proc "Stimulation", if it hasn't proc you swing a wilt, followed by a shock and so on.
In Mono-cible:
I'll usually start with "Crushing Darkness" or "Force Pull", then "Wither". Then I use my "Lightning Strike" to stun the target followed by "Shock" and "Tumult" (or crushing darkness if you started with the force pull, you get the 8 sec stun from the lightning strike for the place quietly). It will allow you to build up your aggro while the group settles down quietly.
Then you use "Correction", again to try to trigger "Stimulation". As soon as it goes off you swing "Shock". Once you have your 3 Relentless Darkness, you activate "Recklessness" and you send a "Force Bolt", normally it should tick at 1k2 / 1k5 while restoring you 700/800 hp per tick!
If the target is not immune to Interrupts and Knocks, consider using "Spike" followed by "Tumult". Then this is where it gets fun, you can improvise. You should always try to trigger the "Stimulation" with the correction and always have 3 fierce shadows in case of a big slap, that can always help the healers.
The spells to use as often as possible are, in order of priority:
Shock, Wither, Discharge, Force Bolt, Lightning Strike, Crushing Darkness, Lacerate, Correct, Spike + Tumult, and Assassination if the target is below 30% HP.
Last thing which is very important: you must always have the "Dark Zone" activated. It increases your chance to trigger shields by 20%. I insist, you must ALWAYS have it activated. It has a 12sec cooldown and you have 8 charges for 20sec, so you can have it continuously unless your shield has triggered 8 times within 12sec, which rarely happens. You can stack it with "Advanced Saber Charge" which boosts your Dark Charge (example: Dark Zone -> Advanced Saber Charge -> Force Lightning with 3 Fierce Darkness).
The role of the Tank assassin is really multi-target based, if you lose aggro, don't panic with the panoply of controls at your disposal, your role will also be to prevent mobs from hitting your friends. "Shock", "Overload", "Spike", "Lightning strike" or even "Force Pull" and "Shock" on weak targets can help you interrupt, paralyze or knock down your enemies.
The angry subject: the powers of defense. They are easily counted, there are only 2 but luckily the "Force Shroud" has a rather short cooldown (45sec) and is very effective against Force and Tech attacks. Then there is the "Deflection" which on the other hand has a cooldown of 2min, but it increases your melee and distance defense by 50% (combined with Shroud and Deflection, this makes you practically immortal for 12sec).
Try to throw the "Shroud of Strength" often and keep the "Deflection" in case of force majeure.
The Relics
I will close by telling you about the relics. You are really free to do as you see fit. For my part, I opted for a Campaign 405 cumulative power relic with a 475 power Dopant for the burst phases. For example, the assassination manages to swing me from the 4700, the electroshock to 3500 (5250 if it doubles) and the lightning of force tick to 1800 !!! Which is really not bad for a tank.
For the 2nd, I use a relic which gives me absorption each time I protect myself from an attack, it is the ultimate relic for the assassin because every 20sec, your shield will benefit from it. So every 20sec, I have the possibility of having 380 more absorption. For a shield-based tank, you understand the utility.
Voilou, I hope you enjoyed my little guide and I also hope I made you want to try the Assassin Tank. Thanks for taking 5 minutes to read my guide and good game everyone.
Fayte


