


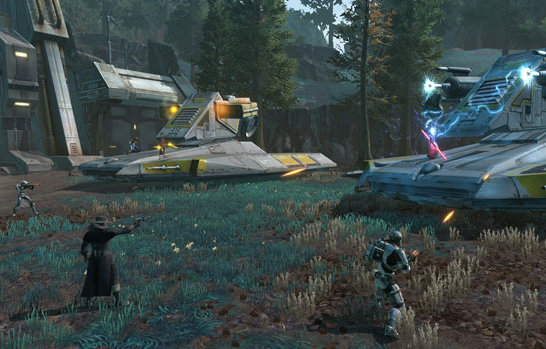
Second boss of Operation Explosive Conflicts, Calcinis and Storm Storm is still a double boss like Jarg and Sorno or Zorn and Toth.
Composition
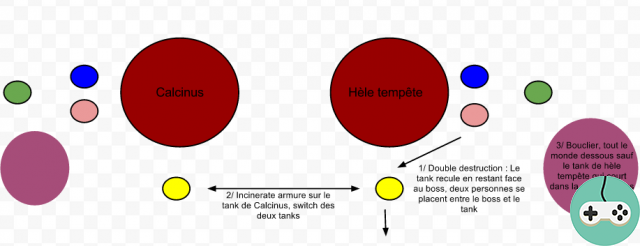
2 tank, 4 dps, 2 heals
Placement
As usual with this kind of boss, you will have to split your raid into two groups of 4, each made up of a tank, a healer and two dps.
Each group will be assigned to one of the two bosses and placed on their right flank for storm hail and left for Calcinis. If you have melee, prioritize them on Storm Storm.
The tanks will be placed so that the two bosses are looking towards the entrance of the room as they are when you arrive in the room and so that they can easily change targets. Nobody should pass in front of the cannon of the two bosses because it risks to suffer significant damage, respect your positioning on a flank and in case of major necessity (need for a resurrection spell for example) go to the back of the bosses towards the back of the room.
progress
Three main stages punctuate the entire fight:
- The Double destruction technique of Hele Tempest does heavy damage on the two closest people, two members of the group on Hele Tempête come to stand between the boss and the tank to take it instead of the tank. In practice, the spell is channeled and its duration is very short, the affected dps must therefore be squarely on the tank and on its right flank to be able to place itself very quickly in front of the boss.
- Just after the double destruction, Calcinis places an armor reduction on his tank, a pipe, it's time for your two tanks to exchange targets and positions. This is so that the Calcinis tank does not suffer from the reduction.
- Every 20% (80, 60, 40, 20), Calcinis and Hele Storm go into defense mode and canard the room. Two protective shields activate to the east and west of the Hall. Dps and healers must quickly get to safety on their respective sides. 3 adds will appear on each side of the room under the shields, charge your dps to kill them during this phase. Warning, no area damage on adds ! Indeed, the defense shield has a bar of life and suffers the damage done at the risk of 'breaking it.'
At the same time, one or two tanks remain in the room and run through - within reach of the healers - to place the energy domes outside the defensive shields.
Besides that, two techniques two damage of zone are to be avoided:
- The energy dome which must be quickly brought out when it appears is a bluish energy dome that is easily visualized.
- A yellow target that attaches to a member of the group and follows him in his movements, after a few seconds, it attaches to the ground, it is then necessary to get out quickly. Remember to step away from your colleagues when this happens to you!
Once these different steps have been assimilated, in particular the exchange of targets for the tanks because of the reduction of armor, the combat proceeds without a hitch.


