


- Race : Cyborg, Human, Mirialan, Zabrak
- Poor : Laser cannon
- Armor : Heavy armor
- Resource : Munitions
- Main characteristic : Aim
Hello everyone, young recruits!
I am the Zealous Captain of the Pandora regiment deployed on Starmap. I will be your trainer during these long lines of training. The reading will be tough, but you will come out better!
You have all received the best combat and medical training in the galaxy, war medics are the backbone of our military strategies. A wounded or dead man cannot defend his homeland. It is our duty to take all the risks to care for and support our glorious troops in the battles.
The Republic has lost a lot in recent years, we are on our knees, the Jedi have strayed from us, and Senate policies are mired in unnecessary bureaucracy.
We are the last bulwark of the galaxy against imperial tyranny, every day we fight to defend our values, our worlds, our lives ...
I will introduce you to the weapons and technologies that will help you do your job and help your allies, as well as how they are used.
Equipment
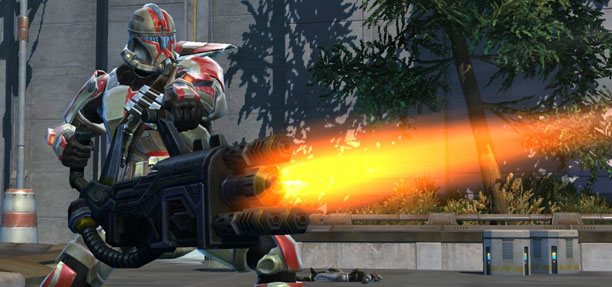
We are already going to provide all of you with armor, it is based on the famous Mandalorian armor, a dead medic is useless to his battalion, right? Their hard steel shell makes them light and very resistant, you can take blaster shots without flinching. Watch out for blue, the armor collects the energy rays but you can still feel them passing. In a suit of armor in perfect condition, only internal bleeding from the shot can knock you down. If you are injured, use your medipacs and beware of lightsabers, these crazy Jedi jerks shake them in all directions like kids chasing a fly with a stick, we quickly left an ear or a finger .
You will be equipped with an URR (Ultima Ratio Regum) type assault gun, we are not only doctors, we are above all soldiers and with these little jewels we can make pretty holes in the dresses of silk from our Sith buddies.
Our main tools are medical probes, they have a radio range of 30m and allow advanced kolto sprays to be sent to the wounded, very effective in treating even heavy injuries, from the growing leg to the regenerating organs. , this marvel of technology makes soldiers almost invincible. Thanks to that the only bulwark of our troops is pain. I admit that even being treated constantly, it is not pleasant to be shot or to see your arm serving as breakfast for a rancor ...
We will see later how to optimize our equipment and learn new skills.
skills
The skills are presented here with the modifications made by a template specialized in war medicine. They are therefore only valid for a Commando specialized in care. I am only mentioning the skills that are involved in the healer role, you will have the opportunity to discover the dps skills in play, and I will not complicate this guide with that.
Care
- Field aid (2 ammunition, instant, 30m): Dispell two negative physical or technological effects.
- Kolto Bomb (2 ammo, instant, cd 6s, 30m): Heal AoE that hits 3 targets within 8 meters.
- Overloaded Cells (Talent, Instant): Converts 30 Support Cell stacks to a 10 second buff that reduces the cost of Auto Fire and Charged Cannon Shots, removes Advanced Medical Probe cooldown, and grants damage reduction shield to Kolto Bomb targets.
- Infusion of bacta (talent, instant, cd 21s, 30m): Free big instant treatment.
- Medical probe (3 ammunition, cast 2s, 30m): Basic long-cast healing.
- Advanced medical probe (2 ammunition, cast 1s, cd 12s, 30m): Flash heal at the base of the heal synergy.
- Trauma Probe (talent, instant, 30m): Shield of 10 charges that heals the target when it takes damage. Only one can be active at a time.
Buffs
- Support Cell (cast 1s): When active, your drumsticks shots overload your cell with energy, increasing your healing and damage by up to 3% with 30 stacks. In addition, your Pestle Shot heals your allies.
- Diversion (instant, cd 45s): Reduced threat.
- Fortification (instant, 30m): Increases stamina by 5% for the party.
- Cell recharge (instant, cd 2min): Recharges 6 ammunition in 3 seconds.
- Pestle Shot (instant, 30m): Basic shot, usable to heal your allies when Support Cell is active.
JcE template
As your training progresses, you will learn to use your equipment, I will tell you about it now. The final template looks like this: 32 / 7 / 2.
I haven't detailed the usefulness of the talents, by looking at the archetype above you will easily understand my choices (note that the improved dispell is indeed a PvP talent, totally useless in PvE, even in nightmare mode).
A good medic should have Quick Thinking when triage of combat casualties, no room for hesitation, thinking less will heal faster!
With a good Field Training you will be more effective in combat and you will have better results.
A good Cell Capacitor to improve your charger.
When your weapon is too hot, use Cell Overload to deliver that gentle heat to your enemies.
In war, you often have to be the first interlocutor ...
With the experience you will become a good field doctor.
The Kolto Bomb is a small jewel, it allows you to bathe your allies in a soft healing cloud.
In addition, it tends to leave a Kolto residue on them, which improves organ regeneration and fights unsightly pimples!
When you have a scalpel near the family jewels of your comrades, you better have a sure hand.
You have to be efficient for Triage in the field, act quickly to tire yourself less and heal more.
The trauma probe is a little gem, it sprinkles kolto on its target when it is injured.
Preventive medicine should not be underestimated, we are not always on the side when a Sith takes the lokkus of a twi'lek for sausage ...
We also have a very useful Armor Screen.
Over time, you will practice a prodigious medicine.
When an ally is within two shots of death, a Bacta Infusion can be lifesaving.
Don't forget to train yourself in Advanced Technologies.
Always use a Metal Sight for better aim.
When the crazy people opposite wave their neon lights running towards you, a burst of chaos can cool some down.
Use the new Special Ammunition developed by our friend Q.
Always check the calibration of the weapon before going to the front lines.
Personally I also use a small variant with a fluted barrel, it makes nicer and bigger holes on the imperials.
gameplay
Ammunition how to save and recover it
Our ammo bar has 12 cells. Ammunition regeneration behaves differently depending on the number of cells we have left.
- Between 8 and 12 cells, regeneration is rapid and goes back to a rate of 0.6 cells / sec
- Between 3 and 7 cells, regeneration is average and goes back to a rate of 0.36 cells / sec
- Between 0 and 2 cells, regeneration is very low and goes back to a rate of 0.24 cells / sec
The main difficulty will be to manage this resource by consuming the minimum with maximum care. Indeed, the lower our resource, the less it rises quickly, it is therefore essential to avoid as much as possible falling below 3u of ammunition. We have 3 techniques that reload or save our ammunition:
- Reloading: returns 6 ammunition in 3 seconds (2 per second), it is a non-GCD spell (2min of cd).
- Overload Cells: Restores 2 ammo instantly (plus the effects I discuss below).
- Cell saving: your next technique is free (15sec buff, 2min cd), very useful for launching a medical probe out of proc and therefore saving 3 ammunition.
Cell overload and the basis of our mechanics
You should know that there are different types of ammunition (cells) that have an effect on some of our capacities, as far as we are concerned, we use the Support Cell to heal.
Under Support Cell you can aim at a friendly target with the pestle shot, this shot heals it for an amount equal to your bonus heal score (mainly provided by the aim score), so it's a "light" heal, free which is the basis of the gameplay during the "charging" phases (I come to this below).
The main utility of the Support Cell lies in the fact that each Pestle Shot (friendly or hostile) generates 3 charges of energy cells, it is a form of "buff" which is stacked, up to a maximum of 30. Stacks last for one minute and increase your healing and damage by 3% (once at 30 stacks).
We therefore come to the overload of cells, a skill obtained at level 16 via your skill tree: the overload of cells consumes 30 charges of energy cells and puts your weapon in overload for 10sec, during these 10sec you benefit from the following bonuses:
- +2 units of energy cells (our ammunition).
- + 10% to healing and damage.
- Auto Fire (which is not an auto attack but a channeled attack) costs 2 less ammo, or 1 instead of 3.
- Charged shot costs 2 less ammo, or 1 instead of 3.
- Your advanced medical probe no longer has a cooldown.
The healing mechanics will therefore go through phases of "load" and "overload", it is under overload that we can send a maximum of care for a minimal blow. Indeed the advanced medical probe which costs only 2 ammunition during these burst phases and allows to alternate with medical probes at reduced cost (1 instead of 3).
We will see below why, by unlocking certain talents, we will be using the medical probe between each advanced probe. For information, the healing of the Trauma Probe is not affected by the overload healing bonus.
The mechanics of probes and the care cycle
To discuss the mechanics of probes, I will first have to talk about the main skills to unlock so that you clearly understand the principle of charge phase and discharge phase. Here are the essential talents for this gameplay guide to be consistent:
- Cell Overload whose effects I described above.
- The Kolto Bomb with the 2 points in Kolto Residue.
- Field medicine.
- Sorting in the field.
 During the "charging phases": in perfect conditions, we heal the tank with the pestle fire, we use the Advanced Probe when we need it, we obtain a treatment over time (9sec, like the cd of the advanced probe therefore) and a Medical Probe inexpensive in the following 15sec.
We also have the trauma probe which heals the player on which it is placed slightly for each damage he takes. It is important to remember to keep the Kolto Bomb buff on the tank at all times during this phase.
If things go wrong, we use the Medical Probe while waiting for the Advanced Probe to be available again, even if it costs us a lot of ammo it gets us closer to overloading.
During the "overload phases", once our 30 cells are loaded, we have two choices.
Is: the group needs care. In this case we alternate the Advanced Probe with the Medical Probe (you can use the Advanced Probe to place a HoT on some players or even all). As a reminder, the Medical Probe that follows an Advanced Probe costs only one ammunition, the Kolto Bomb also places a shield that reduces damage by 10% for 15sec on targets hit. Either place it at the start of the overload to relieve the damage, or you lift the players up first and place it at the end of the overload to mitigate the damage a bit during the charge phase to come (i.e .: buff 10 % is only taken into account at the end of the cast, if you launch a probe one second from the end of the buff it will not benefit, and the Advanced Probe will resume its 9 sec cooldown in the classic way, an Infusion of bacta or a Bomb of kolto can be interesting at the end of overload).
Is : the group does not need healing and we can help with dps, the easiest and most effective way is to spam the Loaded Shot
It is good to note that with a talent point in Fluted Cannon (artillery branch, reduced by 1 the cost of Charged Shot) we can dps more than suitably in raid during the slack phases, thus the cycle (basic but effective) is summary to: use the charged shots while waiting for the cd of the auto shot, this one lasts twice the time but inflicts 75% of two people shots loaded for 50% of their cost, to be used when you are at 8u, if you drop below 6u of ammunition, use the fire pestles.
The perfect cycle is completely dependent on your alacrity, just watch your ammo and of course the life of the group which remains your top priority. We are not worth a real gunner but our damage is more than correct, moreover the overload reduces the cost of the Shot charged to zero thanks to this talent, suddenly we can empty his magazine and launch an overload to regenerate while burstant the dps , who dreams of better? ?
Optimization
Statistics
The main statistics
- Aim: Increases your combat ability with ranged weapons (damage / critical chance).
- Endurance: Increases your health.
Secondary statistics
- Surge Index: Increases the power of critical hits.
- Critical Rating: Increases critical strike chance.
- Potency: Increases damage and healing.
- Technological Power: Increases healing and damage related to technology (Probes / Grenades).
- Alacrity Index: Increases the speed of casting abilities. (Alacrity does not affect the base 1,5sec GCD except in certain cases - The casting of a spell that is 1,5sec base and which ends at 1,3sec thanks to your alacrity , will see its GCD also reduce to 1,3sec - Alacrity does not modify the GCD of instant spells nor the "ticks" of HOTs).
- Hint: Increases the Critical Chance of Technological Skills (Warning! I list it here but in no case should this stat come before the others. It's just a bonus. For example datacrons to recover, but in no way to put on your equipment).
Figures
Healing bonus:
- Aim: 7.14 pts = 1 (Healing point)
- Potency: 5.8 pts = 1 (Healing point)
- Technological power: 5.8 pts = 1 (Healing point)
Casting Speed:
- Alacrité: 27.5 pts = 1 ( %)
Critical multiplier:
- Influx index: 5.8 pts = 1 (%)
Critical Chance:
- Aim: 143.34 pts = 1 (%)
- Tip: 124.7 pts = 1 (%)
- Critical Index: 23.75 pts = 1 (%)
It is important to note that the statistics have a declining return, so it is interesting to balance these different statistics according to your needs. In terms of how important these stats are, I would say it's already based on how you play. For example, if you are assigned to the tank heal, you will have to aim for the critical index and the influx index. If you are more assigned to the raid heal (although in my opinion it is more the role of the scholar or the thug) you can aim for alacrity for more responsiveness.
Knowing that Potency and Alacrity are fixed stats and Crit (Crit Chance, that says it all) is a very random stat. But knowing the statistics and what they bring, we can classify them as follows (in order of importance):
- Aiming
- Critical Index
- Influx index
- Alacrity
- Engime
You should know that there is a declining return on the critical and the influx, excluding the skill bonus, we must not exceed 30% of these stats there, a good commando will therefore have 70/75% influx (+ 15% not showing via talents) for 40% crit (no buff)
Alacrity sees its declining performance skyrocket towards 15%, so I advise to favor criticism / influx up to the cap then alacrity
Many are fans of the "caps" to reach, here is what I recommend: 250/300 pts in influx (beyond that I find the yield low), 400pts in alacrity or 15%, we reach the softcap of 20% under first contact, ie 1,5sec on the medical probe and 1,2 on the advance. The potency provides relatively little additional healing percentage, I'm not at all a fan of it, I recommend increasing its critical / influx once the alacrity cap is reached.
* Personally, I am capped at 10% alacrity (20pts) and I have increased my inflow to 75% (300pts too), I have changed all my power module in crit, I have reached 50% of written in raid condition
For the moment we cannot reach the cape of influx and alacrity at the same time. In 1.2 new stuff will be released and we will be able to increase the alacrity. In the meantime, as 3 of our treatments do not depend on alacrity, I have chosen to favor the influx
Dopants
On the subject of dopants, there is a stimul which increases power and one which increases techno power, the second reduces damage dealt by 50% but tech power and potency provide the same healing bonus, for now use the attack dopant for more versatility.
knowing that the power dopant provides a little less than 10% more healing. The critical or alacrity dopant can also be very helpful.
Useful links and thanks
Thanks to Subarys, I copied some paragraphs from his blog about statistics.
Thanks to the work of Tektonis, take advantage of a printable version of the old guide in paper format to read in the metro, on a bench, in the toilets… To print in booklet / brochure format to make a very pretty mini guide? Please note, however, that this version is not updated and may differ quite a bit from the online version which remains the most recent.


