


This instance now has 5 bosses with more or less varied strategies that I will show you. Each time, I will explain the method we used, it is not necessarily the best and therefore do not hesitate to give me yours if it differs. This strategy concerns the normal mode of operation. Strategies can vary in hard / nightmare mode.
We were 1 tank (pest), 2 healers (mercenary and secret agent) and 5 dps (wizard, marauder, mercenary, sniper, secret agent).

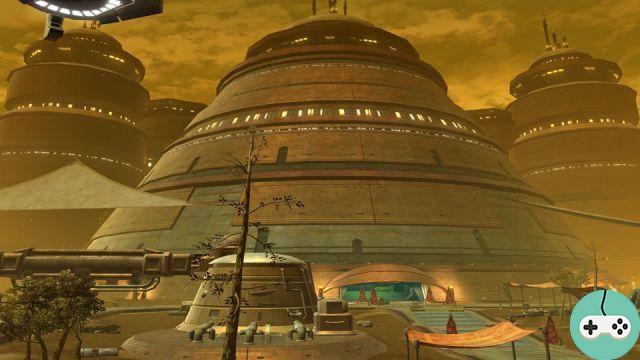
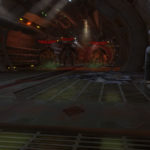
When we arrive in the instance, it's yellow, very yellow! No doubt, we are in a Hutt palace. The shuttle drops us off in front of the doors.
Karagga Palace" src="/images/posts/447471e62d490a965065515317d148b9-2.jpg">
Some guards welcome us warmly with blasters (their number has also decreased since 1.1) but nothing too bad. After the door and the access ramp, you arrive in front of a door. Don't click immediately, young unconscious, because behind is the first boss!
Breeze-os
Some naughty Manka cats will greet you right before she arrives. Nothing to say in particular, they don't really hurt. Just before the end, step back so you don't hug the boss as soon as he arrives.

This huge boss is pretty dumb as he'll pick someone at random in the raid and follow him, until he changes his mind and follows another. We chose the solution to make it run but some prefer to stay put and take the damage.
It has 4 major abilities:
- a cone attack in front of him: not to be in front
- immobilization of a person for a few seconds (he will sink it into the ground): raise it very quickly because it is fatal combined with the 1st ability
- a jolt that takes about 25% of its life from the entire raid: keep everyone high alive
- a reversal that pushes everyone back: don't get close to the edge
During the fight, he will pop two types of ads:
- vicious manka cats: they are champions. The tank must be quick to pick them up to avoid them annoying the healers
- palace guards: they appear on the edge, 1 by 1, and have only 5000 life points. It must be made a priority for the distant ones
The adds should be killed as fast as possible. If Bonebreaker eats one of them, it will gain damage buff. Nothing insurmountable in normal but certainly death assured in difficult / nightmare, so much to train!
An anecdote by the way, have you noticed the disappearance of the strips of earth on the side? It would seem that it allowed to do the boss without taking any damage!
Karagga" src="/images/posts/447471e62d490a965065515317d148b9-4.jpg">
After the boss, our adventure continues through mazes of corridors where we meet unfriendly palace guards.

Jarg & Sorno
Two of Karagga's best guards wait in a large room with a green floor. They are so friends that when one of the two dies, the other goes into a frenzy and increases his damage in a reckless manner. The key to the fight is therefore to kill them simultaneously.
Jarg & Sorno" src="/images/posts/447471e62d490a965065515317d148b9-7.jpg">
Jarg has a flamethrower ability that does area damage around him, so it's best for the distant ones to do this while the contact classes deal with Sorno, the healer, and try to interrupt him. to the maximum. The tank charges up with Jarg, with Sorno doing little damage.
Sometimes Jarg will use his jet-pack to get into the middle of the room and draw all the players to him. You have to get away as quickly as possible because he can be teasing and combine that with his flamethrower.
Towards the end of the fight, Sorno will fly away and pass out of contact classes. It will be necessary to finish the fight and therefore reverse the priorities of the DPS. Areas on the ground will appear during these phases. You have to get out of it, of course, under penalty of taking a rocket!
After the boss, we find ourselves in the sewers where slobbering animals roam and where scientists are doing strange experiments. We did not linger, preferring not to know what is going on there.
We arrive in a courtyard, filled with guards and monsters. There are large turbocannons (4 from memory) that must be used to deactivate the force field protecting the 3rd boss. A pack protects the access panel each time.

Foreman Crusher
Above all, be vigilant. The force field is reactivated when we engage in combat, everyone must enter the room otherwise they will be blocked outside.
Foreman Crusher" src="/images/posts/447471e62d490a965065515317d148b9-12.jpg">
At the beginning, start by killing the 4 supervisors of the Cartel of the Hutts which chain it, they have only 15 points of life.
The boss is quite simple, a big bag of life points with 3 abilities:
- throwing rocks at people from a distance: avoid it as much as possible
- a reversal: keep everyone high alive
- the frenzy which increases its damage and its attack speed ("The Crusher Foreman is unleashed!"): the tank runs! His agro is reset afterwards, the tank must be ready to take it back and the DPS to stop for a few moments.
From time to time, 4 supervisors of the Cartel of the Hutts will arrive by the big door, at the bottom, they do not have much point of life and must be killed quickly. If the tank is nearby, he will be able to take them but it is not a necessity.
After having killed the big bad and a rather annoying session of trash, here we are facing the 4th boss!
Heavy Manufacturer G4-B3
This boss is a new puzzle boss and can be quite confusing at first. For those who do not know, the principle is based on the towers of Hanoi, a puzzle game already in the spotlight in KOTOR! The principle is simple: move all the parts (here 3) to a column with the constraint that a larger element can never be on a smaller one:
- the 3 can only be placed at the bottom
- the 2 on the 3 or below
- the 1 over the 2, the 3 or below
Heavy Manufacturer G4-B3" src="/images/posts/447471e62d490a965065515317d148b9-13.jpg">
Solutions
A tool has been created by the Occo Clan which allows you to tour all the available possibilities: Heavy Manufacturer Tools G4-B3
A second tool: http://www.delistage.net/swtor/
Here's a diagram of the possibilities, found on the Versus Guild Forum:
First shot
A
I --- II --- III
B
-------- II
I---x---III
C
--------I
-------- II
x---x---III
Second tir
A
--------I
-------- II
x---x---III
B
-------- II
x---I---III
C
II --- I --- III
D
IN---------
II --- x --- III
E
IN---------
II --- III --- x
F
II --- III --- I
G
---- II ----
x---III---I
H
----I-----
---- II -----
x---III---x
Each time the puzzle is solved (all the symbols in a column), it is possible to shoot (the shoot button is to the right of the console). If the boss is well in the firing zone, he will lose his armor buffs (reducing damage taken) and become very vulnerable to damage for a short time.
This is how we lay out:
- 3 remote remain at the top, one in front of each console
- the healers, the tank and the 2 contact DPS remain at the bottom, with the boss
If ever you do not have enough remote, you will have to make do with 2 and go back and forth between the consoles.
It is important to be precise and quick. It takes good communication between the members of the raid because it is necessary to prevent shots so that everyone gets to safety and that the tank checks its positioning. As soon as the boss loses his armor, all DPS should do him maximum damage until he recovers 2 buffs.
At the end of the Vulnerability Period, stun security droids and mines appear. Distant ones deal with mines, cacs deal with stun droids. Finish off as many droids as possible before firing again as mines hurt and stun droids prevent healers from being effective and can cause the tank to die quickly and painfully!
Karagga
After having to think, here is an easy boss, which does not require a lot of thought.
Karagga" src="/images/posts/447471e62d490a965065515317d148b9-14.jpg">
This boss is a big bag of hit points and does next to nothing. We killed him on the first try without even knowing the strategy.
It has 4 capacities:
- the launch of missiles in front of him: not to be in front
- fire, behind him: the DPS are put to the side and the tank continuously advances to get out of puddles of oil
- spikes that appear from the ground and bump: hard or even impossible to avoid
- the immobilization of one or two people, who become the center of a whirlwind causing area damage, after having drawn colleagues in: the attracted people must move away quickly (the immobilized do not take part in discussions).
Mouse droids arrive several times during the fight. These little animals explode on contact, so you have to run, avoid being caught and kill them as quickly as possible. With a little synchronization between the players, the damage of zones is to be used (this method is recommended in hard mode to optimize the DPS).
Karagga and her hat" src="/images/posts/447471e62d490a965065515317d148b9-15.jpg">
Karagga thus succumbed to our blows but unfortunately did not give his magnificent hat?
Hope you learned a few things. Do not hesitate to give me your impressions on this new instance!


