In the first article, we summarized the strategies of Operation The Chamber of Eternity in normal mode.
For the brave adventurers, here are the differences between this normal mode and the hard and nightmare modes. To explain all this to you, I commissioned Son. So I let him speak!
Hello ! My name is Son, currently Jedi Special Tank Guardian and GM of the Republic Cor Hydrae guild on the Baron Deathmark server. I have the privilege of telling you about the Nightmare strategies of the various operations that currently exist in the game.
These strategies are mainly derived from my knowledge and the experience of the fights that we have experienced. You can therefore "adapt" the advice I provide to you with the strategy corresponding to your raid and your way of playing. Finally, note that this article was written for the nightmare mode where the points of life and the damage are increased compared to the difficult version. However, the strategy does not change.
First of all before telling you the differences between normal mode and hard / nightmare mode, it is important to explain some things to you about the approach to have when you go on this difficulty mode.
The strategies in general do not differ. It can sometimes be a question of frequencies of appearance, of certain techniques but the difference remains mainly on an increase in the boss's life points, a relatively short enrage and considerably increased damage.
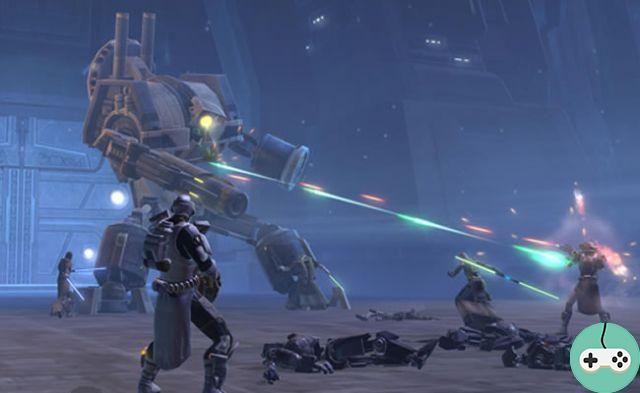
Droïde of annihilation XRR-3

Placement/Engagement
Here it doesn't change much from the strategy in normal mode. Distances, including healers, are scattered behind the boss. The cac, them, stick behind him with the tank which positions the boss back to the group.
Fighting
The boss's techniques don't change. The real difference here comes from the fairly substantial DPS to provide in relation to time (enrage at 6 minutes). Instead of hiding behind the pylons during its missile phase, you have to regroup behind it. The tank can join the group to take advantage of the healing zones.
Thanks to this technique, you benefit from a considerable gain of dps and essential for the difficult / nightmare mode. Be careful, during this phase, the healers must be prepared because the damage is quite substantial and the use of defensive improvements and assist are recommended for each member of the raid.
Normally, you will have to repeat this phase 3 to 4 times depending on your dps. However, try to keep the maximum of CD for the last percentages (around 7-8%) because its aoe phase is amplified and here it is a general burst of the group to finish it as quickly as possible.
Tip: If you have Jedi Sentinels, save the inspiration for last. If you have Mavericks, keep the shield for this phase as well.
Gharj
Gharj" src="/images/posts/3c598771b1895f21377c69841aa6bfb9-2.jpg">
Placement/Engagement
The placement is identical to the version in normal mode. The raid must always be opposite the tank and the cacs on the platform to avoid taking area damage.
Fighting
As you know, people on contact take area damage from the boss. To improve the efficiency of your group, the cacs will have to cash it otherwise you will be too slow on the enrage timer (6 minutes). There are no major difficulties with this boss. Your tank must however be attentive to the placement and position it well at the entrance of the path for each platform that arrives.
Tip:
- the raid should always pass Gharj as far as possible during platform transitions so as not to take the regular damage it does.
- the tank can, on the arrival of the adds, make a taunt to place them in the aoe made by the dps distances.
- always favor the platform transition before the adds because they go hand in hand almost all the time.
If you apply all of this, you shouldn't have a problem if the dps and gear are present (minimum tionist / columni).
The Ancestral Pillars
The Ancestral Pillars" src="/images/posts/3c598771b1895f21377c69841aa6bfb9-3.jpg">
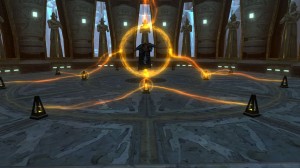
Apart from the dysfunctions, we must admit this event is very easy. The activation delay is there of 1 minute so we can only help once.
Personally, we have discovered that in Nightmare Mode a very often walking technique is to ALWAYS validate south first. Otherwise, know that there is a timer that corresponds to the waves of adds (about 3-4 minutes) so you must use the simulation to not waste time with the clicks.
There is only one noticeable difference between normal mode and nightmare / hard mode - the person clicking on the console recovers a debuff that prevents them from clicking again for a period of time. A rotation between 2 members on each side fixes the problem.
The Hellish Council
The Hellish Council" src="/images/posts/3c598771b1895f21377c69841aa6bfb9-4.jpg">
Placement/Engagement
Hit points increase right here in the nightmare version.
- Healer => 48 hit points
- Damage => 110 hit points
- Tank => 72 life points
The principle of the duel remains the same.
Soa the demonic
Be careful, in the nightmare version, Soa is much more difficult than most of the bosses you will have encountered so far. He has approximately 1 million health points.
Recommended composition: 1 tank / 2 healers / 1-2 cacs / 4-3 distances
The dps to provide is considerable especially in phase 5 (29% => 0%) in 5 switches of 12 seconds. It is above all a matter of properly managing the placements and the preparation of the switch to do the maximum possible damage.

Fighting
Phase 1: Here not much that changes, do not stay in the green areas that arrive 2 to 3 times on the sources of power. It is a very easy phase (100% => 74%).
Phase 2: P1 / P3 transition which requires jumping from platform to platform. Remember to destroy the pylons before moving to another platform. Also, try taking care breaks.
Compared to the pylons, Soa has 5 aoe stack at the end of P1. Destroying the pylons causes these stacks to fall, the goal being to get to 0, because Soa will caster at the start of P2 as many aoe (-10k) as there are stack. The important thing is above all to destroy the pylons in order, if people in a bit of a hurry destroy a pylon before the one on the plate above, this blocks the "unpacking"!
Tip: To be safe, organize two general breaks while waiting for two platforms during this phase.
Phase 3: Be careful here, it gets tough. Soa spawns balls (two at the same time in nightmare version) which will each take a random target in the raid. You must go and detonate them by going through them if you are the target. Be careful, the balls emit chains of lightning at 5 meters range and do not explode if you are not their target. You must therefore be sure that this ball follows you to then go into contact (cross it and not tickle it).
I will therefore set out some rules to be respected that we have chosen to follow so that this phase takes place without too much problem.
- The whole raid meets in the center of the room with the tank.
- Only distances deal with mental traps (depending on your composition but this is much more effective).
- The people targeted by the balls must move away from the raid to go and detonate their respective balls. NEVER cross your teammate's ball.
- Never go around your ball, you have to rush at it, otherwise you take a chain twitch of 4-5k damage and the explosion that can go up to 10 damage (yes it stings).
- Always try to be certain that the right ball is following you or you will die from the damage of these lightning chains.
- The tank must move to explode the ball like everyone else.
- A medipack or a CD is always welcome for the healers when you go to explode your ball. If you have a scholar, he must do his best to shield the two people the balls have chosen before the explosion.
- Try to quickly bring up the people who have exploded their balls, because they can be caught in a cyclone just after (sending in the air cf. normal strategy) and die.
- Try to kill the mental traps quickly, especially if they are trapped healers. The demand for care during this phase is considerable.
- When the boss switches to P4 (74% => 29%), keep this in mind: always prioritize the cyclone. If a person is in it, wait before passing it to P4 because otherwise it will die without having any possibility of resurrection.
You will have understood that in this phase a good management of the boules is the key to success. You will need practice to get there. The order of priority for the P3 / P4 transition is therefore Cyclone> Mental Trap> Ball.
Phase 4: Here, Same as for phase 2. Any advice, don't stress? because you will see that the tension rises very quickly after the passage of the P3.
Phase 5: Soa arrives at the bottom with 29% health. The strategy of this phase does not differ from the normal strategy, except that there will always be two arrivals of balls and the enrage of the 4th pillar (which is mandatory) one will shoot your tank almost all the time.
What should be remembered is that for the first switch, you must be between 18 and 21% otherwise you will be late for the rest which leaves you less margin for error.
You must also be careful on the boules because the short phases on Soa will make you forget them which could lead to a loss of 2-3 players. So always remember to provide a sustained DPS on mental traps to avoid having too many people stuck in them.
The order of priorities for this phase is therefore Soa> Ball> Mental trap. This is to be adapted according to the situation of course. Remember, there are only 5 changes on this phase, after the 5th, it will no longer be possible to dps.
The P3 remains the major difficulty of the fight in terms of power of healing to be provided and its rather random sides of the techniques which can make a deadly combo for some players (example: balls / cyclone).
Finally, know that there is no enrage in the fight. Enrage is only present in phase 5 and will be activated at the 4th pillar. So choose survival for phase 3.
Hope to have helped you!
His.


