


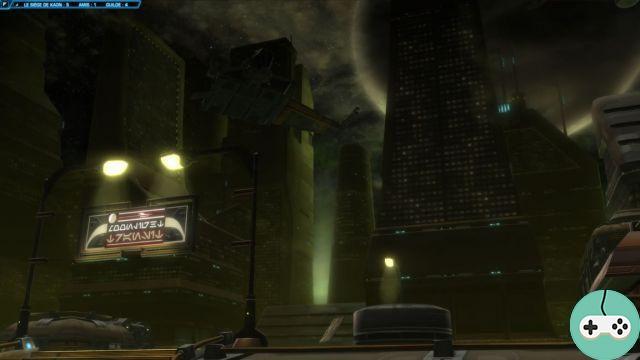
This instance, rolled out in SWTOR update 1.1, is available in Normal and Hard (HM) mode, for both Republic and Empire. The mysterious illness of the Rakghouls is the main theme of this instance, worthy of an excellent survival-horror. Creepy and dark atmosphere, shrill cries, zombies and other surprises, it's all there!
The group
Even if the instance is not, in itself, extremely difficult, some passages can be quite complex for the healers to manage, much more than in other instances. So go with someone you know or at least that you can have vocal with you, it will probably save you a lot of misunderstanding and death.
After completing this instance with several types of groups, it now seems clear to me that the easiest technique is to only start with “distance” teammates (tank and DPS) of the type:
- Tank (the best, the most beautiful, the Gods: p What do you mean, “which class I play?”): Avant-Garde (Shield Mastery specialization)
- Healer : Scholar, Thief or Commando (Care specialization, no preferential class)
- Nags (: p): Commando (DPS spec), Scholar (DPS spec), Maverick
This type of group will greatly reduce the load of healing that your healer will have to provide. If, however, you have no choice in the composition of the group, remember to brief everyone beforehand! This guide will be (I hope) beneficial to you.


The trash mobs
Unlike the other instances, the trash here is quite complex and can easily decimate your party if you don't pay attention. A general precaution is to always let the tank advance in front of the group at a safe distance. Indeed, mobs sometimes appear while springing from the ground and it is then easier for your slapping taker to recover everyone's aggro.
Four types of mobs can cause you problems:
- Screamers
- Infected Mercenaries
- Infected Hunters
- Epidemic Swollen
These are the least annoying of the lot. Other than making your eardrums bleed like a Mayhem gig, they push the tank back relatively far. If you don't want to have to tickle the dandelions by the root after tickling the pigeons, pay attention to your placement! Jumping into a secondary mob pack is quite confusing ...
These have a very annoying, potentially deadly power: "Strangulation". This very long channeled ability blocks the targeted party member as long as it is not interrupted by absorbing their life in the process. On a DPS, it's annoying. On your healer… Well, you can imagine… Manage your interruptions well and everything should be fine.
In the “Tank Nemesis” category, here are the winners! These mobs have the unfortunate tendency to easily lose aggro. This often results in a jump on one of the group members, the only way for the tank to recover it for a few moments then being to launch a taunt. Good management of these taunts is essential, unless your group has a burst force worthy of a Jean-Pascal "song" (for those who have never tried it, be careful: it's OS guaranteed!).
Mob normal, not too worrying until he gets to around 10% of his life. At this point, it begins to inflate and explodes 2 seconds later. The explosion (AoE of course) is quite violent and can easily cause the death of a group if this mob is not the last one standing. For your information, being Vanguard with full Combat Master equipment, the explosion took me almost a third of my life, or about 6.700 HP ...


"Boss" n ° 1: Defense against Rakghouls
During this first encounter, you will have to defend yourself against waves of monsters arriving on you, using a turret, like the "Collicoid War Game". Make sure to clean the surroundings well before starting this fight, by clicking on the big box then on the turret located just in front!
If the first waves are made up of standard mobs, our friends listed above quickly join the fiesta!
Please Note: The turret will only fire if it is pointed at an enemy. The rate of fire is quite fast (3-4 shots in about 2 seconds) and does good damage (800 per shot, from memory). In addition, each shot passes through enemies and injures anyone in its path. The goal is therefore to make “pâtés” of mobs (or skewers, but it's hotter and if you mess up, you're toast… Ok, I'm going out: p).


- The "bourrino-sprotch" method
- The “lazy home-like” method
Troubling for your healer, and potentially risky, it involves having one of your DPS without AoE on the turret. The latter will duck the Raks while your tank will run around trying to group them on top of him to facilitate pigeon shooting. The poor healer will sweat but it seems that it is good for the health! Be careful to manage elite mobs as explained in the paragraph “Trash mobs”! Be careful, mobs can arrive from anywhere around the turret (360 ° what)!
This method is complex and requires responsiveness, placement and precision from your entire group. If you pull it off quietly, a finger on the seam of the pants, drinking your coffee and reading the newspaper, well done! You can claim the Roxxors category and I bow down!
Well here, no mysteries, we are faking the system.
Next to the turret, you will notice a piece of rutted wall on which you can make your group climb (as high as possible eh ^^) very simply. The monsters cannot climb on them and therefore line up below, in nice, compact packs, ready to be atomized.
So the tank takes place on the turret, strains everything that passes in front of its cannons while the healer heals it. The DPS can, if they are distant, send the mash in peace. For the CaC DPS, well it will be the moment of the pee-coffee-cigarette break.
Boss # 2: The Testosterone Breastfed Rakghoul
Your next boss will be a huge Rakghoul, probably breastfed by Chuck Norris himself, who will appear as soon as you approach the center of the room. Before that, go locate the explosive barrels in the corners of the room.


As soon as you understand the technique, this boss becomes quite simple:
- The Rak 'engages in combat by jumping on your group. The tank must then take it back and bring it to a corner of the room.
- Once positioned next to the barrel, detonate it and the Rak 'will undergo a debuff (you will see flames on its body) allowing you to inflict maximum damage on it.
- The tank must, as soon as the barrel has exploded, kite the monster in order to bring it to the next corner, while the group sends the sauce. This is a bit tricky since if the tank gets too far away, the Rak 'jumps on it. Conversely, if he stays too close, she sends him a model uppercut "PèteRatiches n ° 5" which will send him back to say hello to the pigeons (good friends now). It is normally at that moment that you will be happy to have listened to me and to have made a group made up mainly of distances?
- Repeat this sequence until the death of the beast.
Note 1: As soon as she gets below 50% of her life, the Giant Rakghoul will go into frenzy on a regular basis. At that moment, announced by a big red message, move away a little. While the damage isn't phenomenal, it can still be quite a slap in the face and surprise your healer.
Note 2: It seems obvious to me, but it never hurts to re-specify it: the room has only 4 corners. Which means you only have four barrels to kill the Rak '. If she isn't dead by the end of her fourth debuff, expect to have to start this fight again ...
Note 3: Your DPS will be maximized for a few seconds after a barrel explodes. So remember to save your brute attacks for this time!
Boss Bonus: KR-82
Well, this is certainly the bonus boss, but the general opinion is also the hardest boss of the instance. Then again, you'll be happy to have a majority of distance in your party, as this droid is relatively painful to the CaC.

There is nothing out of the ordinary about this droid. He hits hard enough but nothing transcendent. However, some of these attacks can give your healer a cold sweat (or trigger a stroke in extreme cases) if your group has not prepared well. This is why it seems important to me to explain the attacks he uses. It therefore has the following skills, ranked from the least to the most deadly:
- Explosive Shot: The little moment of fear of the tank. Every 15 seconds or so, the boss turns around and launches a missile at one of the group members. Contrary to what all tanks will think for 2 seconds, there is no loss of aggro, no panic. This attack does small area damage, easily avoided if players are standing a respectable distance from each other.
- Barrage : Channeled attack. This is a real burst, sending big damage in a short time. As soon as the healer sees the launch of this skill, he will have to be ready to reassemble the life of the poor victim. Lucky for you, the CD for this attack is relatively long, about 1 minute!
- Grapple: The skill every tank would dream of! An area grapple that brings all party members (within a 35m radius) back to the CaC, every 30s or so. Nothing catastrophic in itself, except that directly after comes an AoE centered on KR-82 which does good damage. You can dodge the problem, however, by hiding behind a barrel, crate, or your original size Wookie plush, 2869 edition, if you have one.
- Energy shield: Okay, now we start to discuss. It's this attack that makes this boss so hard to kill. At 66% (then 33%) of his life, KR-82 surrounds himself with a force field for 20 seconds. It will not attack the group during this time but will summon 3 probes (Strong level) which do a lot of damage. The most common technique therefore consists of checking 2 of the 3 probes, killing the third, then finishing the first. For probes reaching 33%, just kill one, then focus on the boss, while controlling the remaining 2 probes in a loop.
Note 1: The Energy Shield does not protect the boss from damage?
Note 2: The placement is very important for this meeting. If you don't want to have to scoop up your healer with a teaspoon, you have to stay relatively far from each other, to avoid all AoE damage.
Know that, if you pass the first phase of ads, you have a good chance of overcoming this boss?
Bagarre finale: Commandant Lk'graagth, Chak'aghakh et G'klarg
The pronunciation of names is the main difficulty in this fight. Nothing very transcendental otherwise.
Know first that the 2 minions of the Commander do not have aggro. You can therefore forget your tank, these mobs will roam around attacking those that their leader will designate for them. Rest assured, they don't hit very hard and unless you're in white Owl gear, that shouldn't be too much of a problem. However, for the fight to run smoothly, it is important to drop these adds first. Pick one, graze the tar and move on to the next one.
Whenever one of the Commander's companions dies, a wave of addons arrives. These are normal little mobs that the tank will be happy to take back and the DPS a joy to atomize brutally.
Once Chak '(for close friends) and G'klarg are dead, you can express your affection to Commander Lk'graagth and send him, too, to join these ancestors!
Taelyck


