


My name is Loonya, tank specialist of the Ufrog guild on Darth Nihilus. This guide is taken from my personal experience with SWTOR, so it will necessarily be subjective. By respecting it, it allowed me to clean all the content currently in play and therefore allows to do PvE HL in good conditions.

template
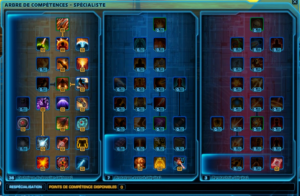
I am using a template 36/7/3 !
The goal of this template is to get the 36 point skill from the defensive branch. At the same time, we take the opportunity to take the talents obviously increasing our defensive capacity, but also those allowing to facilitate our generation of animosity (aggro).
On the Advanced Prototype branch, I take Prick et Prototype combustion stimulators to increase the generation of aggro to the maximum. The first because 3% remote and techno precision are not negligible. Reminder: techno damage includes Energy and Kinetic damage (see table below). The second, because the specialist's fire skills are very present (Flamethrower, Heat Breath, Flame Burst and Flame Sweep).
Unlike other tank classes, the 36 points of Tech. shield numbers do not vary from boss to boss. And the only visible changes will be in the Advanced Prototype and Pyromania branches. It's up to everyone.
Example: Template 36/5/5.
Rotations and Cooldowns
The specialist threat generation is not a cycle. It's an order of priority and this is even more true since the modification of the Flamethrower. The aggro of a specialist can therefore vary enormously from one fight to another depending on his luck.
Single-target combat opening:
I open the fight with Explosive dart, directly followed by Charge Express. We slam it Lightning point.
At this point, there are already a lot of possibilities (8 exactly):
- No proc de Aligned shot, neither of Flamethrower, neither of Dazzling point (no chance…)
- Proc of Aligned shot but not Flamethrower, ni du Dazzling point
- Proc of Flamethrower but not Aligned shot, ni du Dazzling point
- Proc of Dazzling point but not Aligned shot, ni du Flamethrower
- Proc of two of the three skills ...
- Proc of three (Lucky)
You see the table… We must therefore adapt according to what we have available. The Neural dart (mono provocation) will therefore intervene more slowly in the fight depending on the procs.
In all cases, the tendency to respect is Searing Point> Line Shot> Flamethrower> Unloading > Burst of Flames > Explosive dart (the skills mentioned above except Burst of Flames must always be on CD).
Then there is the Breath of heat, this can only be used when the specialist has 3 stacks ofHeat shield. This skill must always be on CD because it increases absorption by 25%! And being outside of GCD, it's easily usable alongside another Instant Skill.
Random example in Mono-target:
- Explosive Dart
- Charge Express
- Flamethrower (proc something else ...)
- Dazzling Point (Aligned Shot proc)
- Aligned shot
- Flamethrower (canalization of 3s because no proc ...)
- Breath of Heat
- Unloading
- Flame Burst (proc du Flamethrower)
Multi-target example:
- Death from the sky
- Charge Express
- Flame Sweep x2
- Explosive dart
- Missile Sonique
- Aligned shot
- Flamethrower (by positioning yourself intelligently)
- Breath of Heat
- Oil jet (in case of loss of aggro the 70% slowing down is practical)
- Flame sweep
Cooldowns :
- Energy Shield: it's our biggest defensive CD. It must be preserved to avoid death. This is our real Panic-Button !!
- Usable Relic: like the Energy Shield, it's a Panic-Button, but it's less effective. We can use it a little more frequently for situations that are perhaps less critical.
- Shoulder cannon: there are several advantages to this skill. It is out of GCD, can be used while being CC and on top of everything each missile heals you for 5% of your health points (so 20% in all).
- Grapple: it allows us to bring a mob to us.
- Hydraulic handling: Not only does it increase movement speed by 30%, it also makes it immune to movement, knockdown, and physical effects.
- Kolto Overload: this buff will stay on you for 1 minute and will only activate when you drop below 35% health to heal yourself. For an amount of 2% of your health per second after rising above 35% of health.
- Explosive Fuel: Sure, we're Tank, but we also have a CD that allows us to increase our critical chance by 25% for 15 seconds. We can use it at the start of a fight to increase our generation of animosity, for example, or in a DPS burst phase. When active, Explosive Fuel increases alacrity by 5%.
- Determination: As with all classes, this skill negates crippling effects.
- Gel by Carbonite: interesting on trash packs in order to better control them.
- Oil jet: interesting on trash packs but also in mono-target in order to reduce the precision of the mobs hit.

Heat management
The higher our heat, the less quickly it will dissipate. It is the basis of our class. We must ensure to remain in rapid heat dissipation, ie below 40/100. To do this, you will have to try to respect as much as possible the rotation of skills recommended previously, if this is the case you should not have a heat problem. Otherwise, do not hesitate to use Chain of Fire when the 40% approach and capacities reducing your heat.
- Breath of Heat: it reduces our heat by 8 points. It should be used as soon as it is available.
- Thermal manipulation: this ability allows us to use our next skill for free in heat. You have to use it when you absolutely want to launch an ability and you are already above 40 heat points.
- Heat Dissipation: he's kind of our Joker. It dissipates 50 heat points in 3 seconds. It should only be used if you made a heat management error or after an aggro burst.
Statistics and Caps
In this part, you have to understand that it is theoretical and that we are never really optimized. To be perfect, it would therefore be necessary to have several pieces of equipment that we would change from one boss to another. And even there, we wouldn't be really optimized because during a fight, the damage changes. Styrack example: Dragon Kell does internal and elemental damage, so defense will be more recommended and Styrack itself does energy and kinetic damage so shield / absorb will be more recommended for this fight.
The best is therefore to achieve a theoretical balance depending on your equipment:
- Defense : I recommend having between 16 and 21%.
- Shield: I recommend having between 41 and 46%.
- Absorption: I recommend having between 40 and 45%. It is also advisable to have a percentage of shield higher than that of absorption because the latter is increased in combat by the Breath of heat, the Heat shields and the relic to proc absorption. It is therefore not uncommon to go up to 80% absorption in combat.
- Endurance: once the caps are reached, it is the endurance that must be increased. Be careful not to mount it at the expense of defensive statistics.
- Aim: it is not a statistic that we mainly focus on, it goes up on its own.
My stats in 78: 18.87% defense, 45.10% shield, 43.83% absorption and 42349pv.
You can find them on my AskMrRobot: here (Please note that AskMrRobot may change over time, the aforementioned statistics may no longer be relevant).
Equipment
Supercommando set bonus:
We absolutely need the 4-piece set bonus which increases our defense by 2%.
- crystals
- Cannons
- Shields
- Modifications
- Sophis
- Amelios
- Relics
Color crystals:
- +41 Stamina (you choose the color)
Canon:
- Advanced Commando Barrel 34
Shields:
- Advanced Commando Armoring 34
Changes:
- Advanced Weighted Mod 34
- Advanced Deflecting Mod 34
Sophistications :
- Advanced Bulwark Enhancement 34
- Advanced Bastion Enhancement 34
Improvements:
- Advanced Absorb Augment 28
- Advanced Redoubt Augment 28
- Advanced Shield Augment 28
Relics:
I recommend a passive and an active.
Among the active, we have the choice between:
- Relic of the stolen crusader of the underworld: it increases shield and absorption by 265 points for 30s (i.e. + 5% approximately). Very useful since absorption depends on the trigger of the shield. I advise you to activate at the same time the absorption dopant which increases your shield and absorption by xxx points for 15 sec! By stacking the 2, you gain roughly 9-10% shield and absorption.
Note: I deliberately put a relic 72 since the duration of use has decreased by 10sec on the 75 and 78 therefore less interesting.
- Relic of Dread Forge of Compromising Serenity: It increases defense by 490 points for 20s (i.e. + 5% approximately). The defense relic is interesting for a specialist because he has little of it and therefore the 490 index points are not subject to the depression of the curves.
For the passive relic, I recommend:
- Dread Forges Shield Amplification Relic: Increases our absorption by 625 for 6sec. Available every 20sec.
Damage distribution table by attacks
Conclusion
I hope this guide will help you to understand this class. If you have any recommendations or questions, feel free to comment on the rest of this article, and I'll be there to chat with you.


