


Update 2.9 Galactic StrongHolds was not only made up of fortresses, guild ships or even conquest. It also saw the appearance of a new Tactical Litigation Zone, Manaan Depths, which, as the name suggests, takes place on ... Manaan! Well done, you follow well!
This is the second part of the story arc Forged Allianges. As for the story, I won't tell you much, I will rather let you find the little droid on your respective fleets who will send you to Theron Shan or Lana Beniko to find out what brings us to Manaan.
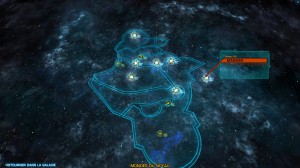
Speaking of the planet, note that Manaan has been added to your ship's map, in the Core Worlds area. Cost of the trip: 2700 credits.

Manaan loading screen
Summary :
- Once there
- Heal yourself during the Litigation Zone
- Regarding enemies on the way
- Premier boss: Sairisi
- Second boss : Ortuno
- Last boss: Stivastin
- End of the ZL and related successes
Once there
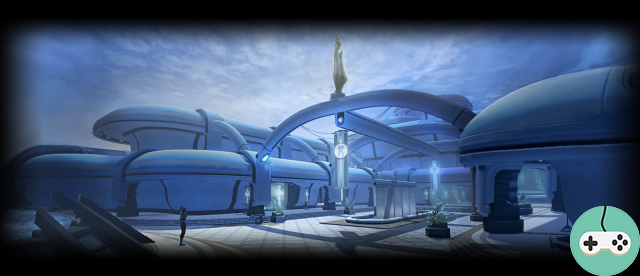
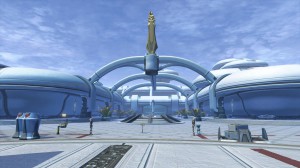
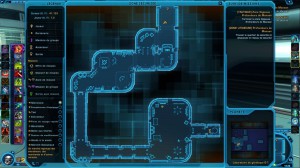
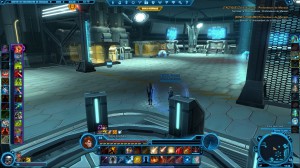
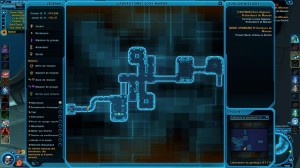
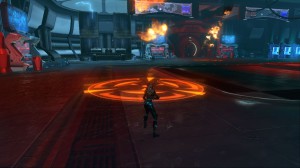
Once there, former KOTOR players will undoubtedly recognize the music. We find ourselves on a floating landing platform whose decor is very nice, including the small cantina on the right, a place that will surely appeal to gamers. The entrance to the contentious area is a little further, you must first cross a corridor and go to the lobby of our faction, where you can also find the seller linked to the ZL.
Let's start in the contentious area, which brings us into the G-1 genetics lab. Objective number 1: make your way to a security terminal.
Heal yourself during the Litigation Zone
Small novelty in this ZL, it contains barrels of crude Kolto that you can break with a simple right click. It will heal you strongly and will also heal close people but in a less important way. You will find around sixty of these barrels scattered throughout the Flashpoint near groups of enemies. At the boss level, you will find the kolto dispensers found in other tactical contentious areas, as well as kolto vats on the last boss. These tanks if exploded, leave a large area of effect on the ground around it, only those remaining in this area will benefit from its regenerative powers.
Note for the barrels, a success that will give you the title of inheritance "100% natural" which requires breaking 500.

Regarding enemies on the way
Before talking about the bosses, a word about the enemies you will meet along the way, some will attract you to them, others will push you back, some will jump on you too, not to mention those who will deploy damage zones and those who will heal their allies. . In short, a great diversity in the enemies, something very appreciable for me, even if they do not pose much of concern.
Along the way you will meet a lot of droids which will please those with the Salvage gathering skills.
Keep an eye on the way too, you will find consoles, datapad and others which will give you additional indications when hovering with the mouse. This information is not necessary for the success of the zone, but will allow you to learn more about the experiments that take place in this laboratory.
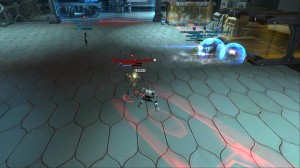
Premier boss: Sairisi
The first boss is Sairisi, the laboratory security commander. Take care before engaging that each member of your group has crossed the yellow dotted line, otherwise, he will find himself out of the fight and will not be able to help you.
Point of view : 556 706
Additional enemies : 2 Riot Droids BL-1T: Champions with 185 hit points each.
Buffs : All three have the "Boss Immune" and "Steadfast" buffs which prevent them from being stunned, affecting their movement, knocking them to the ground, or interrupting them.
Shield Mechanism: The droids each have a "riot shield" that allows them to make the person they place them invulnerable. Before the fight begins, the shields will be on their own, but as soon as the fight begins, one of the droids will place it on Sairisi.
Progress by stage of the fight:
- Attack the droid without a shield, for up to 50% of his health.
- He will take his shield back on him and the second droid will place his on the boss.
- Also lower the second droid to 50% health.
- He will take his shield back on him leaving the boss shieldless and now vulnerable.
- Attack Sairisi until he kills him. The droids will deactivate when he dies.
Additional mechanisms:
- In addition to this, throughout the fight the droids will use a grappling hook to attract the person they are targeting. This grapple will stun the person for a few seconds. People in cover will not be attracted but it will break their cover.
- The grapple is a red-colored cone attack in front of them. Getting out of this corridor in time allows you to avoid the grappling hook. Once the area is defined, they will no longer turn until the use of the grapple. The time to get out of it is nevertheless very short.
- The boss regularly launches missiles at his target, which has the effect of pushing it back in addition to inflicting damage. This is a salvo of two missiles repelling and therefore throwing the victim twice on the ground.
- He is vulnerable to his friends' grappling hook, which will also prevent him from launching his missile spell. Be sure to place it in the area of effect of the grapples.
Until the second
Following this boss, you will be able to log into the security terminal and conduct a conversation with Jakarro during a relatively long cutscene. You can then choose to release him willingly, or release him reluctantly, after which he will let you continue alone while he goes back to get his equipment!
You can then head to the elevator leading to the underwater laboratory, second part of the complex, where your goal will be to locate people able to answer the questions of Theron Shan / Lana Beniko.
Enjoy the scenery, you are underwater. At the first point of objectives, you will have a pupil and a guard of Sasha to face, two elites with 45 points of life each one helped by two additional enemies. On the program for this group of enemies: healing zone from the guard, grappling hook, stun, and multiple damage zones! In a group, however, you shouldn't have any problems if you tackle additional enemies well first, while a party member remains on guard to interrupt their power channels.
Second boss : Ortuno
The second boss then, Ortuno!

Point of view : 620 400
Additional enemies : 2 followers after each channel of "Flot".
Buffs : Like the first, he is subject to "Boss Immunity" and "Steadfast".
Combat mechanics : No phases strictly speaking, the boss does the same chain of powers continuously:
- "Throw" attack, which places a puddle of water under the target's feet. Staying in the puddle places the "Aqueous Field" debuff on us which increases damage taken by 300%, and if you stay in the puddle for a few seconds after it is put down you are electrocuted and stunned. It is advisable for the person who is the target of the boss to shift right out of the puddle in order to minimize the space taken by them, as they persist on the ground.
- Every 5/6 projections, the boss will channel a "Flow". It then becomes invisible, and the puddles will roughly double in radius. At the same time, it will throw a rain of lightning throughout the room. This rain cannot be dodged, but if you stay in the puddles you will be electrocuted and not be able to move. In addition, puddles increase damage from lightning.
- At the end of the flood phase, he begins again, with two additional enemies who come to assist him each time.

Once the second boss is defeated, you can speak to the scientific chief of the complex, and find old employers who will leave you a small underwater mine as a souvenir, just to sink the complex and you with it. Then begins a race against the clock to go to the airlock which will allow you to exit thanks to outside help!
There is just a corridor to go with few enemies then a door at the end which will launch a mini cutscene.
Be careful, as soon as you start the cutscene, you will have triggered the timer for the end boss, a charming creature from the laboratory experiments, specimen 71.
Last boss: Stivastin (Specimen 71)

Point of view : 911 422
Additional enemies : During phase 2.
Buffs : He only has "Boss Immunity" and this time you can interrupt his spells.
Combat mechanics : We can sort of distinguish 3 phases which all have the same combat cycle, but with secondary elements that change. Here are the phases:
- Presence of the shield
- Absence of the shield
- Arrival of reinforcements.
It is equipped with a shield at the start, it absorbs 50% of the damage you inflict on it. To blow up his shield, you will have to make it pass through flames which will overload him. The shield will not come back afterwards and you will only have to take care of the basic cycle. Finally, after a while (which is 50% of his life?), Reinforcements will arrive in waves of 3 droids each time. They then return on a regular basis.
Basic cycle of combat :
- Attack the boss
- When the lights will dim and then come back, an orange area of flame coming from the ceiling will appear. Be careful though, the weakening of the lights is not noticeable when playing in low and very low graphics. Those who play thus will have to be extra vigilant to see the areas of flame because no warning sign will prevent them.
- Move the boss under the flame area. This will inflict damage on him, moreover, when he has accumulated 5 times the Flame Debuffs (while staying in it), his shield will jump for the first time and he will be paralyzed for a few seconds. During his paralysis, take the opportunity to send the big attacks because he will suffer more damage. Ideally, you can also place the reinforcements from phase 3 under the flames, this is very effective at killing them.
- Start over and move it as soon as more flames appear.
Also note:
- At any time, the boss will be able to channel an attack that will make the person he targets fly back. This person will then not be able for 10 seconds to take the aggro of the reinforcements or the boss, even if he is a tank. This debuff cannot be purged, which is why it is important to properly interrupt the channeling (very fast) of this attack, or that everyone moves towards the flames and not just the tank.
- You will find on the side of the room kolto tanks, which once exploded (simple right click) will leave a healing area around it for a few seconds. The vats do not regenerate in combat unlike the kolto dispensers that you will also find.
Stopwatch: I saved the best for you for last. You only have 5 minutes to defeat the boss before you die. If not ... well I'll let you find out what will happen, the boss will enrage? Or maybe you will die directly from drowning?
End of the ZL and related successes
Once the last boss is defeated, you will have the right to one last small cutscene, then to come back to the surface where you will be waiting for the loot left by the end boss.
Each boss has a chance to drop a "Manaan Research Data", which will allow you to purchase various items, as well as an area-exclusive Selkath decoration. However, in 4 times, I only saw the decoration once, on the end boss.
Finally, who says new Litigation Zone, says new successes. There are 18 of 6 different types:
- 3 successes by eliminating enemies: Defeat 200, 800 and 2000 enemies in the area.
- 12 successes by eliminating the bosses each separately: 1 time, 10 times and 25 times.
- destroy 500 barrels of kolto, which will give you the title of heirloom "100% natural"
- obtain the other 17 achievements, which will give you the legacy title "Honored Aerobics"
This guide ends here, hopefully waiting for a tough version at this hot spot! I would like to thank those who helped me to make this guide possible: Djesa, Lemari, Heeresh, Nogevio and Juliaan (and little addition from Juliaan for the screens: DrQueen, Obiwanjeuneuséki and Alorma).


