


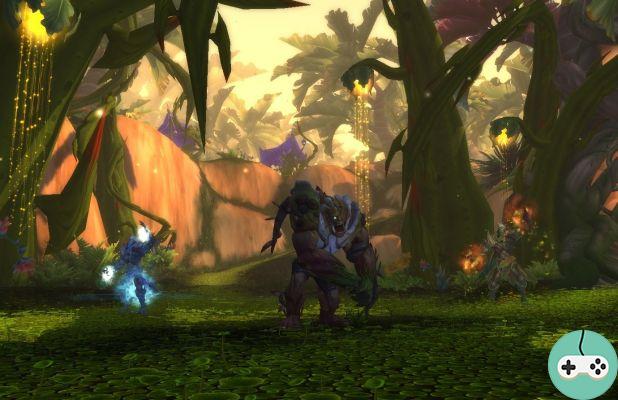
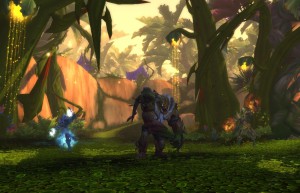
Arriving in Draenor, the Kirin Tor realized that outposts had to be established to supply the armies of Hurlevent with reinforcements and provisions. One of these outposts is located near the Fonderie des rochenoires in Gorgrond. The vegetation is dense and old ...
There are 5 bosses to defeat and the equipment to collect is level ilvl 615 on normal difficulty and 630 on heroic difficulty.
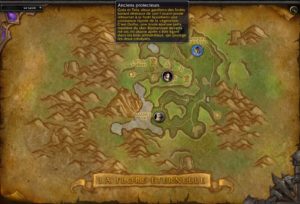
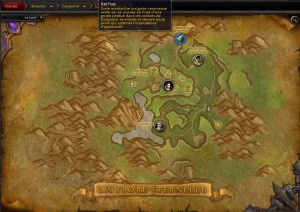
Boss to defeat
- Witherbark
- Former protectors
- Xeri'tac
- Archmage Sol
- Yalnu
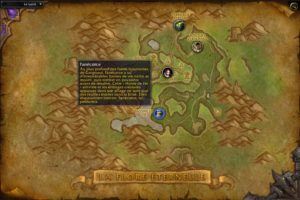
Fanbark is a very ancient treant, who has seen the forests of Gorgrond evolve over the years and be shattered by the arrival of the Iron Horde and other factions. He is now determined to restore calm and peace to his territory.
Techniques
- Fragile Bark: The bark becomes fragile which stuns it and increases the damage it takes. This effect is negated when the Bark reaches 100 energy.
- Withered Gasp: Witherbark unleashes a torrent of energy that deals heavy damage to all players in a cone in front of him.
- Uncontained Growth: Witherbark grows vines that move towards a player. When it reaches its position, the vine explodes, dealing area damage.
- Uncontained Growth: If the vine is hit by a watery globule, it uproots and attacks nearby players.
- Choppy Water: The waters of the lake swirl around and launch a live stream of eay from a player, dealing area damage.
- Watery globules: Water globules form in the nearest lake and move towards the bark. If the treant absorbs them, he gains 25 energy points.
- Aqueous Explosion: If the Aqueous Globule is defeated, it explodes, dealing damage to all players.
Manage the fight
Phase 1
During this first phase, Fanbark sees its energy gradually decrease to 0.
Tank
- Tank the Bark in the middle of the area, facing the water.
- Use a defensive spell when Witherbark casts Withered Gasp.
- If a player is targeted by Uncontained Growth, move the Bark so that melee DPS does not take damage from the growth.
- Note that the bark freezes when it runs out of energy.
DPS
- Ranged DPS can be targeted by Uncontained Growth, so you have to kite the vine out of other players and out of the combat zone. Once the growth has come out, walk away from it.
- Melee DPS cannot be targeted by Uncontained Growth, but ranged DPS can cause it to pass nearby. Get out of its way.
Healer
- The healer can be targeted by Uncontained Growth, so you have to kite the vine out of other players and out of the combat zone. Once the growth has come out, walk away from it.
- The tank takes very high damage from Dry Gasp.
- The rest is quite calm during this phase.
Phase 2
During this second phase, the bark itself applies the fragile bark and watery globules appear to restore it. Witherbark no longer casts Withered Gasp but Uncontained Growths continue to arrive.
Tank
- Deal damage to Bark or any watery globule that comes near.
- Blood cells can be repelled and slowed down with skills.
- If uncontained Growth appears (if it has crossed a blood cell), induce it immediately.
DPS
- This is a good time to cast Blood Fury, Heroism, or Time Warp.
- Melee DPS must stay towards the Bark for the collateral damage to work on the water corpuscles as well.
- Ranged DPS take care of killing the Watery Blood Cells, prioritizing those that might come across Uncontained Growth.
- Blood cells can be repelled and slowed down with skills.
Healer
- It's a good time to use long cooldown spells.
- The entire party will take moderate damage for each globule killed.
- The tank takes repeated damage if there are multiple uncontained Growths.
There is a strategy which aims to not move the boss from its initial position and to position the DPS at a distance at the limit of the Growth range (you can hit the boss anyway). With Heroism cast at the start of the second phase, the fight doesn't last very long.
Heroic / Challenge
There are two new mechanics in these difficulty modes:
- the lake will cast Rough Water. This damage can be avoided by exiting areas with a pale blue indicator.
- Witherbark will continue to use Uncontained Growth during phase 2. As a result, by leaving contact to kill blood cells, contact DPS and the tank can be targeted. This makes healing difficult, so it's best if they stay on the boss and only attack globs nearby.
Booty
After defeating the Treant, you will have the option of obtaining a Crossbow or Trinket (Floraskin Punch and Witherbark Branch), as well as Cloaks and Gloves (see full list).
Gola and Telu are two Botani guardians who want to see the Kirin Tor outpost disappear. Dulhu, a half-orc-half-plant creature protects the two botani.
Techniques
Gardevie Gola
- Draft of Water: Gola bombs a random player. This spell can be interrupted.
- Revitalizing Waters: Gola heals an ally for 15% of maximum health. This spell can be interrupted.
- Swift Tides: Gola reinforces an ally, removing their cooldowns. This spell can be interrupted.
Telu Earth Sculptor
- Wrath of the Wild: Telu hits a random player. This spell can be interrupted.
- Bramble Bush: Telu spawns brambles under a random player, slowing and injuring them. This spell can be interrupted.
- Bramble Skin: Telu protects an ally, reducing damage taken by 75% and injuring attackers. This spell can be interrupted.
Dulhu
- Noxious Eruption: Dulhu deals damage to all nearby players and knocks them down.
- Slash Charge: Dulhu charges a random player and injures them (damage over time).
- Greedy Creeper: Dulhu envelops a random player, pulls them towards him, and slashes them.
- Slash: Dulhu attacks Greedy Liane's target and also damages nearby players.
Manage the fight
Combat is typical of a board in that all three bosses fight at the same time. The order of focus is Gola, then Telu, and finally Dulhu. It takes many interruptions to wage this fight.
Tank
- Gola and Telu cannot be tanked. Just keep your threat on Dulhu and tank him near the current target.
- Exit the Noxious Eruption area of effect.
- Interrupt Revitalizing Waters and Rapid Flows of Gola.
- After dropping Gola and fighting Telu, interrupt Bramble Bush and Bramble Skin.
- Exit Bramble Bush if you are the target.
DPS
- Use Heroism, Time Warp, or Blood Fury early on to defeat Gola as quickly as possible.
- Stop dealing damage if your target has Bramble Skin.
- Melee DPS must move outside of the Noxious Eruption area of effect.
- Interrupt Revitalizing Waters and Rapid Flows of Gola.
- After falling Gola and fighting Telu, ranged DPS must interrupt Thornbush and Thornskin.
- Use dispel spells to remove Bramble Skin and Swift Tides on an enemy.
- Ranged DPS can be targeted by Greedy Creeper, so stay far enough away from Dulhu so that you don't get Slash too soon.
- Exit Bramble Bush if you are the target.
Healer
- The beginning of the fight is the most intensive part and which requires the most care. Don't hesitate to use big spells.
- If you can interrupt, do it on Bramble Bush.
- If you can dispel an enemy, do so to remove Bramble Skin and Swift Tides.
- Players hit by Slash Charge require a bit more healing.
- Exit Bramble Bush if you are the target.
Heroic / Challenge
There are no new mechanics in these difficulty settings, but leaving Swift Tides and Thornskin on the boss has far more consequences. It is important to stop / dissipate these effects quickly.
Booty
Dulhu drops a jewel and a left hand (Mossy Skull of the Intruder and Leaf of the Ancient Protectors), as well as belts and leggings. The complete list can be viewed at this address.
Xeri'tac is an optional boss (not for the challenge mode though) but which allows you to pick up some additional pieces of armor.
Techniques
This fight begins with waves of spiders, cut by the appearance of pale people panicked by the venom. As they die, they each leave a cloud of poisonous gas which attracts the pale man and turns him into a brute if he inhales the gas. The pale is therefore the second target.
When 8 poisonous spiders are dead, Xeri'tac descends from his web. She also launches areas of poison at ranged characters, and if a Pale is nearby, Xeri'tac consumes it to regain 25% health.
Manage the fight
During the first phase it is important that everyone positions themselves on the left platform (when entering) to fill it with pockets of gas and not be hampered during the second phase. The tank must bring the pale out of the poison zones and control it as much as possible.
In the second phase, the tank must tank Xeri'tac in the water while the other members of the party must move to the large platform. We must get out of the poison areas, interrupt as much Toxic Lightning as possible. As before, the pale is a priority target.
The healer will need to heal the tank that will take heavy damage from Xeri'tac and party members that take poison damage over time. The DPS and the tank should especially not hesitate to use defensive CDs during these envenomments.
Heroic / Challenge
The only difference is the appearance of another type of spider in the first phase, the force-fed piercers who will focus on a random player. This spider must not reach the targeted player, otherwise it will explode and inflict enormous damage in the surroundings.
Booty
In both Normal and Heroic difficulty, Xeri'tac drops feet and torsos. The two unique pieces are: Cocoon of Unhatched Xeri'tac Eggs and Desiccated Shell Shield. The full list is available at this address.
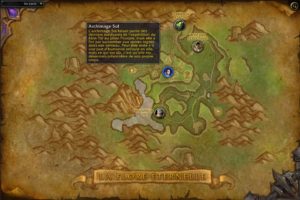
Techniques
Archmage Sol will change schools of magic as the fight progresses. The basic techniques are used by the monsters to be defeated before hitting the boss.
In Fire Magic, there are Fireball and Fire Flower which will require movement. In Frost Magic, the Archmage casts Frostbolt and Frozen Rain which also requires movement. In Arcane magic, she casts Arcane Burst and Arcane Bloom.
Parasites that control the Archmage will attempt to increase their hold through Parasite Growth. It will also generate Spore Images which will cast basic magic schools spells.
Finally, Archmage Sol also suffers Parasitic Injection which increases the damage inflicted by the boss.
Manage the fight
For ranged players, your best bet is to stand to the far left of the combat zone and move each Fire Flower. The tank must leave the Archmage in the middle and interrupt Parasite Growth after 3/4 charges.
There are no particular difficulties apart from the reactivity to spells cast by the boss. All players should attempt to interrupt basic spells. Use defensive CDs to absorb damage from Fire Flowers and possibly Frozen Rain.
Heroic / Challenge
Parasite growth retains the effects of the previous school of magic, so Frozen Rains and Fire Flowers remain.
Booty
Whether on Normal Difficulty or Heroic Difficulty, Archmage Sol drops head and wrist parts. Two unique pieces are also present: Sol Mage Staff and Alacrity Spores. The complete list can be viewed at this address.
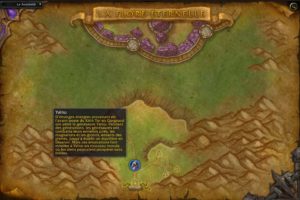
Techniques
The fight against Yalnu is quite special because the Kirin Tor helps us kill the boss. Players must focus on the different events that occur around the boss.
Yalnu tramples part of the combat zone with Colossal Blow and dealing massive damage. He then summons various adds with Fountain of Life. Genesis is a skill to be absolutely managed. Finally, Entanglement will stun a Kirin Tor mage.
Manage the fight
The tank must provoke Yalnu and avoid the Colossal Blow. He must also provoke all the adds generated by Fountain of Life and Genesis.
The other players spread around the boss may not touch Yalnu from the fight. Indeed, they must crush the flowers during Genesis (each flower spawns an add if it reaches maturity), destroy the Entanglement and kill the Fountain of Life adds to release the tank from additional damage.
The healer will focus on the tank. Other players may take no damage if they are careful.
Don't hesitate to take advantage of the movement speed bonus (transfer, wolf form, rush, etc.) to crush all the flowers.
Heroic / Challenge
Entanglement can hit one of the players causing them to take damage.
Booty
Yalnu drops necklaces, rings and shoulders. Two unique pieces are available: Yalnu's Hoof and Coagulated Genesaur Blood. The full list is available here!


