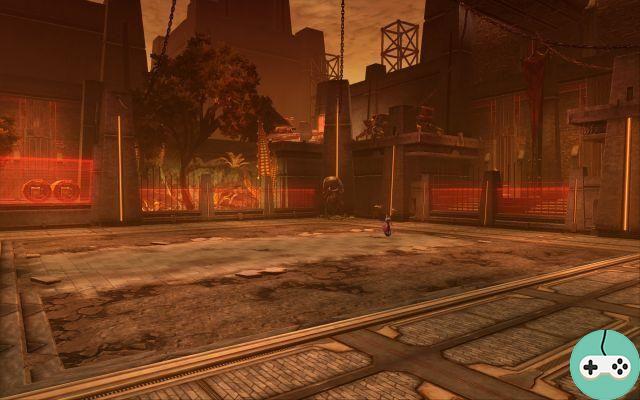
We finally come to the last boss of the Dread Fortress: Brontes
Hard mode: 1 health

The fight is quite special because, in addition to killing Brontes, you will have to kill his hands and fingers, which is actually quite strange. To do this, you have a number of phases, each more interesting than the last.
Course of the fight
Here are the six phases of the boss in detail.
Phase 1
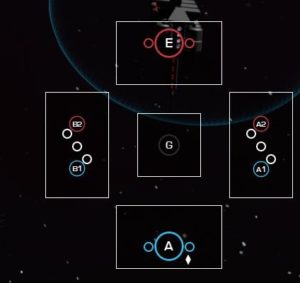
In this phase, there is no question of hitting the boss but rather of hitting his hands and fingers. Both hands appear when you engage in combat and move at 2%, 75% and 60%. When they return to the ground, they leave a curse to your tanks which considerably increases the damage received by their respective hands.It is therefore necessary to alternate between the right hand and the left hand at each movement. To do this, you just need to to divide your group in two and to balance damage classes so that the hands move at the same time. Since they always alternate between right and left, your group does not have to move around the room.
In addition, fingers will come to annoy you regularly by inflicting weak attacks on your group. Use ranged damage classes to kill them faster.
Note that if you lower your hands too quickly, your tank may end up with both curses on it.

- Blue and red circles: hand placement
- P1: from 100% to 75%
- P2: from 75% to 60%
- P3: from 60% to 50%
Phase 2
This phase is very quick and just requires a little attention. Fingers appear in pairs and are linked together by a lightning bolt. If a person ends up between or near a finger, he dies instantly.- Purple circles: fingers
- Green circles: players alive.
- Red circle: dead players.
Phase 3
After two phases of looking at us, Brontes finally decides to assume his punching-bag role in the company of our eternal Kephess and some electric spheres.- First of all, you must always place a tank in front to collect the armor cuts. This reduction appears in packs of four and stacks up fairly quickly.
- Regarding Kephess, it must be recovered very quickly because it sends a ray of flame in front of it which can wreak real havoc on your group.
- The last thing to deal with, and certainly the most complicated, is the appearance of the electric sphere. This focuses on a player, charges with electricity and explodes on the player. The damage depends on the number of charges she has accumulated: the more charges she has, the less damage she does. However, if it hits twenty charges, it will explode around the room and your party will have to take the brunt of it. For the placement, there is nothing obligatory but the diagram gives you an idea of the distance so that this one explodes around 15 charges.
The tanks must therefore alternate the boss each time Kephess appears and then after each loss of armor reduction. This phase ends when Brontes reaches 50% health. The transition to the next phase can be quite complicated if the spheres are poorly managed (the assassin's shroud can be useful).
- DS: distances and healers
- T : tanks
- Blue circles: likely location of Kephess
- Red circle inside white: sphere
Phase 4
So who has the biggest .... lightsaber? Eh yes ! Here we have an intensive phase with six enemies to kill in a fairly limited time. The stopwatch is none other than the electric arc of Brontes.- DS: distances and healers
- C: melee
Phase 5
Without a doubt, the most fatal phase, only one mistake and it's heading to square one. As you can see in the diagram, both hands come back accompanied by 6 fingers. Here are the few tips to know:- The fingers deal low damage. However the presence of a player within 3 meters is required. Otherwise, it will launch a curse which will kill your group in about ten seconds.
- The hands place an area in front of them and frequently throw you back. This attack hurts more and more but has the merit of making the electric spheres disappear.
- Brontes places a tiny area under players' feet that can do great damage if your party isn't responsive enough.
- Red circle inside white: sphere
- Green circles: players
- Red circles: hands and fingers
Phase 6
The hard part is done and your road to victory is not far away. In this phase we have again Brontes accompanied by his two hands.- Brontes launches a curse stackable in the room which increases the damage received from all players. In addition, he systematically throws the player with aggro and resets his threat.
- Hands pose a bouclier upon their death which resets the curse.
So you just have to alternate your tanks with each projection and kill the hands when you feel that it stings too much. Depending on your group, you should feel this moment between eight and ten.
It only remains for me to wish you good luck!
Difficulty
This boss is without a doubt the most difficult of the operation, if not of the two operations, and requires a certain number of tries before being overpowered. He is also the one who has caused the most problems for experienced players. I advise you to go your way if you have other bosses to kill on the Dread Palace.
Booty
- Torso 78 type Token
- 2 random pieces out of set 78
- Volcanic kell dragon
- 1/2 exotic element equalizers
- 1 generator mass manipulation
- 6 ultimate distinctions
- 8 elite distinctions


