


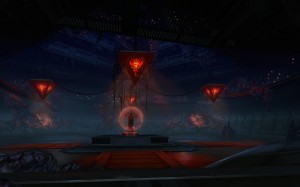
We are back for the Bestia Cauchemar guide. This is the first boss of the Dread Palace and certainly the most difficult of the first four.
The writing team has grown with the arrival of Avön from the Ufrog Guild. The team of writers is therefore made up of different members of the Frog, Amnesia, Kraken and Guardians of Anachore guilds.
We will continue on the same format as before, namely a reminder of the Hard mode strategy, then we will explain the differences with the Nightmare.
Hard mode reminders
During the fight you will have to face three types of enemies in addition to the boss:
- The larvae. They are the smallest of the adds. You don't need to tank them, however be careful not to leave too much lying around. They have little life, so you might as well get rid of them quickly to avoid building up damage.
- The dread monsters. They must be taken by the tanks. If they are close to one of their congeners, the damage they suffer is very greatly reduced. You can easily see it as they turn red (like in "enrage" mode). The objective is therefore to isolate the one on which you want to tap.
- The tentacles. A player must take care of killing them before they become enraged. If no one is in contact with the tentacle, it casts a "spit". This incation will then have to be broken. From the moment someone is in contact with the tentacle, there is no more incantation.
In addition to the mechanics of the adds, there are of course a few little things about the boss:
- Power Buff: Bestia increases the damage of nearby adds. We must therefore avoid leaving a fright monster close to her (and yes Bestia is a young lady!).
- Stacks (I don't know the name of the debuff): the tank that has aggro on Bestia will steadily ramp up. The higher the number of charges, the more damage the tank will take. It is therefore necessary to make tank exchanges regularly to avoid going up too much.
- Red zones n ° 1: regularly a debuff arises on a random member of the group. This player will have a nice red zone following him and a small countdown before the explosion of this zone. Be careful not to put anyone in this area.
- Ground areas: red areas (which then turn yellow) are placed on the ground under the feet of a player who is not in contact with Bestia. Be careful to get out of it as quickly as possible. This area is especially lethal when it overlaps with the other red area, so you have to be extra vigilant when you place one.
Combat management:
During the first phase you must position a tank on each side of the room and assign each of them a role.
The first tank will be the one that has the monster on which the DPS must hit, while the second tank will be used to "store" the adds while waiting for the first tank to take them back one by one.
Don't forget to assign someone to take care of the tentacles.
When Bestia comes out of her Shield, you must finish the remaining dread monster (s) (if you are dragging them) before dealing with the boss.
It is then a phase where you simply have to type Bestia and do not forget to make tank exchanges.
At 50% of Bestia's health, a new dread monster appears. You then have two solutions depending on the level of damage your group is capable of inflicting:
- If your DPS is fine you can stay in focus on Bestia, the goal is to kill her before being overwhelmed by the dread monsters.
- If your DPS isn't too edgy, you'll have to deal with the dread monsters. You can then leave a single DPS on the boss while the others resume the fight as during P1.
New mechanics
Essential points to know for the fight:
- Dread Monsters can bump the player they aggro. This bump will have the effect of throwing the player behind the monster. If you put the boss back to the center, you will be thrown in the center of the room.
- The larvae are sensitive to aggro, be sure to put the tank protection bubbles on the healers.
- Arriving at 5% of remaining life on a champion add, the left tank must anticipate and take an add from the right tank so that there is no waiting for DPS.
- Spending 5 debuff stacks on the tank with Bestia can lead to a one shot. Switch regularly (3-4 stacks).
- Be careful if an add is found next to Bestia, it takes less damage and also hits a lot harder.
- To kill this boss with some comfort, each DPS must be able to make at least 3200 dps throughout the fight.
- Favor the DoT specials for the DPS.
We will now offer you two strategies. They are relatively similar in the management of monsters, larvae and tentacles. The second is slightly more demanding with more precise placements to respect.
- First Strategy
- Strat Ufrog
The first strategy is based on the ability of DPS to hold aggro and take damage from dread monsters in phase 1. This requires good management of defensive powers. This strategy is best suited to groups with lower DPS.
Phase 1:
This is the phase where Bestia is under shield until the moment she removes the shield.
The room is divided into several parts. We will always speak in relation to where we enter the room (for example the bottom left, it is behind the throne on the left)
- In the sweater, 3 monsters appear:
- Two on the right which are taken by a single tank and which is placed on the right between the two portals.
- One on the left which is taken by a CaC DPS.
- During this time, the second tank collects all the larvae (there are 3 or 4).
- Once the first monster is dead, a second monster appears as well as a tentacle (in fact it appears 15 seconds BEFORE the monster if you are rigorous).
- The first tentacle can only appear in two specific places on the map. Either at the left entrance or at the bottom right.
- The second tank that has the larvae moves on the tentacle and interrupts its casting. He takes the second aggro monster and packs it with the rest.
- As a DPS, at this point you have to launch Inspiration, the dopant, the offensive CDs to drop all these pretty people with the monster as the main target.
- The other tank still has his two monsters on his face and slams his CDs.
- The distant ones will finish the first tentacle after the monster.
- Once the second monster is dead, a third spawns with a second tentacle (again, the tentacle spawns 15 seconds AFTER the monster).
- The second tentacle can only appear in two more places: either at the right entrance, or at the back left (of the room eh)
- The CaC DPS collect the third add and roll defensive CD between them.
- Meanwhile, the second tank picks up a monster from the main tank. He stands towards the back of the room and stands on the tentacle (if present).
- The first tank is placed towards the entrance on the right in case the tentacle appears there.
- The distant ones focus on the tentacle.
Thus ends the first phase. In terms of timing. You must have finished the first monster (on the left) before the second one spawns. Likewise with the second for the third.
When Bestia pops without a shield, the third monster, the tentacles, the larvae must be dead. There should only be two monsters left (one per tank).
Phase 2:
The second phase begins with Bestia and one monster per tank.
During this phase, you will have recurring red zones centered on players. You must be the one to take the damage. You can dodge them thanks to the roll for the Maverick / Sniper, thanks to the désaggro (Diversion / Lure glitter) in Commando / Merco, thanks to Resilience / Shroud in Shadow / Assassin. Red / yellow areas will also appear, they will damage players in the order of 20k if they stay in them.
The primary target is Bestia's isolated monster. As in HM, if Bestia is found next to an add, it turns blue and takes 50% less damage.
Ideally, you must have killed the two monsters before the sequel.
Here is the timing thereafter (knowing that T0 is when Bestia spawns):
- T + 45seconds: Appearance of a monster and a larva.
- T + 1min30s: Appearance of a monster, a larva and a tentacle
- T + 2min15: Appearance of a monster and a larva.
- T + 3min: Appearance of a monster, a larva and a tentacle.
- T + 3min45s: Appearance of a monster and a larva.
- T + 4min30s: Appearance of a tentacle.
Subsequently, the next appearances of the monsters will signify the general rage of the boss. The enrage is tenable for a few seconds (about 30 seconds then it is death).
Here is our attrib for phase 2:
- The 4 DPS focuses on the monster, the larva is grouped with the monster for maximum damage.
- The monster is demolished by 3 DPS. The last DPS focuses on the tentacle while staying at the CaC. The monster must be placed on the tentacle.
- the same 1
- The 2.
- The last monster is not hit by DPS. One tank will therefore have the monster in aggro, the other tank will have the boss. The switches will be done in a classic way. I trade you the monster for the boss every 4 or 5 stacks.
- For this tentacle, either the DPS destroy it in 10 seconds, or the tank which at the aggro of the monster goes into melee but it limits the placements in the room.
Then we kill the boss. Enrage with this technique does not exist or at least is not very long.
This strategy stems from the Ufrog experience. It requires more optimal placements, a strong rigor in the movements. This strategy is much more advanced than the first.
Phase 1:
Bestia is under shield, so the party must deal with the adds before she is no longer immune. Just like the first strategy, we will always speak in relation to where we enter the room (for example the bottom left, it is behind the throne on the left)
In pulling, the 4 DPS and the healers are placed in the middle (next to the throne). The tank on the right collects the two adds champions on the right and starts kitting them so that it takes fewer hits. The usefulness of this strategy is that it can happen that the tank on the right can have 3 adds champions on it and therefore potentially take a lot of damage. So by kitting the adds the risk of dying is reduced. It is much safer to assign a Tank Specialist to this role since his AoE threat is better than an Assassin or Ravager. Otherwise failing that, assign a pest. Finally, be aware that the kitting of adds is not done at a specific location, the right tank will have to adapt to the positioning of the second tank and the tentacle. It can therefore be led to end up on the left, at the back, at the entrance…. You have to communicate!
The second tank picks up the champion add-on on the right and brings it to the middle of the room. All larvae will automatically go to the middle (thanks to the threat generated by the healers). From this moment there, a marauder launches Thirst for blood, the left tank launches his zone taunt to take the aggro of the larvae, then while having in priority the dps on the big add champion, be sure to send spells of area damage to get rid of the little ones.
Soon after this will appear a tentacle. Here send a CaC to take her aggro and kill her alone. The left tank must then bring an add champion + larvae on the tentacle so that all the DPS can continue to do area damage.
Repeat these chains until there are only 2 champion adds alive.
At this moment, Bestia loses his shield, the right tank recovers it, the DPS must then hurry to finish the add champion on the left tank to quickly switch to the last add so that the tanks can perform their switch correctly. . And this is the start of phase 2.
Phase 2:
The big difference in phase 2 nightmare mode is that Bestia's adds spawn continuously (while on hard, they revert from 50% boss). So during the P1 / P2 transition (when Bestia loses her shield) you have about 30 seconds to stabilize the situation by killing the remaining adds.
Here, like the P1, it's a dps race but with some essential points to respect:
- Both tanks perform their aggro Boss / Add switch
- The areas placed on the floor by the remote must be located in the middle of the room and especially not on the outside of the room.
- The adds must be packaged on the tentacle to promote area dps. The DPS CaC which was to take the tentacles therefore takes on the same role.
- All DPS land DoTs and hit the boss a few times when possible. The CaC DPS assigned to the tentacles must learn to judge when it is necessary to help the Monster's dps. When he thinks it's not useful, he can devote himself to the boss a few seconds before another champion or tentacle appears. If the DPS respects this aspect of the fight, the boss should be around 65%. before the final burst phase.
- When the "red zone" debuff ends, an explosion takes place and deals a large amount of damage to you. This damage can be negated by certain classes. The Marauder casts his Force Camouflage and will take significantly less damage, the Sniper rolls right at the end of the debuff and will not take any damage, the Assassin casts his Force Shroud and will also not take any damage. Very useful for your healers, consider relieving them.
Phase de burst:
When you see that a tentacle appears without an add champion, it's time! This is the start of the burst phase. We call it the break phase. It's a given time that the group has in order to do as much damage as possible to Bestia before she goes into soft enrage. For information, Bestia's soft enrage is characterized by the fact that a lot of ads appear to overwhelm the group completely. This phase is not manageable by the group, it must devote itself exclusively to the boss's dps, even if it means having 2 or 3 dead players.
To be more precise, the 3rd tentacle pop of the P2 marks the start of the endgame. You should then have finished the add champion and the larvae. You will see larvae keep popping during the burst phase, don't worry about that. Just make sure they're not on the healers.
So from the start of the burst phase, the two tanks must exchange the aggro of the tentacle and the boss. If arrived at 15/10% of the health of the boss, the soft enrage begins, throw a ballistic shield on the group, slam your defensive spells and finish the boss.
videos:
Finally, we will offer you a batch of video.
- Pov FT GdA
- Pov AG Amnesia
- Pov Heal Amnesia
- Pov Marau Ufrog
- Pov Tank
Thanks everyone for reading this guide. This boss is really a wall in difficulty compared to the following bosses. If you fall this one, you will fall relatively easily the following ones.
We will meet again soon for Tyrans and its checkerboard of death.


