


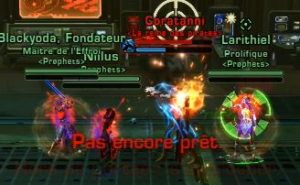
The two droids are defeated, it's time to tackle the last boss of the operation. Finally two bosses to tell the truth: Coratanni at first, then Ruugar.
Description of the fight
The last and most difficult boss of the operation, the fight takes place in two very distinct phases on two different ships.
The first is to get rid of Coratanni and her pearl piaf. The second phase involves massacring Rugaar's traitor on his own ship.
Combat abilities

- Coratanni
- Pearl
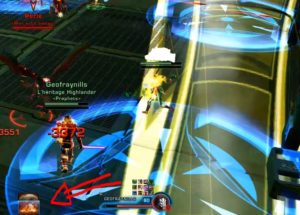
- Ricochet shot : particular mechanics of Cora and will be the subject of a complete paragraph. Sends a debuff on the targeted player as well as Divided City that causes the Ricochet Shot to propagate twice in 2 seconds.
- Suppressive fire : cone attack, every 15 seconds and channeled for 3 seconds. It hurts a lot (~ 30k in 3 seconds)

- Grenade corrosive : grenade that hits the player as well as all players within a radius of 5 meters (~ 6K every 3 seconds for 15 seconds)
- Flaming grenade : attack that hits the entire raid causing about 6k damage every 3 seconds. The showers allow the purge of this grenade.
- Bridge cannon : yellow cone causing heavy internal damage to people staying inside.
- Acid spit : cone directed towards the targeted player, causes slight damage and a debuff that decreases healing received by 20%. Avoid if you are not the target.

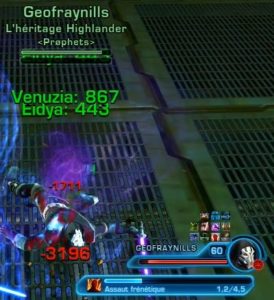
- Frenzied Assault : blocks the target on the ground and causes medium damage on the tank and heavy on the others. Logically, the frenzied assault is only triggered after Pearl's walk and therefore the tank should still be the target.
- Poison : standard attack on the target
Placement
So we have 3 people who stay in the background with Perle: a Tank, a Healer and a DPS preferably the least mobile, or the least comfortable with the strategy. This group will be called the "remote" hereafter.
And the 5 other people find themselves more or less in close combat with Cora, we can distinguish 2 groups:
- The Tank and 2 DPS in triangle around Cora
- The second Healer and the last DPS withdrawn.
Ricochet management
The trick with this placement is as follows:
- If the ricochet fire is launched on the group of distant, they are already 3, good communication and it goes easily
- If the ricochet fire is launched on the CàC group, then there are several scenarios:
- The very first time that this happens, we transmit the ricochet to the Tank and then with the person with our sub-group
- If the ricochet fire returns to the CAC, we transmit to the fifth person who does not yet have the debuff as well as to the last person to have been the transmitter.
Example:
Assuming legendary bad luck and therefore ricochet shots 100% on the CàC group, i.e. 5 players from J1 and J5.
J1, J2, J3 represents the group around Cora, J1 is the tank. J4 and J5 represent the Healer and the DPS withdrawn.
- J4 receives the ricochet shot, it transmits to J1 then to J5
- J2 receives the ricochet shot, it transmits to J3 then to J4
- J5 receives the ricochet shot, it transmits to J1 then to J2
- J3 receives the ricochet shot, it transmits to J4 then to J5
In real life, it rarely happens twice in a row and so it's much simpler than that, but to perform this strategy well, you have to be aware of this logic. The worst we had was 3 times in a row at CàC and it only happened once.
As soon as a ricochet shot is sent to the group of distant ones, the next ricochet shot will logically be at CtoC (except in extremely rare cases). J4 and J5 will make the transfer together then with J2 or J3.
J1, J2, J3 are already 3 and if it falls on one of them will do it together.
It is the responsibility of Cora's tank to announce the target of the Ricochet shot.
Management of the purification console
Since there are 5 of us at CàC, we have 5 potential clickers. With practice, you will eventually be able to do this in 4 clicks. Once a person triggers a console, they will receive a debuff preventing them from using it again throughout the fight.
The first to trigger the console will always be Cora's Tank, this is the most optimal and it frees him from this function for the rest of the fight.
The second person will be the Healer, if your DPS is good, Ruugar's bridge cannons will be triggered before, otherwise you will have to anticipate a bit.
The last 3 people will be the 3 DPS, the order does not matter, it all depends on each person's situation. The key is to communicate correctly to know who is next. Usually this is someone who has just had the Ricochet Shot and is already well placed but there are always exceptions and that is why there is no rule.
The triggering of the console must imperatively occur BEFORE the Incendiary Grenade appears on the group. To do this, nothing could be simpler, the Tank must go and trigger its console after the first person receiving the ricochet shot has transmitted it for the first time.
Then, you have to trigger the console between 5 and 9 seconds after the disappearance of the blue circles.
Dispel, unlike in Story Mode, lasts long enough to kill you if you don't do it at the right time:
- It is customary to perform the dissipation with the second person to whom you want to transmit the ricochet shot.
- If you enter a blue circle you are immune for the next 10 seconds, so be careful not to get out of position / re-enter too early or take additional damage.
- Depending on your DPS, Bridge Cannons can spawn at the same time, which is potentially fatal. There is no particular rule on this subject, it is up to you, depending on your DPS, to know which gun will arrive at the same time as a purification (for us it is the third - we have time to purify oneself if it is done in the second after the appearance of the Pomegranate, afterwards it is too late)
- Healers should not dispel at the same time. Additionally, it is better for a Healer not to dispel at all if the raid is in the red. However, having the 2 Healers that do not dissipate causes serious problems for the future.
- Special attention should be given to the person who received the Corrosive Grenade. The cumulative damage of the 2 grenades is not negligible.
Pearl Management
Perle's tanking isn't too complicated, but this dirty trickster's tendency to throw people around will undoubtedly get you in serious trouble.
When Perle goes for a walk, he will happily assault 3 people before he can be provoked again. These 3 people will find themselves thrown in the opposite direction and this is where the drama begins:
- You are thrown into a blue circle before the Flame Grenade is there, too bad you won't help your Healers
- You are thrown away from the person trying to give you the Ripple Shot, you probably killed a buddy.
- You are thrown into a blue circle and the yellow cone appears as if by chance on your nose, too bad you are probably already dead
- Owl, you are superbly placed to avoid the yellow cone, it is without counting on Perle's deceit which will throw you into it, too bad you are dead.
In short, you will understand, this apparently silly mechanism will make you tear your hair out, also to avoid problems as much as possible, it is the responsibility of the Pearl Tank to announce its targets so that they can choose :
- Initiate a projection immunity
- Position yourself in a clever way to be projected where it suits us and not where it suits the piaf
- Use a defensive power in anticipation (it's really not optimal but good)
Order of elimination and enrage
In order to quickly finish with the most complex mechanics of this beginning of a boss, it will be necessary to concentrate on this very dear Cora.
The longer it stays, the more your Healers will suffer until the complete wipe, for a start, 5 clicks on the console are a good point of reference, if after 5 clicks, Cora is still not gone, go back to pole, your DPS is insufficient and you will never fall Ruugar below 40%.
Once the ugly bitch is gone, we tackle his piaf, which becomes enraged very quickly.
Some adopt a group formation, I am rather adept to space the players a little, in order to have time to provoke him again just before his frantic assault of death.
Indeed, enraged Perle, does everything the same as before but much faster, his internal GCD goes under the second, so sometimes, we provoke, but the frantic assault eats your friend Healer anyway, hence the interest of put some distance between you so you increase the duration of its cycle and it becomes easier to recover it.
For security (or noobitude), I recommend double provoking Perle. The first Tank taunts as soon as possible, and the second Tank 1 / 1,5 seconds later. This is to ensure that Perle will go on one of the 2 Tanks (and as weird as it sounds, he will not always go on the second).
For the rest, there is nothing difficult, you just have to tear yourself away from healing during the frantic assault, and the other Tank must systematically reprovoke Pearl during the assault in order to reduce the damage.
If you take too long in the execution, you will then see a double enrage of Perle, it becomes almost impossible to resist his next frenzied assault, you can still manage to kill him but again, you will have de facto. serious difficulty on Ruugar.
Note: It often happens that Cora does one last Ricochet Shot for Glory before disappearing, be nice to yourself, don't screw it up.
Tips and tricks
Bulk:
- Uses that reduce area damage and / or DoT damage (damage over time) are mandatory. Learn to play without your favorite uses and use the optimal ones
- Reduced DoT damage on Commando / Mercenary purge
- Damage reduction by 30% on AoE damage on a whole bunch of classes
- Damage reduction of DoTs in Scholar / Sorcerer
- The damage reduction on the Thief / Agent Stim is a must have
- If you have a Scholar / Sorcerer, Unlimited Force / Power Self-Supply can be used to procrastinate on Coratanni
- If you have a Sniper / Sniper, the Scrambling Field / Ballistic Shield is not just there to decorate, it allows you to temporize on Cora or Ruugar
- Pearl is dropable with only 1 Tank, so no stress if you lose one (we managed to drop it with only 1 Healer as well, but it's special)
- Vanguard / Specialist mass taunt reflects damage from Frenzied Onslaught. If a DPS is targeted during his enraged phase, it can save his life.
- The use of dealing damage via head-to-head is damn effective in Avant-Gade / Specialist DPS and a significant bonus in Tanks
- The Scholar / Sorcerer Force Barrier can be cast even while stunned in the shower. Handy if a yellow cone arrives
- Resilience / Shroud of Strength negates damage from the yellow cone
- Rolling may allow you to dodge the yellow cone, but it's still a dangerous and unadvised game - as a last resort and with mastery.
- Force Camouflage, Saber Return or Eternal Rage greatly reduce damage.
Combat Abilities - Ruugar
- Grenade corrosive : it is the same as Cora except that it is dissipable. 6k / 3 seconds
- Projection : projects the whole raid to more or less 30 meters. 15 / 20k
- Flame grenade : Same as Cora, dissipable. 6k / 3 seconds
- Frag Grenade : direct damage. 15k
- My : deposits a mine which activates after a few seconds. Triggered by the passage of a player in his circle. 15k
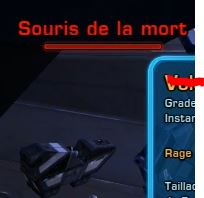
- Mouse of death : 2 in number to drive you even crazier. Throws the target during the explosion. Targets the person with the least health when they appear. This is area damage. 20 / 25k per mouse
- Jetpack charge : change aggro and jump on a random player in the raid. Seems to prefer people far away. 20k / 30k
- Corrosive dart : direct damage causing a cumulative debuff on the target. 3k / 4k per charge
- Slaughter : 2 / 3k per charge of Corrosive Dart and per tick
- Hostage taking : returns X damage per shot received (one auto shot = 3 shot = 3 damage tick. Auto shot is bad!)
Placement - Ruugar
In order to avoid a number of problems, we have opted for a placement that looks like this:
- The 2 Tanks take care of Ruugar on the console. There are potentially 2 places left for 2 DPS CàC
- The distant DPS and the Healers are divided into 2 balanced groups to the left and to the right of Ruugar. The objective is to be projected into the wall and therefore as far as possible
- The Soigneurs are the closest to the center
- No need to be at maximum distance, 15/20 meters from the boss, things are going well
Figures - Ruugar
Now that the stage is set, know that Ruugar is probably the toughest DPS challenge with Revan's core.
- Health Points: 5
- Triggering at 9% for a total of 4 722 900 hp to be lowered in 4min30
- This brings us a theoretical Raid DPS of 17
- Assuming that our Tank friends do 3k of DPS to them 2. There is 14 or 992 theoretical DPS left to drop the boss before the enrage
- Except that… during these 4min30, we will have 4 Hostage takings, which last 5 seconds each and during which it is impossible to DPS. The stopwatch therefore goes to 4min10.
- This brings us the DPS of the theoretical raid to 18 or 891 per DPS.
Your Healers can and should help nibble some DPS at the tap and at the very end when the anger subsides.
To arrive at these figures, we will send all of the group buffs available to Ruugar's engagement as well as your dopants. The fight lasts more than 4 minutes, you are supposed to use your doping twice.
For the rest, there is no secret, it is necessary to send the pate and maximize the uptime on the boss, survival although important must be a little forgotten in favor of the DPS.
Mouse management - Ruugar
In order to make it easier to deal with death mice, your Healers must learn to use their love for characters with the least amount of health to aim mice at people who are convenient for us.
The object of the game is to prevent mice from targeting fragile classes like our fellow Scholars / Sorcerers or Villain / Agent.
Our Healers have therefore gotten into the habit of always leaving a DPS with a little less health than the others, so that the mice take it for target.
Be careful, however, Ruugar has 2 abilities that can ruin your organization:
- Mass projection
- The jetpack charge
So you have to be able to react very quickly and get the right people back.
For informational purposes only, a Scholar / Sorcerer who no longer has the desaggro available will be almost OS by the first mouse, if both arrive from the same side, he is already dead.
Tips and tricks - Ruugar
Bulk:
- We switch every 2 corrosive dart charges
- Depending on the active defensive powers and / or the health of the Tanks, the one with Ruugar will be able to collect the mines or leave his place for the other tank to collect it.
- The hostage-taking takes place approximately every minute and I insist on the approximately:
- it happens very often after the third slaughter and / or the appearance of mice
- In Tank, do not use a white stroke
- In DPS, avoid using "multi-shot" attacks when the hostage approaches - the timing will come with trials.
- Saber Reflection negates damage from mice
- Force Camouflage, Saber Return or The Force Keeps Us / Eternal Rage are great tools for playing with mice.
- As a Scholar / Sorcerer, if you have the mice, use increasing damage reduction on the Desaggro is your salvation. If you don't have it anymore, you have the option to use the Force Barrier after taking the first mouse. The second will then explode on someone else, or come back to you if the Barrier ends.
- Resilience / Shroud of Strength negates damage from mice
- Roll can be used to dodge damage from mice - random
- Hold on / Entrench and Dodge / Evade make it easy to take damage from mice. To be used separately
- Reactive / Energy Shield combined with Immutability / Hydraulic Manipulation allows for plenty of damage absorption and knockdown cancellation
- If you can dispel, and there are more than 2 debuff, give a hand
- During the hostage-taking, SPAM THE ESCAPE KEY, otherwise it dies!


