


Foreword
This message is for players who want to try the ZL adventure in Hard mode. Unlike the front 3.0, the new ZL HMs offer a much greater challenge, so before tagging on the RDG be sure to:
- Master your class and your role.
- Having equipment up to the challenge.
- If you are DPS always have your desaggro handy (I put the V key on shortcut, it's quick and accessible).
This ZL poses no difficulty for the group, if everyone scrupulously respects their placement. Otherwise ... good luck!
Group of enemies
There are, in my opinion, two types of enemies to be wary of.
- Imperial / Republican soldiers
- Assassins / Shadows
strong type (silver)
You find some on all the packs before the first boss and are able to pose real difficulties to the group. They launch a firebomb at the biggest threat, which takes the form of a red AoE. If you go through it, the tick is 10k so hang in there. To top it off, the chubby officers (not found on all packs) will stun you and the combination of the two can cause the tank to go up in smoke! The best is therefore to target them as a priority (failing to be able to control them) and especially to interrupt their incantations.
weak type (double yellow blade saber)
You will find them in the objective pursuit before the second boss. Not that they hurt nor that the packs are particularly difficult, but if like me, you like to organize your groups in a well-ordered way, they will make an indescribable mess with their projection of 30m. Also ask a DPS to take them one on one or stick a grenade on them (they are weak type I remind you so can be stunned easily).
Imos / Travik
Here everything is a question of placement and if everyone plays their part, it does not pose any difficulties even for the healer.
There are 2 distinct phases for this boss, this one will follow one another during the fight.
- Phase 1
- Phase 2
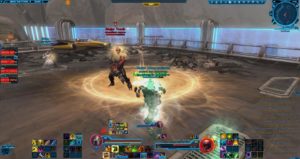
"Alone against all"
The boss is in the center of the room and will ALWAYS channel in this order:
- weak automatic fire
- strong automatic fire
- a volley of mortar
- another volley of mortar.
Here the tank takes the boss and turns it over in the classic way. However, he must be careful to leave the area pounded by successive volleys of mortar.
To add a little difficulty, the boss will regularly during this phase cast a "death from the sky". Its damage is insurmountable, but even though the area covered is a bit larger than that of the mortar volley, it is perfectly avoidable and MUST be avoided. You have plenty of time, the first tick only hits 4 seconds after the area appears.
"Soldiers to the rescue"
IMMEDIATELY after the end of the second round of mortar, 4 soldiers of the "strong" type will appear in the four corners of the room.
From now on :
- The boss is covered with a shield that makes him invulnerable
- The adds also have a shield which makes them almost invulnerable.
- The boss instantly casts every 5 seconds on each member of the party, a big AoE that ticks once after 2 seconds.
You must first know:
- That once the 4 adds lose their shield (if one remains up, it doesn't work), the boss instantly stops putting down their AoEs.
- That adds aggro works in a special way, as with the adds from the first boss of Operation Ravagers, they attack the closest player.
- Having the boss's AoE correctly placed in one hit removes the shield from the adds.
The strategy is therefore as follows:
- At the end of the second round of mortar, each of the 4 players is placed on each of the 4 corners of the room.
- As soon as the adds are there, put you right on the one that appeared in your corner (your two characters must merge) and wait for the first AoE of the boss.
- Once the zone is present, get out of it without straying too far from your add.
- At the first tick, if you have followed what is written, all the shields have fallen and the boss stops his AoE (so you will only have had one AoE).
- At this precise moment, you all slam a defensive power and soloter your add in 1 against 1. If level care, it is too hard (more defensive power, limited equipment), you can at this moment all go down the first stairs ( not the latter). The adds will then follow you and pack, the tank can then take them all.
- Once all dead return to the boss in P1.
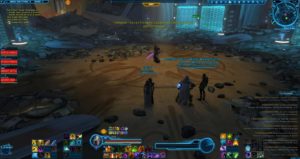
Liam Dentiri / Kreshin
The fight starts, the boss is surrounded by 2 droids of the "strong" type. They should first be eliminated. However, pay attention to their projection which hurts a lot as well as (if you do not fall them fast enough) their self-destruction. Once the 2 droids are gone, go to the boss.

From this moment, 2 phases will be repeated successively.
- Phase Fufu
- Boss Return Phase
The boss casts a camouflage (this one is long enough you have time to see it coming) and disappears to make way for 2 droids.
To locate them I will choose the Jedi Temple as a reference.
- If, when you are in front of the temple, the droids appear on your left: they are 2 Melee droids that look a lot like the ones you faced at the start of the fight. Also beware of their area projection.
- If, when you are in front of the temple, the droids appear on your right: then they are 2 ranged droids which when they target the same person hurt a lot. Here the tank must therefore take one while the others go on the one that remains.
- If, when you are in front of the temple, the droids appear behind your back: no luck, this is the hardest pack. They are of the "Elite" type, do ranged damage and regularly land on each player an AoE which hurts a lot. Also avoid the ^^!
Anyway, it is imperative to get the droids down as quickly as possible so that the next phase does not overlap with this one. Once the droids are dead, if the boss has not yet reappeared, remember to regroup in the center of the area to facilitate healing and what follows ...
The boss comes back and puts (not always but 2 times out of 3) on a member in a random way a DoT which hurts very very much (this one takes the form of a small dagger).

Hence the interest of being grouped so that the healer (or yourself) can purge you instantly. Note that if you are full life, this DoT will not kill you but you will focus the attention of the healer and the boss in the meantime does not deprive himself to hurt others, if you add the adds that you did not have the time to finish ... CRITICAL FAILURE!
And we start again ...
Oric Traless/Goh
Here the strategy does not really differ from that practiced in normal, however let us recall the fundamental.
The fight is broken down into three phases:
Phase 1: the tank takes the pole boss and all players hit him. However, be careful with purple AoE scattered all over the room it hurts a lot. Regularly, the tank is thrown by the boss which has the effect of reinitializing his aggro. So pay attention to this
Phase 2: The boss focuses on one of the datacrons in the room, all players MUST focus on this one. If you take too long to drop the datacron, the boss recovers all of his life ... After that, it's up to you.

Phase 3: The boss surrounds himself with a shield which makes him immune to all types of damage and all players are targeted by purple AoEs on a regular basis. Here again, don't start running all over the place !! One step is generally enough to get you out of the area, and the less you move the less the area is squared ...

Then we go back to P1 then P2 then P3 ..
Boss Bonus
This Boss inflicts heavy damage on the whole group and regularly throws the one with aggro to 60 meters !!
Also I advise you to use the surrounding scenery to drop it quickly. Personally I like to place my group against the small bunker at the entrance to its area ...

Strategically, apart from this projection, the stakes are not really high.
A big thank you to Maxxencimus, Chips, Nouchkai, who participated in this ZL.


