


Again Mothership from the Illendar guide, for Denova's sequel in Hard mode. As an introduction to the two bosses that will be your next difficulty, I will say that we find Bioware's desire to give back an importance to the tanks since they will need two within your group and to ensure the switches and some animations between the different phases. . But it is especially for the DPS that the level of difficulty increases since they will have to be very efficient to afflict the damage necessary to fall the two bosses, Calcinis and Stormcaller (HT) on time.
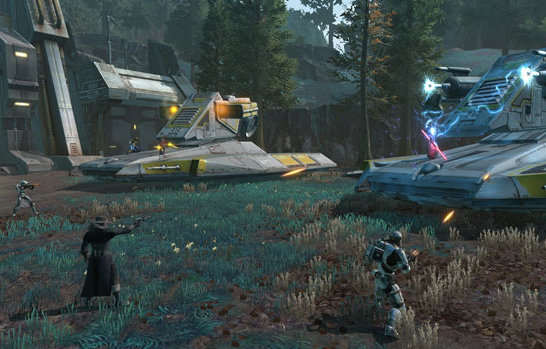
Your group has finally killed its first Denova HM boss, stay focused it's far from over! Once the trashes have descended, you will come to two bosses: on your left Calcinis and on your right Hele storm!

Boss overview
- Hele Storm
- Calcinis
- distance damage in a cone
- le sort double destruction (DoubleD)
- electric domes on players placed on the ground
- distance damage in conical AOE
- the Charcoal spell
- a missile targeting a player on the ground
Some general mechanics concerning boss management:
- the two bosses never move, only players must move
- Calcinis incant Carbonization, once a player has been touched by this dowry, the player will not be able to take the “classic” shot of Calcinis without dying.
- When Stormcaller casts double destruction, two players must stand under the shelves to receive the dowry instead of the tank. Likewise, the tank will not be able to receive a "classic" shot from Storm Hail if it has a dowry linked to the DoubleD. This spell is cast after 30 seconds of combat then every minute
- shield areas appear in front, on the outer side, or behind each tank. These phases begin as soon as one of the bosses passes a threshold (80%, 60%, 40% and 20%).
- During the shields phase, the tank with the focus of Stormstorm will be targeted by electric arcs. He will therefore have to walk around the map (near his healer) to put these 10 domes on the map before returning to his Storm Helmet for a new DPS phase.
The placement
There are several possible placements, here are the ones that I have most often met (1) and the one that we apply within our guild (2).
Legend
In yellow: CalcinisIn Blue: Stormcaller
In brown: Shield area
In red: DPS
And vert: heals
In black: tanks
Placement (1)
2 groups of 4 "autonomous" to manage the boss who is assigned to you (damage or healers). I advise a scholar for AOE following the double destruction on HT. If necessary, one of the two healers in difficulty goes back to the boss to heal himself / his group without being interrupted by the different activities of the two bosses (electric arc + missile).

Placement (2)
The difference, you will have seen, is that the group is towards the interior of the bosses. For tanking, placement is important to prevent the AOE from hitting another party member.
Our group often leaves a thug on the ground to heal the Calcinis group, it's a bit like the gland and also because being interrupted is less of a problem for a thief than for a scholar.
Both groups must be on alert when the shields are activated and quickly place themselves under its protection (especially the one opposite our placement towards the outside of the map). The two healers can thus heal the whole group.
Regarding the DPS, everyone can benefit from the inspiration of a sentry and this allows to make a switch of DPS more simply.

The fight itself
I'm going to talk about the fight with the placement instead (2), although basically that doesn't change much.
- DoubleD
- Carbonization
- Shields
- Missiles
- Dome Shelters
Spell management: Double destruction
Principle: an incantation of 3 seconds (approximately) putting a dowry on two players who must not then be touched by the shot in AOE of the storm-helicopter. The spell is cast after 30 seconds of fight then every minute. It has, to my knowledge, three possibilities:
- a DPS and the Healer on Storm Helps stand in front of the tank
- the two DPS on Storm Hole are placed in front of the tank
- the tank is placed behind two players
Each strategy has its small drawbacks
- loss of a little DPS on when the latter moves to stand in front of the tank
- loss of a little more DPS than solution 1 (especially according to the class of players who move)
- risk of loss of aggro for the tank
Once the dowry is on the two players other than the tank, they move back to avoid the AOE (and the OS), the healer will prefer an AOE spell to raise the two players at the same time.
Spell management: Carbonization
Principle: an incantation of 3 seconds (approximately) placing a dowry on a player who must not then be touched by the AOE shot of Calcinis. The carbonization occurs just after the double destruction. There are also three solutions to my knowledge:
- a DPS with a taunt on Calcinis takes aggro to take charring
- the tank on Stormcaller (which does not move) takes the aggro of Calcinis to take the dowry
- the tanks, at the moment of carbonization, exchange their bosses
Here again some drawbacks:
- the DPS must be in the timing (simple since depending on the double destruction announced by the other group)
- the tank should easily be able to do "TAB" to taunt quickly so watch out for lines of sight
- potential loss of aggro and mess at the time of the switch
In cases 1 and 2, nobody has to move on Calcinis, optimizing the DPS and the aggro of the tank towards the boss.
The shield phase
The triggering of the phase is linked to the percentage of the life of the bosses, in particular Stormcaller. Every 20% and it starts at 80% then 60%, 40% and finally 20%. So there will be four shield phases if you can count. During the raid announcement "Activation of shields" position yourself quickly because the bosses send the players in their cabin flying. You have two choices:
- get into position to be thrown directly under shields (and continue to DPS)
- run straight into it
In the shields there will be 2 or 3 trandoshans and the shield generator. You have to hit the mobs without touching the generators, because without a generator ... no more shield and you will take big big damage. So AOEs are prohibited, grenades etc. Under the shield near Calcinis you will have 1 tank, 2 DPS and a healer for 3 mobs. Under the shield near Stormlet (HT) you will have 2 DPS and a healer for 2 mobs.
The tank having the aggro of HT will place the famous electric domes on the map. Regarding these domes, your combat habit will allow you to establish a course allowing you to:
- stay alive (objective n ° 1)
- pass once or twice within range of your favorite healer (and thus ensure objective n ° 1)
- do not block access to bosses for players once the shield phase is over (avoiding placing a lot of domes between players and HT)
- Avoid climbing back up on the boss in the same axis as your DPS / healer group, otherwise they will be hit by the tank's AOE. Prefer another angle / side.
Management of self-guided missiles
Unlike in normal mode, it will be necessary to launch a dispel on the player who is on the ground and who is targeted by Calcinis (a healer here) so that the marking of the target remains on the ground. Then you just have to move 3 meters to avoid the shot (13K memory).
Ground targets must be a healer for me to avoid breaking the cycle of a possible DPS
Random electric domes
These domes also appear on the player on the ground, the latter will have to get out quickly to take as little damage as possible.
Ground targets must be a healer for me in order to avoid breaking the cycle of a possible DPS

Sequence of phases and complexity of this fight
The phases will be linked as follows:
- Double kill (30 seconds)
Carbonization (35 seconds)
- Shield Phase (80%)
- Double destruction (1min30)
Carbonization (1min35)
- Shield Phase (60%)
- Double destruction (2min30)
Carbonization (2min35)
- Shield Phase (40%)
- Double destruction (3min30)
Carbonization (3min35)
- Shield Phase (20%)
- Double destruction (4min30)
Carbonization (4min35)
- End of tanks around 5min30
Finally and I did not specify it, try, as always when there are two Bosses, to drop them simultaneously!
In the end, few phases but the complexity comes from the fact that:
- your tanks / DPS at the time of the key spells that are the DoubleD or the Carbo must be attentive to avoid an OS (dot + shot of the boss)
- your DPS / healers must be responsive when activating shields and avoid being bumped away from where they should be
- your DPS must be careful to change their cycle under shields and avoid bumps and AOE so as not to break the shield generator
- the DPS must not be soft, especially on those close to Calcinis (3 mobs) to quickly return to the DPS of the bosses
Finally, and this is the greatest complexity of this boss, the DPS to provide is very important because it decides the timing of the shield phases. Indeed if you do not manage to change phase fast enough, electric domes will appear at the time of a double destruction on Stormcaller causing the group's wipe most of the time.
There is a very good indicator of whether the DPS is good and sufficient: there should only be one double kill between each "shield activation". If you have two per phase, it is because the percentage of life of the bosses does not go down quickly enough and that inexorably, the enrage of the bosses will not drag.


