


Hello it's Mothership again from the Illendar guild guide present on many online games and, concerning SWTOR, on the Mantle of Force server. I offer you a small guide to go boss after boss Operation Denova in hard mode, the last bastion before the next content (we hope to see quickly)
After many attempts we have finally finished the high-level content, i.e. denova in hard mode (commonly known as Denova HM). I can already hear some voices in the comments: "nothing very glorious the instance having been released 2 months ago", you will be absolutely right, but that does not spoil our pleasure after a few Wipe evenings on Kephess.
This instance requires a (very) good group and very good players, for all classes. Every mistake or inattention can lead the raid to death. It is relatively difficult to pickup unless the group has already made the instance within their guild. Bioware will therefore have heard the people, by providing them with quality and demanding HL content. A lot of MMO regulars will find it similar to their old favorite game, personally and being quite new to this type of game, I rather enjoyed this instance.
Let's get to the point, with the first boss: Toth and Zorn
I will note here the strategy to adopt for the HM mode, on the one hand because it works for the normal mode and on the other hand to prepare you for the few animations and additional difficulties of the Hard mode. Note that the placements and strategies differ depending on the guild you are playing with. Even if you read this strategy, listen to what is being said at the start of the operation, this will avoid a gratuitous death or the questions a little humiliating: are you sure you have already done it?
The composition of the group necessary for this operation:
- 2 tanks
- 2 healers
- 4 DPS (2 distances - 2 CAC is good, a 3rd CAC therefore makes it more difficult to avoid for this first boss at least)

Overview of bosses and mechanics
- Wrath
- Toth
- Contact damage
- Rock throwing
- A dowry (damage over time) cancellable by a dispell
- A scream in the direction of the tank
- A large boulder on the Yellow / purple area that will appear during the fight
- Contact damage
- A jump on Zorn who applies damage to CACs in the area
- U jump in place while performing a zone
- A phase of rage for a short time (it turns into a big chick)
Some general mechanics concerning boss management:
- When the 2 bosses are close, their damage increases (to be absolutely avoided)
- Toth applies a debuff to the tank he jumps on
- Zorn's cry is a cone shaped AOE (cleave) in front of him
- Red areas appear on the ground preventing the eruption of rocks causing severe damage
- Zorn applies a dowry to players with the "debuff" debuff which has the same icon as the "Weakened Mind" spell of scholars.
We usually define 4 groups:
- 1 group with tank n ° 1 and healer n ° 1
- 1 group with tank n ° 2 and healer n ° 2
- 1 group comprising the DPS CAC
- 1 group with both distance DPS
In your operation window, avoid splitting the DPS group into two. If you have a sentry in your group, the inspiration can then benefit the group of 4 in which they are (be careful not to be too far away). Some healers will grumble but they can adapt, their main healing target being the tank and then the CACs when they reach their healing zone.
Among these two groups, the DPS will move to "follow" their boss unlike the healers and tanks which will not move. It will be customary to assign CACs on Toth and Zorn to distances.
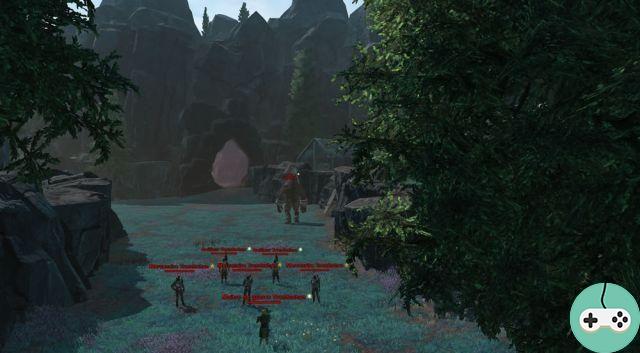
The placement
If I had to make a diagram it would be this one, which you can turn in all directions in the great plain surrounded by small cliffs which will be in front of you.

If you understand what is above, the bosses during the tanking phases should not be within 30 yards. Distance DPS must always be at range limit, beyond 30 meters for snipers / snipers. The CACs follow Toth throughout the fight and join the tank he jumped on. Healers and tanks remain in their initial position except for an urgent need for healing or to provoke (= taunt) a recalcitrant boss (no when I hear pressing I'm not talking about pissing near the cliff).
The tank will try to keep its boss always in the same place to prevent distance DPS from interrupting their spells (if the distance goes to 30.2 meters it's stupid to interrupt its cycle).
The fight itself
Once the groups have been distributed, you throw yourself into the battle by stopping in your area to respect the combat distances with the boss (s). Note: Once the aggro is fixed on the tanks, they will turn them in relation to the rest of the raid.
Each type the boss assigned to him several thresholds will then trigger animations:
- Jumps
- rocks
- Dread
- Dot
- Weakening
- Bump/AOE
- Fat chick
Toth's jumps leading to boss swtich
90%, 70%, 30%, 10%: Toth will jump on Zorn causing an AOE which causes significant damage. These percentages must therefore be anticipated and announced to the operation group for the following reasons:
- The tank on Zorn will be able to anticipate by triggering a stim / buff or a relic allowing him to take the maximum damage.
- In the event that you have a 3rd CAC, the latter will move away from Zorn to avoid taking unnecessary and consequential damage.
Each time Toth is going to jump on Zorn, your two tanks will then exchange the bosses, the DPS will follow their respective bosses and will continue as best as possible to do damage during this a little fuzzy phase where Toth and Zorn will cross each other. middle of the plain.
Rock throws
A rock throwing phase will be initiated by Zorn, causing regular damage as well as damage ranging from 4 to 5 K per rock on some group members. The 30 yard range seems to be the factor for receiving this damage (your ranged DPS + healers). To continue DPS properly, the Maverick Shield will be able to prevent some damage, the AOE of a Scholar will be able to effectively prevent group life from melting away.
The cry "Dread" followed by the red zones
After this phase Toth will jump again on Zorn (70% therefore). Once the bosses are exchanged, Zorn will perform his cry (which precedes the appearance of the red areas preventing damage during the eruption of rocks). This cry has two characteristics:
- it is a very important key and which can OS, hence the need to run Zorn in relation to RAID.
- this cry "dread" freezes (stun) the tank (only in HM) which will have to free itself ASAP via one of these spells to regain its mobility and thus avoid the red zones.
This phase will be repeated twice (it seems to me) during the fight, it is conducive to trigger for a distant DPS his defensive spells (called CD) such as the maverick shield or the commando shield.
Le dot (dispellable)
For the duration of the fight, players based on a bad placement will receive a DOT that can be canceled by you or by your favorite healer. It will be enough to announce it or if it is very reactive, it will remove it on its own.
The "Weakening" debuff (only HM)
Depending on the positioning of the DPS, especially those firing from a distance, a debuff called “Weakness / weakening” will be applied to them (non dispellable = non cancellable). If they keep shooting Zorn, they will take cosmic damage. If they realize this in time, they will need to temporarily switch targets to avoid dying while focusing on Toth. A CaC DPS can also do the swtich to avoid having too big a difference in the life of the bosses.
Toth's different bumps / AOEs
In addition to jumping on Zorn, Toth performs BUMPs applying area damage to players around him, the CaC will be forced to take them which will give the healers a bit of work. On the other hand, some big bumps will be anticipated by a RAID announcement: Toth goes crazy (or something similar). The CaCs will then have to temporarily move away from Toth, otherwise they will die or at least cripple their healers for the next minute.
The big chick mode
Finally, and novelty compared to the normal one, Toth will become a little bigger and yellow (big chick mode), a sort of mini-enrage during which he will hurt a little more. A player in the raid (pray that it is not the opposite tank) will be given a yellow area under him that he will have to place under Toth. Once this area turns purple, Zorn will throw a huge boulder at this area which will cancel Toth's enrage mode. As a remark I will add:
- Do not play with this area once it is purple, if you leave a toe on it, death is guaranteed when the boulder arrives
- If you have too high a DPS during this phase, you will accumulate it with a jump from Toth which will no longer be on the yellow / purple zone… Wipe almost guaranteed. Check the percentages if necessary to avoid this (70% 50% or 30%)

Essential Tools and the End of Boss # 1: Appearance of the Trainer
These phases will follow one another and cause some cold sweats during the fight with in general terms and never to be forgotten / neglected:
- boss placement in relation to the raid
- ability to taunt quickly to avoid unnecessary damage
- dowry management for healers
- management of debuffs for ranged DPS
- damage management for CaCs (Toth's jumps and " Toth goes crazy ")
- eradication of the two animals at the same time if possible to avoid anger of the survivor (the jump of Toth for example is fatal in this mode)
Once the two bosses are killed, the trainer will then descend from his hill. Several RAIDs died thinking it was over, so stay focused. There is little to say about this trainer other than:
- it must be shot at the raid (rule of thumb)
- all these attacks will have to be stopped quickly (announce the orders to break the spells)
Once dead, you can run naked into your apartment and get your / roll ready for potentially your first campaign loot.


