


Aaaaaah, Taral V… Its jungle, its monsters, its Imperials… This pretty little instance, perfect for your summer vacation or your GIGN model training camp, is considered the simplest instance in Hard mode. People of the Republic who have just reached level 50 will therefore have every interest in starting there to start their equipment phase.

Introduction
You'll find the quest at Carrick Station (L2-PN), which will send you on the Telos ship to talk to Jedi Master Oteg (small, green, you'll recognize!).
For those of you who have never set foot on the other Republic Fleet ships, take the "Missions Depart" elevator (east), select the "Inter-Fleet Transport" destination. there, take the taxi to Telos!
As you are not just anybody, no but no kidding, oh eh, Oteg and you will have a vision of Force. A mysterious Jedi entity will reveal to you the existence of a prison in the Maelstrom nebula, in which a powerful Jedi has been held for almost 300 years, which does not make us any younger ... Obviously, the only way to get to this prison is to access a Gree computer (which by the way is gray. How's that, I get out?), hidden in an Imperial bunker located on Taral V. On the track, the precise and meticulous infiltration will begin.
The group
The instance is not really hard, I have no specific advice as to the composition of your group. As usual, it is better to be vocal (TS or Mumble for example). It is not mandatory but it will greatly simplify the work, especially if it is your first ride or if you are in a pick-up.
It can be noted, however, that, if you wish to do the bonus boss "Lord Hasper", the presence of a Jedi Scholar and his "Force Armor" will be more than welcome. In addition, this fight will be easier to fight with ranged DPS, for reasons that we will discuss later.

Bonus quests
It is done in a very natural way, following the progress of the instance. The different phases of the quest are as follows:
- Step 1 : Defeat the Jungle Creatures (/ 20)
- Step 2 : Defeat the Imperial forces (/ 45)
- Step 3 : Hack into security terminals (/ 10)
- Final step : Defeat Lord Hasper
- Independent bonus : Destroy Imperial Research Stations / 8
Progress slowly by destroying everything and everyone and you will complete this quest without even realizing it.
Enemies
Here, no surprises… They are standard groups, nothing very violent. We can however mention the monsters that climb on the small bridges when you pass over them, do not be surprised.

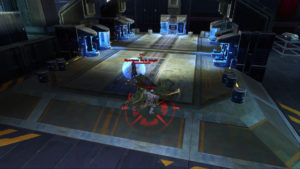
Dompteur gattan

Point of view : 88 589
capacity :
- Trained vine cats: Gattan is accompanied by two cats, of 27 hp.
- Mortar Volley: One area of damage.
Focus on the cats to eliminate them as quickly as possible (you can control one so that it doesn't get in your way), and finish Gattan.
Once the three awful ones on the ground, direction the Imperial base!
Captain Shivanek / Ripper

Hard hit points : 70 870
Ripper health points : 65 200
capacity :
- Recharge: which increases damage dealt (can be interrupted)
- Bleeding: causes you to lose health gradually
From the start of the fight, Shivanek summons Ripper. Both are immune to Crowd Control.

Rather, it is advisable to eliminate Ripper first. If you kill Shivanek first, he will regain a Semi-Enrage Buff, increasing his damage by 300%.

Doctor Zharen
Doctor Zharen" src="/images/posts/8d11d9c9b6024a1ca36e2506bbbdf23e-7.jpg">
Point of view : 43 209
capacity :
- Charged Breath: Casted power that deals damage and can be interrupted
- Corrosive Grenade: Throws a grenade dealing damage, and landing a poison DoT
- Jungle Specimens: Three times in the fight, the doctor will summon Jungle Specimens (4461 hp). It will increase their potency up to 4 stacks, increasing their damage by 25% with each stack
Extremely simple, this boss has very few hit points. The danger comes mainly from the waves of enemies that he summons 3 times during the fight. Try to reunite them on the boss, and drop the damage zones (AoE) to eliminate everything.
Lord Hasper
Point of view : 206 826
capacity :
- Force Bolt: Immobilizes the target, dealing damage
- Force Storm: Hasper will draw everyone to him, and will launch a Force Storm, materializing on the ground as a red zone. Get out of it as quickly as possible (don't back down, go forward). At the same time, it debuffs players slowing them down (cannot be dispelled).
Note that the boss performs the same sequence of attacks, namely 3 Force Lightning, followed by the Storm. It is therefore quite easy to predict when to travel.
 Eclair the Force
 Storm of Force
PD 44

Point of view : 239 188
capacity :
- Focused Shot: Deals heavy damage to the target. Can (and should) be stopped as soon as possible.
- Missile Fire: From time to time, the boss turns around and sends an attack, on a randomly chosen person, consisting of a volley of 4-5 missiles.
- Bombing: Area of damage, targeted at a random player. The targeted player will see a red circle appear at his feet. A first laser beam shot from the sky will strike him, which he will not be able to avoid. However, from this first shot passed, the target will remain fixed on the ground. All players must therefore move away from the area so as not to take damage from the 3 other lasers that will follow.
- Breath of Power: Channeled power, best interrupted quickly, to avoid serious damage.
General Edikar

Point of view : 198 246
capacity :
- Call for reinforcements: Depending on his health, Edikar will summon waves of 4 droids which will appear 2 by 2, to his left and to his right.
- Cooldown: For 35 seconds, after summoning his droids, Edikar does nothing. Nothing transcendent in itself, but know that you will have 35 seconds to kill the droids in peace before he returns to the dance.
- Auto Fire: Channeled attack dealing damage to a target
- Avalanche of Shots: Blasts a burst of fire into a cone in front of him
- Thermal Grenade: Area of damage dealing massive damage to all players hit. Additionally, affected players receive a DoT, which can and should be removed by the healer, which deals even more damage.
Having completed the bonus quests, you can click on the console to the right, which will explode two of the four turrets.
Stay in the middle, explode the turrets. Hit the boss until he summons his droids, kill them, and return to the boss, and so on. This is the "normal" strategy, which will require a little more motivation from the DPS and the Healer.
It is possible to protect yourself from the turrets, by hiding behind the coil that we see on the right, making the boss and his droids come to the same place, allowing to launch AoE on them (this trick only works in Hard mode ).
Warning : Make sure your tank is facing your group, i.e. the boss is facing you. This will allow you to not take damage from Shots Avalanche if it is not interrupted.


